Serger troubleshooting: how to find and fix the four most common failures
Most serger problems trace back to threading order or a tension thread off the track. Here's a symptom finder for the four most common failures - and where to stop.
Four problems account for the overwhelming majority of serger calls for help: chaotic stitches from wrong threading order, tension loops that drift onto the wrong side of the seam, a knife that stopped cutting, and stitches that skip on stretch fabric. Most of them are fixable in ten minutes at the machine. The one that is not - threading order done wrong - will make a perfectly good serger look catastrophically broken. Knowing which problem you have before you start is what separates a quick fix from an afternoon of frustration.
Below is a symptom-first table so you can locate your problem quickly, followed by a section on what makes serger diagnosis different from a regular machine, and then a summary of the four failure groups with links to the full fix for each one. The honest stop-line for each problem is included, so you know where DIY ends and where the machine genuinely needs a bench.
The one thing to know before you start
Threading order is the root cause of most serger failures. A regular sewing machine has two threads. A serger runs 3 to 5 threads depending on the stitch, and the looper threads must interlock inside the stitch-forming area in a specific geometric sequence. Thread the loopers in the wrong order and the threads physically block each other's path - the stitch never forms, or collapses into a pile of loops behind the foot.
A thread that missed a guide is the second-most common cause. On a regular machine, tension problems show up as too tight or too loose across the whole seam. On a serger, a single thread that jumped the wrong slot shows up as a cascade of loops on one side, a needle thread that snaps within the first inch, or a lower looper thread dragging in a loose chain beneath the fabric. Each of those looks, at first glance, like a broken machine. It is usually a thread that missed one guide.
The practical rule: before you adjust any tension dial on a serger, do a full rethread from scratch. Every thread, presser foot up, in the correct order for your specific model (not a generic order from the internet - your machine's built-in diagram is the reference). Then test. Most serger "tension problems" vanish on the rethread.
Symptom finder: what is your serger actually doing?
| What you see | Most likely cause | Where to start |
|---|---|---|
| No stitch forms at all; machine runs but thread piles behind foot | Wrong looper threading order | Full rethread following your machine's diagram, loopers before needles |
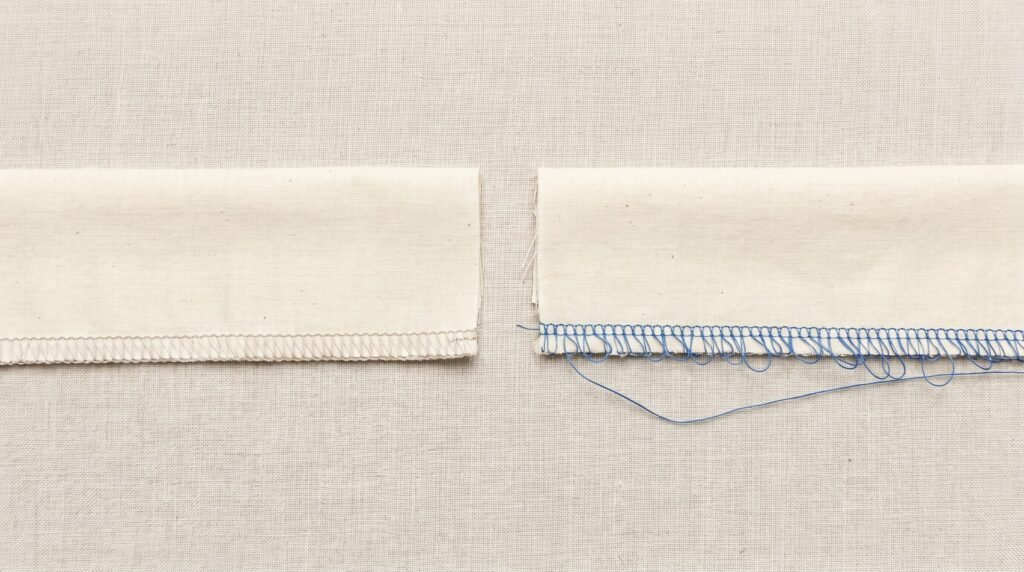
| Large loops on top of the fabric (upper looper thread showing) | Upper looper thread missed a guide or has no tension | Rethread upper looper path completely; check every guide |
| Large loops underneath the fabric (lower looper thread showing) | Lower looper thread missed a guide; lower looper tension loose | Rethread lower looper; then check lower looper tension dial |
| Needle thread loops or shows on the underside of the seam | Needle tension too loose, or the needle thread missed a guide | Rethread the needle path; then tighten the needle tension a little at a time |
| Needle thread breaks within first inch | Needle thread missed take-up lever guide; needle installed wrong or dull | Rethread needle path; replace needle; check flat-side orientation |
| Stitches skip on knit or stretch fabric | Wrong needle type; dull needle; needle not fully seated | Fit a ballpoint/stretch needle for knits (a 130/705 H ballpoint in 75/11 or 90/14, or the serger system your machine specifies); reseat all needles |
| Stitches skip on woven fabric after clean rethread and fresh needle | Threading missed a guide; needle installed too low | Rethread every path; confirm needle is pushed all the way up |
| Fabric edge is not being trimmed | Knife lever disengaged; lint between blades; dull upper knife | Check knife-engagement control first; clean blade area; then assess sharpness |
| Seam comes out wavy or stretched out on jersey or knit | Differential feed too low for the fabric; tension too tight | Raise differential feed above 1.0; loosen tension slightly if still rippling |
| Thread breaks mid-seam on cone thread | Cone feeding unevenly; thread caught on cone cap or guide | Check cone sits flat on spool pin; add a spool net if feed is erratic |
| Stitch forms but is uneven, messy, or the chain is irregular | Needle not fully seated; wrong needle for the machine's spec | Push needle all the way up and retighten; check needle system requirement |
| Looper arm moves but does not catch the needle thread | Bent or misaligned looper arm; possible timing issue | Do not attempt looper arm repair; this needs a technician |
How serger diagnosis differs from a regular sewing machine
A standard home sewing machine is a two-thread system: one thread comes from above through the needle, one comes from the bobbin below, and they lock together in the fabric. When something goes wrong, the diagnosis path is short - rethread the top, check the bobbin, read the stitch, adjust tension if still needed.
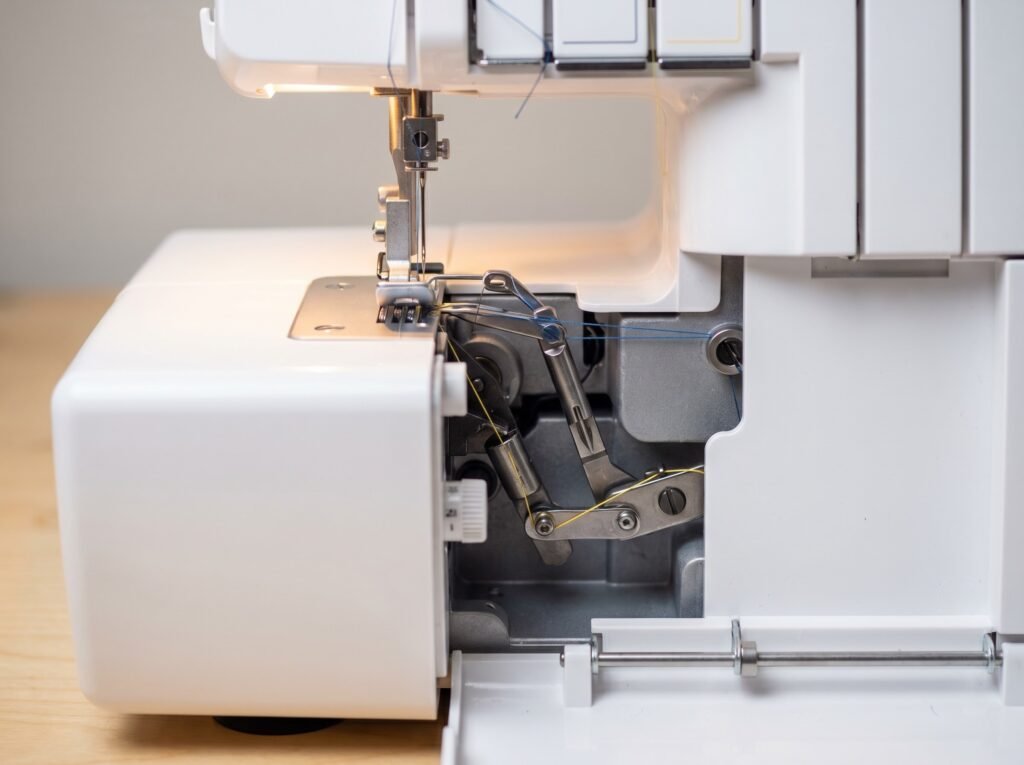
A serger is a three-to-five-thread system with no bobbin. Instead, it has at least two loopers - the upper looper and the lower looper - each carrying its own thread, plus one or two needles. These threads must wrap around each other in a specific geometry inside the stitch-forming area on every single stitch cycle. The consequence is that a single mis-threaded path corrupts the stitch in ways that look, at first glance, like completely different problems.
The other critical difference is the knife. A serger trims the seam allowance as it stitches, which means it generates far more lint than a regular machine, and the blade assembly adds its own failure mode with no equivalent on a home machine.
There is also a serger-specific control called differential feed. It runs two sets of feed dogs at different rates, and the direction matters. Set above 1.0, the front (feeding) dogs move faster than the rear, so they ease extra fabric in and keep a stretchy knit from coming out wavy and rippled. Set below 1.0, the front dogs move slower than the rear, so the fabric is stretched as it feeds - that is how you deliberately flute a lettuce edge. A regular machine does not have this control. When a serger seam comes out wavy on jersey, a differential setting above 1.0 is the adjustment to try once a rethread has not fixed it.
Understanding which thread is misbehaving is the core skill in serger diagnosis. The visual rule is straightforward: loops on the top of the fabric point to the upper looper thread, which wraps the top edge. Loops hanging under the fabric point to the lower looper thread, which wraps the underside and locks the needle thread in place there. When the needle thread itself loops or shows on the underside, the needle tension is too loose (tighten the needle dial), or that needle thread missed a guide - it is a needle read, not a looper read. Each thread leaves its own visible signature.
The four failure groups
1. Threading order
Threading the loopers in the wrong order is the leading cause of a serger that "just stopped working." There is no partial fix. The only correct response is a full rethread from scratch: cut every thread close to the cones, remove each strand from every guide, and rethread in your machine's documented sequence - both loopers in the brand-specific order (lower looper first on the Brother 3034D and on the Janome 8002D; check your own machine's diagram for your model), then the needle or needles in the order the diagram shows.
The full breakdown of the threading sequence, including why the order is mechanically non-negotiable and what each skipped guide does to the stitch, is in the serger threading guide.
2. Tension
Serger tension is adjusted per thread path, not with a single dial. Each looper and each needle has its own tension control. The read-your-stitch method is the fastest way to identify which control is off - loops visible on the top of the seam point to the upper looper; loops on the underside point to the lower looper; the needle thread looping or showing on the underside means the needle tension itself is too loose, so tighten the needle dial (not a looper). Rethread first, always. A thread that missed a pre-tension guide shows up as tension imbalance even when every dial is set correctly.
Differential feed sits alongside tension as a secondary adjustment: if a rethread and tension correction leaves a knit seam still coming out wavy, differential feed is the next control to try. Move it above 1.0 so the feed dogs ease the fabric in and stop the stretch; many machines reach up to about 2.0 at the top of the range. A setting below 1.0 does the opposite - it stretches the fabric for a lettuce edge - so it is the wrong direction for a wavy knit seam.
The complete diagnosis procedure, including how to read each thread path's loops and which dial moves in which direction, is in the serger tension guide.
3. Skipped stitches
Skipped stitches on a serger follow the same priority order as on a regular machine: the needle is the cause most of the time. Brother's official troubleshooting documentation for the 3034D serger puts "needle bent or tip blunt - replace with new needle" at the top of the list, ahead of threading and tension combined. The looper passes at a fixed height, and a dull or bent needle deflects the thread loop just enough to miss the catch. Replace the needle first.
The needle type matters differently on sergers than on home machines. Many modern sergers accept the standard 130/705 H home needle system, but others require the ELx705 or JLx2 serger-specific systems, which have a dual-groove needle design - a front groove and a back groove - needed to form specialty serger stitches reliably. Always check your model's specification before buying replacements - the wrong system can produce skipped stitches even from a brand-new, correctly installed needle.
For knit or stretch fabric that skips regardless of needle freshness, the fix is needle type: a ballpoint or stretch needle whose rounded tip parts the knit loops instead of piercing them, which removes the lateral deflection that causes skipping on jersey. On a machine that takes the 130/705 H home system, that means a ballpoint or stretch needle in a size matched to the fabric weight - 75/11 for lighter knits, up to 90/14 for heavier ones. If your serger calls for the ELx705 system instead, SCHMETZ makes a jersey version of it; the suffixes you will see on the pack describe the same idea - CF is a chrome finish and SUK is a medium ballpoint - and it is stocked in 80/12 and 90/14. Match the system your machine specifies before buying.
The full cause-by-cause procedure with the DIY stop-line is in the serger skipped stitches guide.
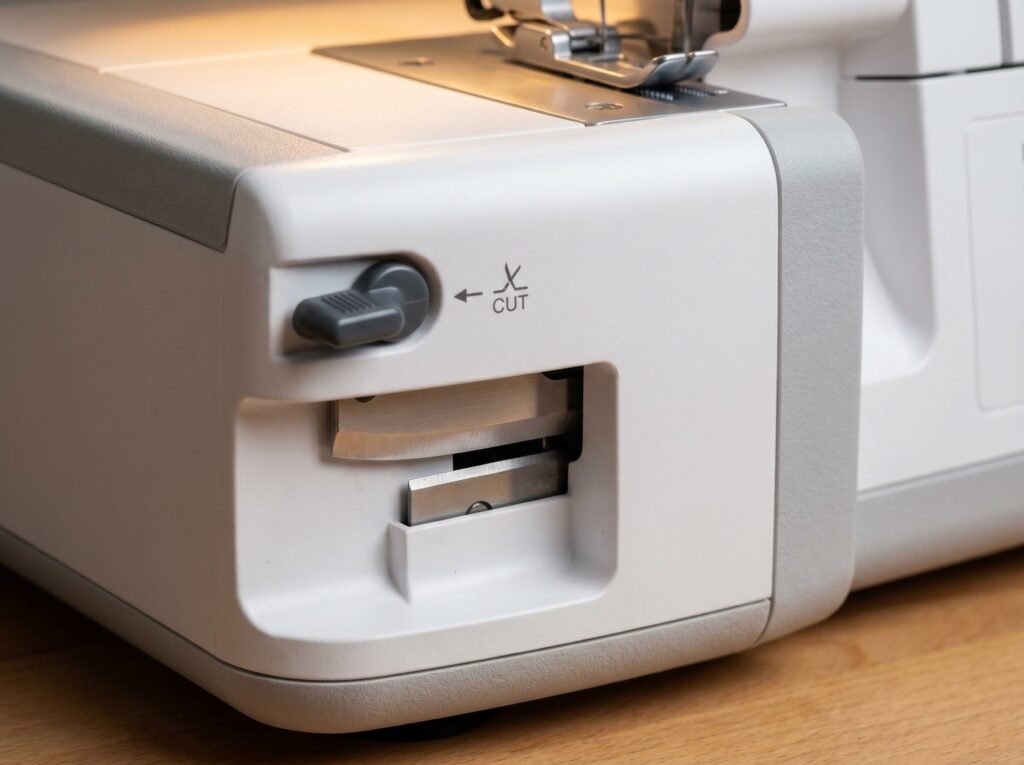
4. Knife not cutting
Start with the knife-engagement control, not the blade. Every home serger has a way to retract the upper knife for flatlock or rolled-hem work, and it is easy to leave it disengaged. The control is usually a small lever or knob on the right side of the machine, near the knife - where exactly, and which way it moves, varies by model, so check your manual's diagram. Brother's support documentation for the 3034D adds a safety point that applies broadly: move the knife lever only while the needle is at its lowest point, and on the 14HD854 Singer describes a knob that rolls the knife assembly out of the cutting path. Before anything else, confirm yours is set to cut.
If the knife is engaged and still not cutting, lint between the blades is the next most likely cause. A serger creates lint on every stitch cycle, and it packs into the gap between the upper and lower knives. Clean the blade area with a brush (never compressed air), then test. If the blades are clean and the cut is still rough or absent, the upper knife may genuinely be dull and due for replacement.
Full blade diagnosis, including how to tell a dull blade from a dirty one, is in the serger not cutting guide.
Where DIY ends on a serger
Sergers have a shorter DIY window than regular home machines. Two areas in particular are worth knowing about before you go further than a rethread and a new needle.
The first is looper arm alignment. If you have done a verified correct rethread and replaced the needle, and stitches still skip or fail to form consistently, the looper arm itself may be bent or the timing between the looper sweep and the needle may be out. Looper timing on a serger involves precise synchronization between the needle bar, both looper arms, and the feed dogs. This is not the same difficulty level as home-machine timing - serger looper geometry requires a service manual, the right tools, and experience with that specific mechanism. A technician call here is the practical choice, not a cop-out.
The second is the lower knife. The upper knife on most sergers is a user-replaceable part with a few screws and a clear replacement path in the manual. The lower knife sits deeper inside the machine. Several manufacturers treat lower knife replacement and alignment as a service procedure: the blade has to sit at a set height relative to the needle plate and in correct relation to the upper knife, and those settings come from the model's service manual, not the owner's manual. Attempting lower knife alignment without that documentation for your specific model creates more problems than it solves.
For any mechanical issue where you have correctly ruled out threading, needle, and cleaning, and the problem persists - stop. The when to see a pro guide helps identify whether a serger repair is cost-effective given what you paid for the machine.
Regular cleaning matters more on a serger
A serger cuts fabric and lint on every stitch. That lint accumulates in the blade area, around the looper arms, and in the feed dog channels faster than on a regular machine. A serger that skips stitches or starts producing irregular tension after months of regular use often just needs a cleaning - not a repair. The machine cleaning and oiling guide covers serger-specific cleaning points including the blade cavity and the looper access area.
Use only sewing-machine oil on the points specified in your machine's manual. WD-40 and household oils gum up the mechanism over time and will cause the exact lubrication-related failures a cleaning was supposed to prevent.
The Stitchmend team compiled this from Brother and Singer serger manuals, SCHMETZ needle technical documentation, published serger-tension guidance from Melly Sews and Nancy Zieman, and iFixit mechanical repair documentation, cross-checked and edited before publishing.
Questions answered
Do I always need to rethread the whole serger when something goes wrong?
Almost always, yes. A full rethread from scratch takes about three minutes on a familiar machine, and it eliminates threading order errors and missed guides in one pass. Partial rethreading - resetting just the looper you suspect - leaves other guides unverified and often produces the same failure through a different path. Cut every thread and start clean.
How is a serger tension problem different from a regular machine tension problem?
A regular machine has one tension control for the top thread. A serger has one per thread - one for each looper and one for each needle. The stitch reads differently too: loops on top mean the upper looper thread, loops below mean the lower looper thread, and the needle thread showing on the underside means the needle tension is too loose. On a regular machine, "adjust the tension dial" is sometimes a reasonable first step. On a serger, rethread first, always. A missed guide mimics a tension problem exactly.
My serger suddenly makes a mess after working fine. What changed?
Look first at what changed without you touching the machine. A cone running out mid-seam leaves a tail that re-threads itself around the wrong guide when the next cone is loaded - the machine stitches, but one path has no tension. A long thread tail from a finished cone can also tangle at the base of the spool pin or catch on the cone cap notch, creating random tension drops that look like mechanical failure. If you recently used a rolled-hem or flatlock setting, the knife may still be retracted - the machine sews fine but stops trimming, which can bunch fabric under the foot. None of these require a rethread of paths that were working; isolate the one thing that silently changed.
Can I use regular sewing machine thread on a serger?
Yes. Standard all-purpose polyester on cones works fine. Serger cone thread is a larger-format version of the same thread, sold in bulk at a lower per-yard cost. Small spools on serger cone pins can feed unevenly - use a proper spool pin adapter if you are running out of cone thread and substituting from a small spool.
When should I not attempt serger repair myself?
Stop when the looper arm is bent or when timing between the looper and needle appears to have shifted - stitches fail consistently despite correct threading and a fresh needle in the right system. Lower knife alignment is also typically a service procedure on most brands. Any internal electrical issue is a hard stop: unplug first, and have a technician handle it.
- Brother Support3034D serger (skipping stitches, lower looper threading, knife retraction)
- Singer 14HD854 Heavy Duty Serger product page
- SCHMETZ Needlesserger needle FAQ, serger needles blog, and ELx705 chrome product page
- Singer machine FAQs and troubleshooting guide
- iFixitsewing machine jam and mechanical repair documentation
The Stitchmend team
Every fix here is built from manufacturer service manuals and needle-maker specs, and fact-checked against those sources before it goes live. How we work