Bobbin tension and the drop test: when to adjust, when to leave it alone
Learn the drop test for bobbin tension, which screw adjusts it and which way, drop-in vs front-load differences, and the clear stop-line before you break the factory seal.
Most "bobbin tension" problems have nothing to do with the bobbin tension screw. Rethreading the machine - with the presser foot fully raised so the tension discs actually open - fixes the issue most of the time. A fresh needle handles most of the rest. The tiny slotted screw on the bobbin case is the last thing to reach for, and on many home machines it carries a factory paint seal that says, plainly, leave this to a technician unless you have a specific reason to be here.
That said, knowing how bobbin tension actually works, how to check it properly, and where the real limit is separates a confident home repairer from someone who turns screws and hopes. This guide covers all of it - the drop test, what the screw does, the differences between drop-in and front-load machines, and the honest line between DIY and service territory.
Why the bobbin side rarely needs touching
Your sewing machine produces a stitch by locking the upper thread around the bobbin thread inside the fabric. Tension from both sides has to be balanced for that lock to land in the middle of the layers. When it does not, most sewers reach for the bobbin - but the bobbin case tension is mechanically stable. Once a machine leaves the factory, the bobbin spring does not wander on its own. What does change constantly is threading, needle condition, and lint accumulation.
Loops of thread on the underside of your fabric almost always trace back to the upper thread, not the bobbin. Threading with the presser foot down is the single most common cause: the tension discs never open, so the thread floats outside them and arrives at the needle with no grip at all. The result looks exactly like a bobbin problem. Our stitch diagnosis guide walks through how to read the failure before you reach for any dial or screw.
Before suspecting the bobbin case, work through this sequence:
- Raise the presser foot. Rethread the entire upper path from scratch.
- Install a fresh needle - size 90/14 universal is the right starting point for most home fabrics, and needles dull faster than most people expect (Organ Needles recommends replacing every six to eight hours of active sewing).
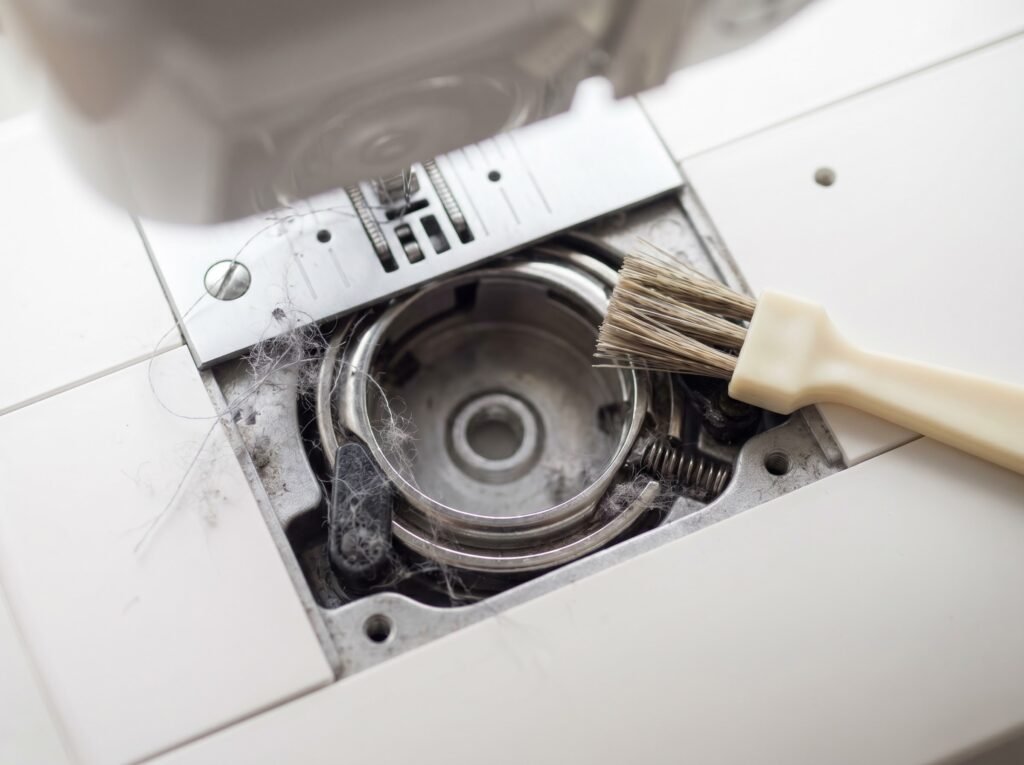
- Remove the bobbin and clean any lint from the bobbin area and race with a soft brush. Lint-packed around the bobbin case spring is a genuine tension thief.
- Reseat the bobbin, following the threading path in your manual. The thread must click under the tension spring.
- Only if balanced stitches still fail after all of the above: consider checking the bobbin tension with the drop test.
For more on that cleaning process, especially around the race and feed dogs, our cleaning guide covers the full procedure.
The drop test: how to do it and what to look for
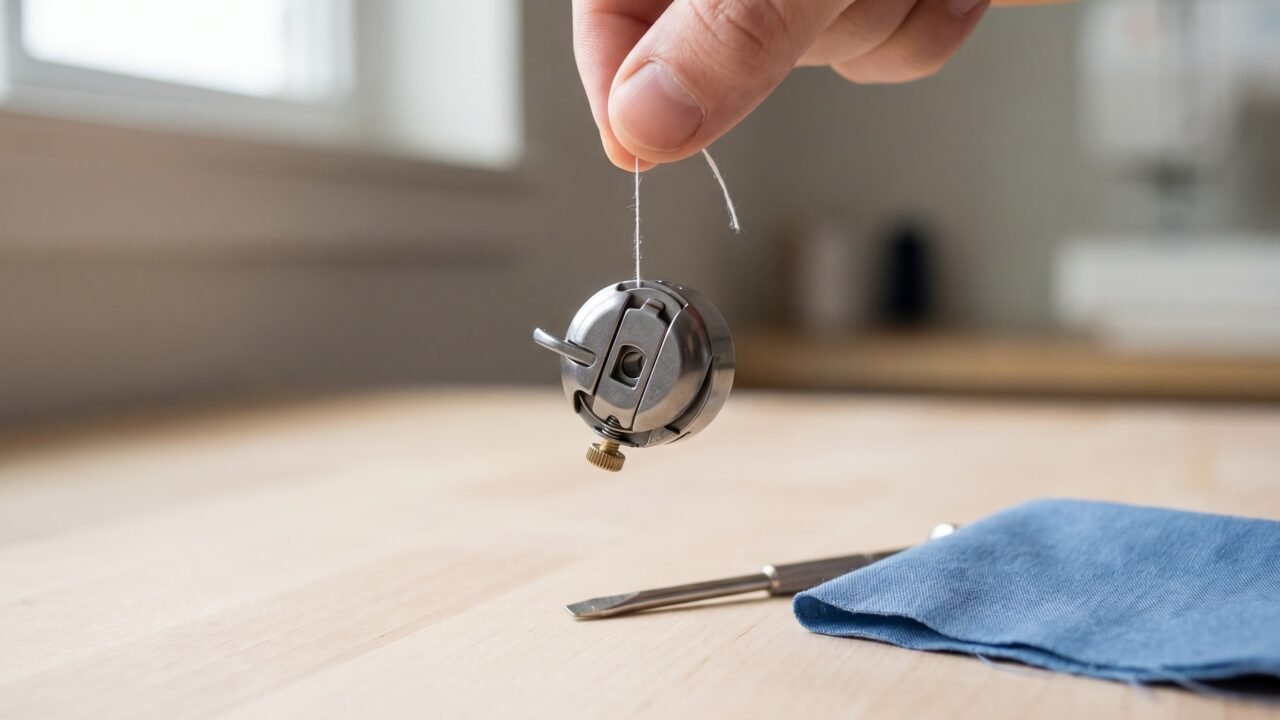
The drop test gives you a quick, tactile read on whether the bobbin case spring is holding thread correctly. Wind a bobbin with the thread you intend to sew, place it in the bobbin case, and thread the case as normal - leaving a tail hanging free. Hold the bobbin case by that thread tail so the whole assembly dangles in the air. Give it one gentle jerk upward, the sort of motion you might use to test if a phone is still attached to its charging cable.
The correct response: the bobbin case drops 2 to 5 cm (about 1 to 2 inches) and then stops (singersewinginfo.co.uk). It should slip just a little, then hold. If the case free-falls without resistance, the spring is too loose. If it does not budge at all even with a brisk jerk, the spring is too tight.
A few things to know before reading too much into the result:
- The drop test is thread-weight sensitive. Thread weight numbering runs backwards: higher numbers are finer. A heavy 30-weight topstitching thread creates more resistance in the case than a fine 60-weight embroidery thread, so the drop response feels noticeably different. Always test with the actual thread you plan to use for that project.
- On machines with a bobbin-class mismatch, the test will give misleading results because the bobbin itself does not seat correctly. A Class 15 and a Class 15J bobbin are the same physical part - the J designation describes the hook and case geometry, not the bobbin itself, so the two are interchangeable. The actual mismatch that causes problems is Class 15 versus Class 66, or metal versus plastic where the machine specifies one material. Verify the correct class in your manual before testing.
- The drop test works reliably on front-load (oscillating/rotary) machines. On drop-in (top-loading) machines, access is more limited, as discussed below.
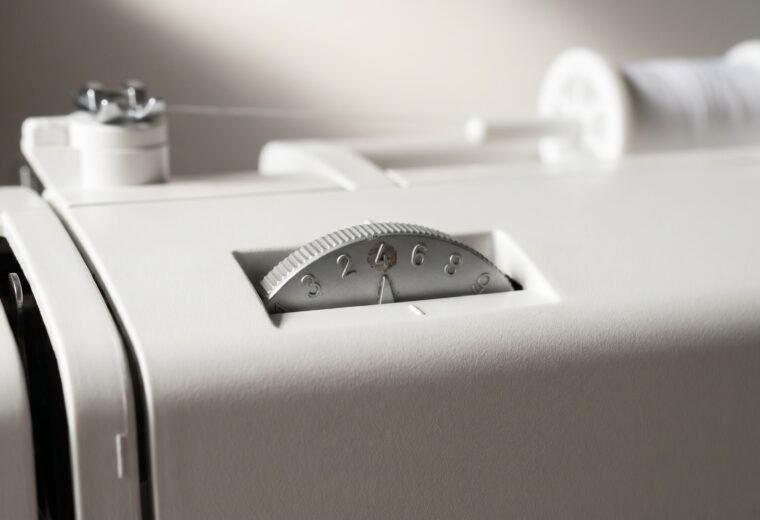
Which screw adjusts bobbin tension, and which way
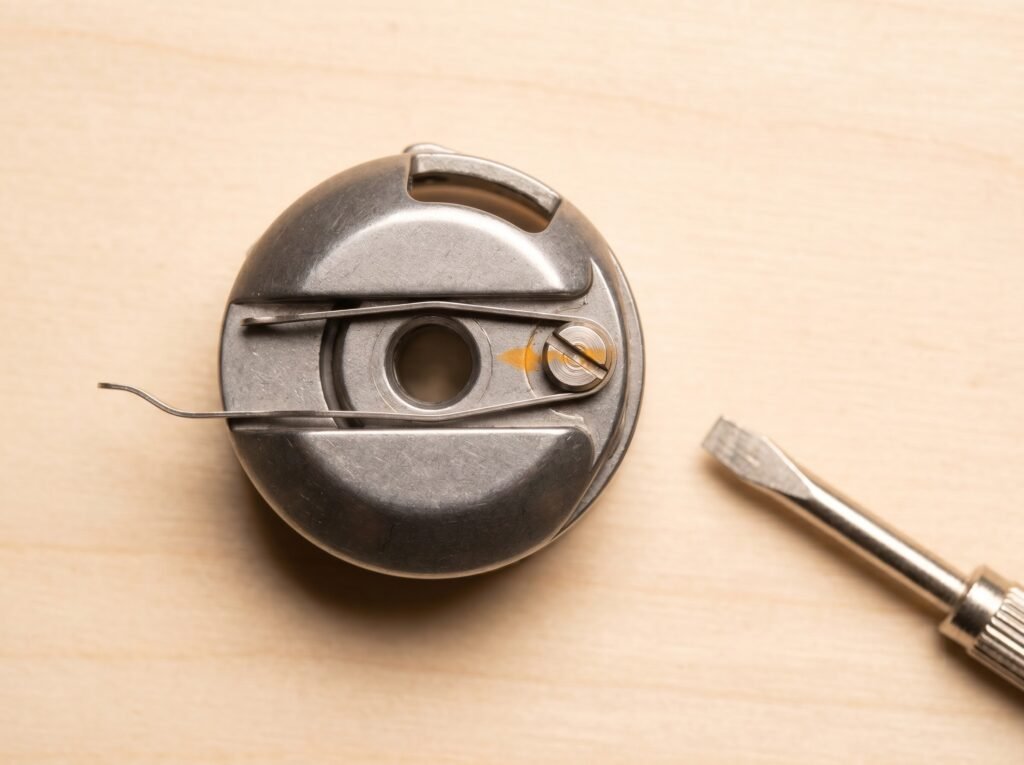
The bobbin case has a flat tension spring - a thin metal leaf - held against the case body. Thread passes under this spring on its way out. A small slotted screw at the center of the spring controls how hard that spring presses. Tighter spring, more resistance on the thread, higher bobbin tension. Looser spring, less resistance, lower tension.
The direction follows the universal rule: clockwise tightens, counterclockwise loosens. Work in very small increments. Brother's official support page specifies 30 to 45 degrees per adjustment - less than a quarter turn - and warns that forcing the screw or turning it too much can damage the bobbin case permanently. A quarter turn is already a significant change.
Before touching the screw, use a permanent marker to draw a short line across both the screw head and the case body. This creates a reference point so you can count exactly how far you've moved and return to the starting position if needed.
On Brother machines specifically, the bobbin case has two screws: a slotted (-) screw that adjusts tension, and a Phillips (+) screw that holds the tension plate in place. Brother is explicit: adjust only the slotted screw. The Phillips screw is structural and should not move.
Drop-in vs front-load: different access, different rules
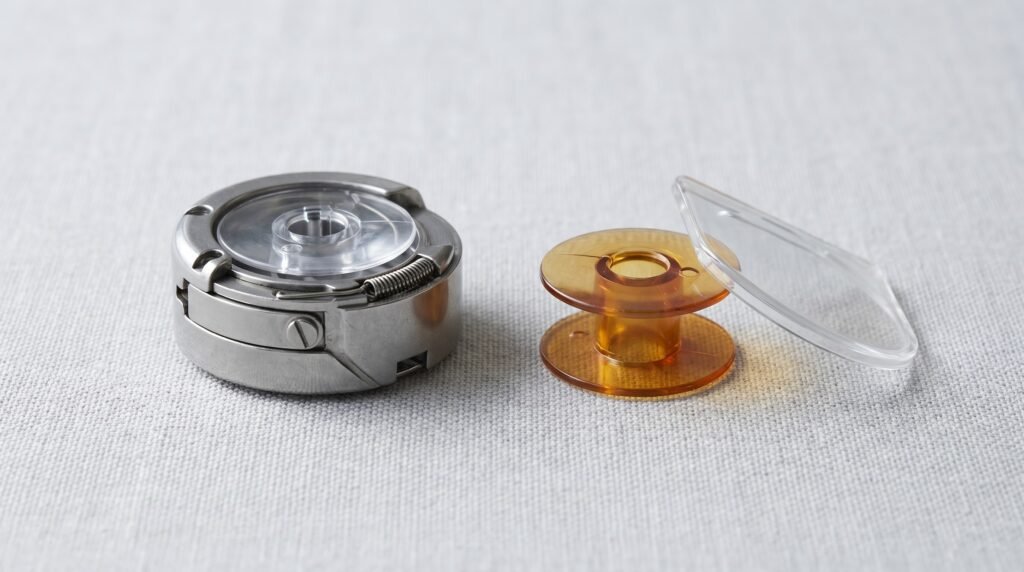
Whether you can perform the drop test - and what adjustment looks like - depends heavily on which bobbin system your machine uses.
| Feature | Front-load (oscillating/rotary, removable case) | Drop-in (top-loading, horizontal bobbin) |
|---|---|---|
| Bobbin case | Fully removable; drops out of the front or side | Fixed in the machine; accessed by removing the throat plate |
| Drop test | Straightforward - remove case, hold by thread, test | Possible but awkward; case must be partially freed first |
| Tension spring screw | Visible and accessible on the removed case | Visible through the throat-plate opening, but harder to work on |
| Bobbin material | Usually metal; holds more thread | Usually plastic; lighter but holds less |
| Who commonly uses it | Older machines, heavier-duty home machines, industrial-style machines | Most modern mid-range home machines (Brother, Janome, Singer HD series) |
| DIY adjustment ease | Easier - work on the case at the bench | Harder - limited access, higher risk of over-turning |
If your machine is a drop-in type and you have confirmed a genuine bobbin tension issue (not threading, not lint, not needle), the adjustment is still possible - but the limited access and the difficulty of reversing a mistake make a professional service worth considering. For a practical look at how the two systems compare for everyday maintenance, our drop-in vs front-load guide covers both in detail.
The yellow-paint seal: the honest stop-line
Many machines - particularly Singer models and a number of Janome and Brother machines - ship with the bobbin tension screw covered in a small dot of colored paint, typically yellow or orange. This is a factory seal. It marks where the technician set the tension during manufacture and serves as a visible record that the screw has not moved since the machine left the factory.
Breaking that seal is not irreversible in a mechanical sense - you can still turn the screw. But it is a signal worth taking seriously for two reasons. First, it means the factory setting, which was tested to work with the machine's specific hook geometry and spring tolerances, is now gone. You are working without a baseline. Second, some warranties treat a broken paint seal as evidence of unauthorized service, which can affect coverage.
The guidance from machine makers is consistent: bobbin tension is factory-preset and should not require adjustment under normal use. The seal exists because the adjustment is there for service technicians who have the tools to test, set, and verify the result correctly - not as a routine DIY control.
When to stop and consult a pro: if the drop test confirms the bobbin spring is genuinely out of spec AND you have already ruled out threading, needle, lint, and bobbin-class mismatches, AND the screw carries a paint seal, this is the right moment to hand the machine to a technician. A basic tension service on a standard home machine typically runs $75 to $125 (Airtasker, B-Sew Inn); premium or electronic machines run higher. For a machine worth repairing, that is a clean solution. Our repair vs service guide helps you decide whether the machine is worth the cost of a service call.
A practical symptom-to-cause table
Before any adjustment, use this reference. The vast majority of cases resolve at the top of the table, never reaching the bobbin screw.
| What you see | Most likely cause | First fix | Bobbin screw involved? |
|---|---|---|---|
| Loops or knots on the underside (back) of fabric | Upper thread not seated in tension discs - threaded with foot down | Raise foot, rethread from scratch | No |
| Bobbin thread pulled to the top surface | Upper tension too tight, or upper thread mis-threaded / bypassed a guide (most common cause) | Rethread upper with foot raised; loosen upper dial one increment and test | No |
| Bobbin thread pulled to the top surface (if upper path checks out) | Bobbin thread not seated under its tension spring, or bobbin spring too loose | Remove bobbin; reseat thread firmly under the spring; rewind if loosely wound | Only if spring is confirmed loose after reseating |
| Skipped stitches | Bent, dull, or wrong-size needle (about 90% of cases) | Install fresh 90/14 universal; push flat of shank fully up | No |
| Bird's nest at the start of a seam | Thread tails not held; machine threaded foot-down | Hold both tails; rethread with foot up; start slowly | No |
| Uneven stitching, upper thread visible on back | Lint packed around bobbin case spring | Remove bobbin; brush race and spring; reseat | No |
| Persistent loose stitches after all of the above | Bobbin wound unevenly or bobbin class mismatch | Rewind bobbin evenly; verify bobbin class | No |
| Drop test fails (free-fall or no movement) after everything else is confirmed correct | Bobbin spring tension genuinely out of spec | Check for paint seal; if sealed, service appointment; if unsealed, 30-45 degree turn of slotted screw | Yes - last resort |
Winding your bobbin correctly is part of the equation too - an unevenly wound bobbin causes the thread to pull at inconsistent tension regardless of what the spring is set to. See our bobbin winding guide for the full process, including the spool-pin angle that most instructions skip.
After adjustment: checking your work
If you do make a screw adjustment, always test on a folded piece of scrap fabric that matches what you plan to sew - same weight, same fiber. The upper thread tension guide explains how to read both sides of the test stitch and confirm the lock is sitting in the middle of the layers.
Make one small adjustment at a time. Sew, inspect. Adjust again if needed. Three or four iterations at 30 to 45 degrees each will usually get you to the right place - or tell you the spring is damaged and needs replacement rather than adjustment. A bobbin case for most home machines costs $10 to $25 and replacing the whole case is often cleaner than fighting a damaged spring.
Questions answered
Can I do the drop test on a drop-in bobbin machine?
Technically yes, but it is awkward. You need to remove the throat plate to access the fixed case and partially free the bobbin. On a front-load machine with a removable case, the test is much simpler. If you have a drop-in machine and suspect a genuine bobbin tension issue, the limited access makes a service appointment a reasonable choice.
My bobbin tension screw has colored paint on it. Does that mean I cannot adjust it?
It means the screw is at the factory setting and adjusting it removes your reference point. It is not a physical lock. But before breaking the seal, confirm through the full diagnostic that the problem is actually the bobbin spring and not threading, lint, needle, or bobbin class. Most paint-sealed machines should go to a technician if genuine bobbin tension adjustment is needed.
How often does bobbin tension actually need adjusting on a home machine?
Rarely, once properly set. On a machine you bought new, the factory setting should hold for the life of the machine under normal home use. Adjustment is most likely needed on a used machine with unknown service history, or after a bobbin case has been swapped or damaged. Most tension complaints are rethreading problems in disguise. One situation worth re-checking even on a relatively new machine: if the bobbin case has been dropped on a hard floor or knocked hard enough to bend the spring, the factory setting may have shifted - run the drop test after any significant impact before assuming the machine just needs rethreading.
The drop test looked fine but I still have tension issues. What next?
Focus on the upper thread path. Even a correctly tensioned bobbin case cannot compensate for upper thread that bypassed a tension disc, skipped a thread guide, or was seated with the presser foot down. Rethread from scratch with the foot raised, install a fresh needle, and clean the race before concluding the machine has a mechanical problem. Read your stitch carefully - the stitch pattern itself tells you which side is pulling.
- SingerSewingInfo.co.uk
- Brother USA Official Support
- iFixit
- Singer Official FAQ
- Airtasker USsewing machine repair cost data
- B-Sew Innrepair shop pricing reference
- Organ Needles (via Diamond Needle)
The Stitchmend team
Every fix here is built from manufacturer service manuals and needle-maker specs, and fact-checked against those sources before it goes live. How we work