How to clean a sewing machine: lint, hook race, and feed dogs step by step
Unplug first, then remove the throat plate, brush out the feed dogs and hook race, and reassemble. The complete hands-on guide with the right tools in the right order.

Lint is the quiet wrecker. It packs under the feed dogs, furs the hook race, and slowly turns a well-running machine into one that skips, jams, or shreds thread - and most sewers clean far less often than they should. This guide walks you through the full process: what to remove, in what order, which tool to use at each step, and exactly how deep to go before you are better off stopping and calling a technician.
The short version: unplug the machine, drop the needle plate, brush out the bobbin and hook area, vacuum the feed dogs, reassemble. Never blow compressed air into any opening - more on why below. The full version takes about 15 minutes once you know the sequence.
Before you touch anything: unplug and raise the needle
The Brother CS-6000i manual states in its maintenance section: "Unplug the power supply cord before cleaning the machine, otherwise injuries or an electric shock may occur." That is not boilerplate. The hook assembly rotates even when the foot pedal is not pressed on some machines if power is live. Pull the plug from the wall - not just the foot pedal from the machine - and then rotate the handwheel toward you until the needle reaches the top of its travel. Remove the presser foot. Set the presser foot lever to the raised position.
Raise the needle now for a practical reason too: the needle plate screws are easier to reach when the needle is up and out of the way.
What you need (and what to leave in the drawer)
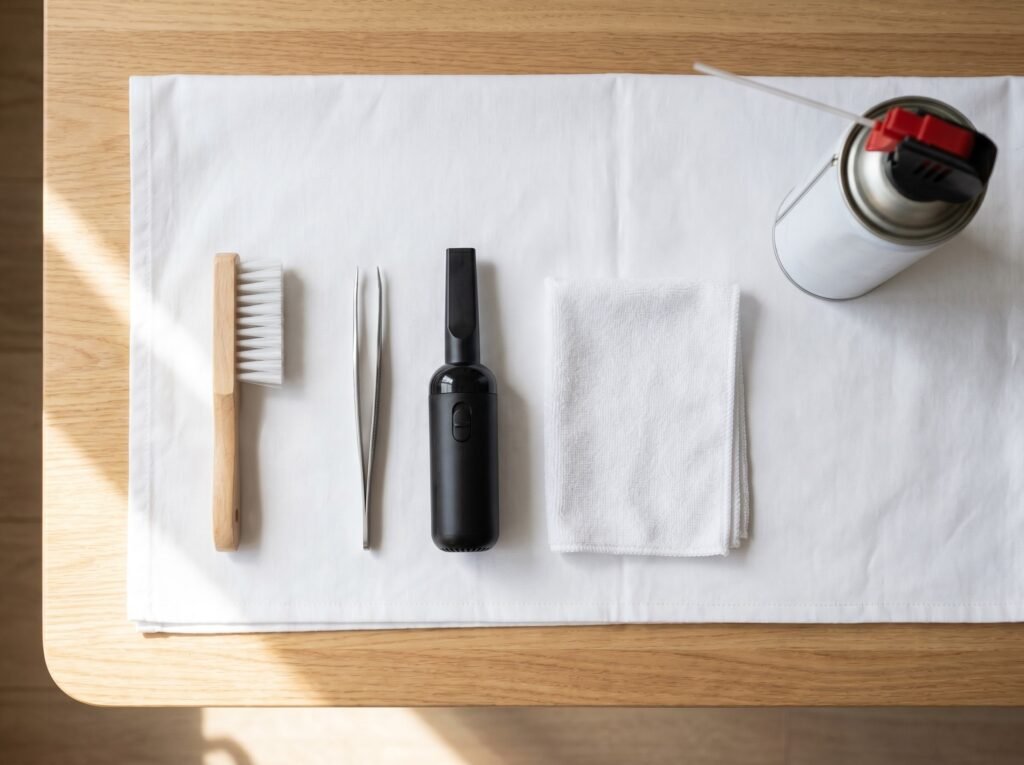
The right tools make the difference between cleaning the machine and just moving lint around.
| Tool | Use it for | Notes |
|---|---|---|
| Stiff lint brush (supplied with machine) | Sweeping the bobbin/hook area, feed dog slots | A small, clean makeup brush works if the original is lost |
| Soft nylon brush (larger) | Dusting the exterior, around the tension discs, face plate | WeAllSew (BERNINA's official blog) recommends a soft nylon type for the hook race |
| Tweezers (blunt-tip) | Lifting out thread wrapped around the hook shaft or jammed in the feed dog teeth | Blunt tips only; pointed tips scratch the hook surface |
| Miniature vacuum or keyboard vacuum | Sucking lint out of the feed dog area after brushing | Pull lint OUT; never push it deeper |
| Dry lint-free cloth or microfiber | Wiping the hook race surface, the stitch plate | Dry only in the bobbin area; no water or solvent |
| Small Phillips or L-screwdriver (supplied) | Removing needle plate screws | Use the one supplied; wrong size strips the head |
Leave these alone: canned air / compressed air, pipe cleaners with metal cores, cotton swabs dipped in oil near the bobbin area, and household cleaners. The Singer SUPERA and SE9150 manuals both include an explicit warning: "Do not blow air into the bobbin case area. The dust and lint will be blown into your machine." WeAllSew's official BERNINA guidance is blunter still: the hook area may look clear after a blast of compressed air, but "most lint ends up in areas where usually no lint ever accumulates, deep inside the machine." You are trading a visible problem for a hidden one.
Step-by-step: the throat plate, feed dogs, and hook race
Work in this order. Each step exposes the next area; skipping steps means reassembling over lint you missed.
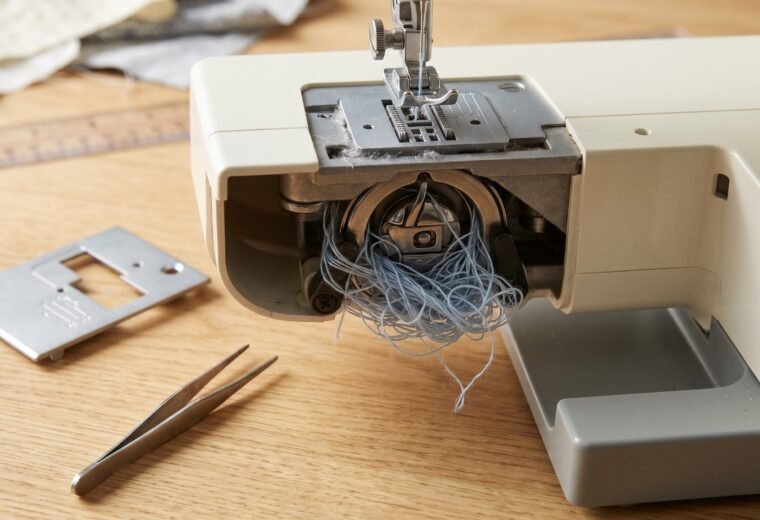
- Remove the bobbin and bobbin cover. On drop-in machines, slide off the clear cover plate and lift out the bobbin. On front-loading machines, open the door and remove the bobbin case. Set both aside on a clean cloth.
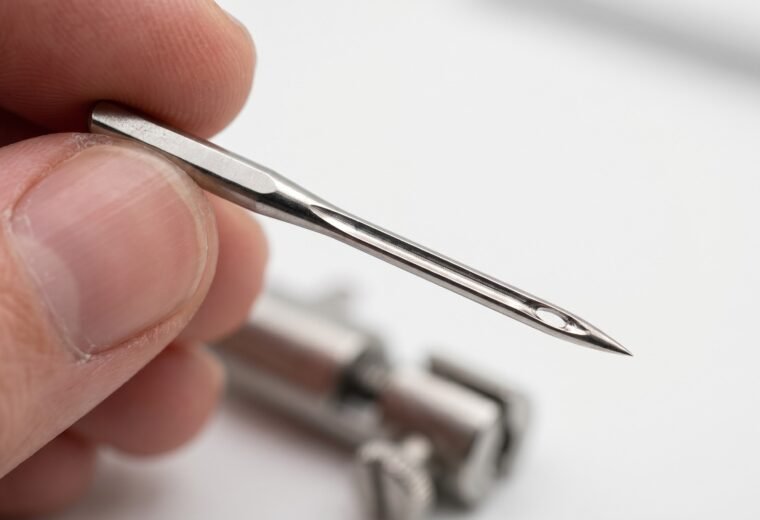
- Remove the needle plate (throat plate). Two screws hold it in place on most home machines - Singer, Brother, and Janome all follow this pattern. Singer's instructions for this style of machine call for using the multipurpose tool (or the small screwdriver) supplied with your machine to remove both screws, then lifting the plate straight up. Keep the screws somewhere they cannot roll away; a strip of tape works.
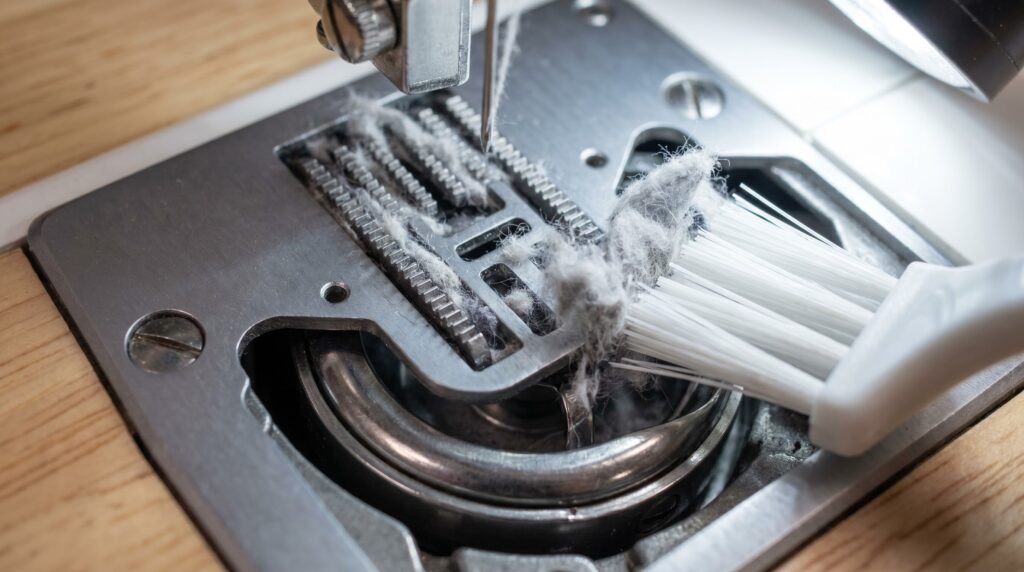
- Brush the feed dogs. The teeth of the feed dogs are a lint trap. Use the stiff brush in short strokes, pulling lint up and toward you rather than pushing it down through the slots. The iFixit guide for the Brother BM3700 calls for "the brush and tweezers" to "clear the area around the feed dogs of lint, thread, and other debris." For thread that has wound around a feed dog tooth, tweezers are far more precise than a brush.
- Vacuum the slot. After brushing, run a miniature vacuum nozzle along the feed dog slots to pull out whatever the brush loosened. The goal is extraction, not redistribution.
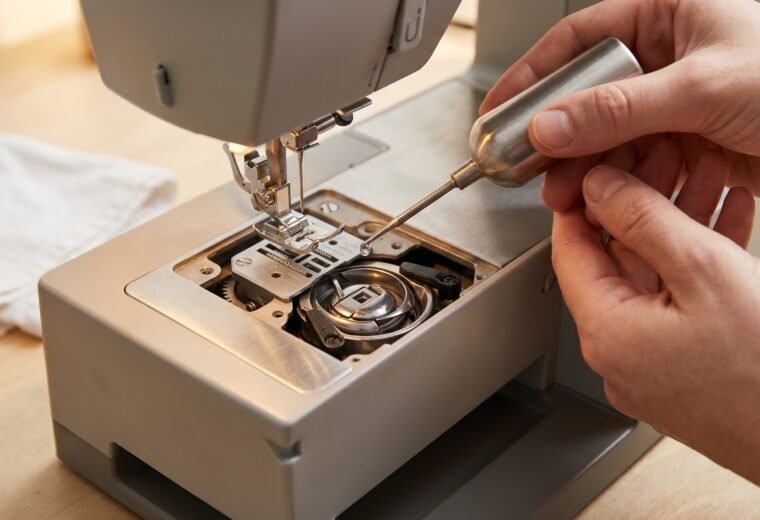
- Clean the hook race. The hook race is the circular channel the bobbin case sits in. With the bobbin case removed, use your stiff brush to sweep the interior of the race - around and behind the hook. WeAllSew recommends also wiping "the hook, including the edge where the hook makes contact with the race" with a soft cloth. This edge is the one that catches thread to form a stitch; lint or dried oil here causes skipped stitches and thread shredding. While you are here: look for any thin thread looped around the post behind the bobbin case - this is part of the same inspection. Thread wrapped around the hook shaft is a common cause of machine jamming and often goes unnoticed because it hides under the bobbin case. Use blunt tweezers, not fingers, to remove it cleanly.
- Wipe the throat plate. Before replacing it, wipe both sides with a dry microfiber cloth. Lint accumulates on the underside too.
- Reassemble. Replace the throat plate, tighten both screws finger-firm (do not overtighten - the plate needs to sit flush, and stripping a screw on a plastic plate is an avoidable repair), reinsert the bobbin and cover.
How deep is too deep?
You can clean everything accessible without removing the hook race itself. That means the bobbin area, the hook channel, both sides and the back of the hook, and the feed dog slots - all reachable through the needle plate opening. Janome and every major manufacturer are consistent on this point: do not dismantle the machine beyond what the owner's manual explicitly describes.
The stop line for DIY is the hook race retaining ring. On most home machines, a small C-clip or set of screws holds the outer race. Do not remove it. The hook timing - the precise angle at which the hook tip intercepts the needle loop - is factory-set and is precise work that typically requires a technician and, depending on the machine, a timing gauge or dial indicator to restore correctly. If you find thread jammed between the hook and the race, remove the thread with tweezers rather than disassembling the race. Anything deeper than that is technician work; the when to see a pro guide covers exactly where that line falls for different machine types.
The rest of the machine: exterior and tension area
The bobbin zone gets most of the attention, but two other spots are worth a few minutes while the machine is already open.
The tension discs. Thread passes between two discs when you sew; lint and fiber collect there and cause inconsistent tension. With the presser foot raised (which opens the discs), slide a strip of unwaxed dental floss or a strip of business-card stock between the discs and draw it through with a smooth pull - not a sawing motion. Use unwaxed floss only; waxed floss leaves a residue that attracts more fiber over time. These stiffer materials are more effective than regular sewing thread, which is thin enough to slip through without dislodging compacted lint. A draw of regular thread is a reasonable first step for light buildup, but floss or card stock is the go-to for anything compressed. If you find that cleaning the tension area improves performance, also read our guide on upper thread tension to understand how the discs actually work.
The exterior. A soft cloth slightly dampened with neutral detergent handles the exterior surface. Lightly dampen the cloth, wring it nearly dry, and wipe down the housing - keep any moisture away from openings, slots, and vents. The Brother CS-6000i manual confirms this approach and specifies using neutral detergent (not solvents or all-purpose sprays).
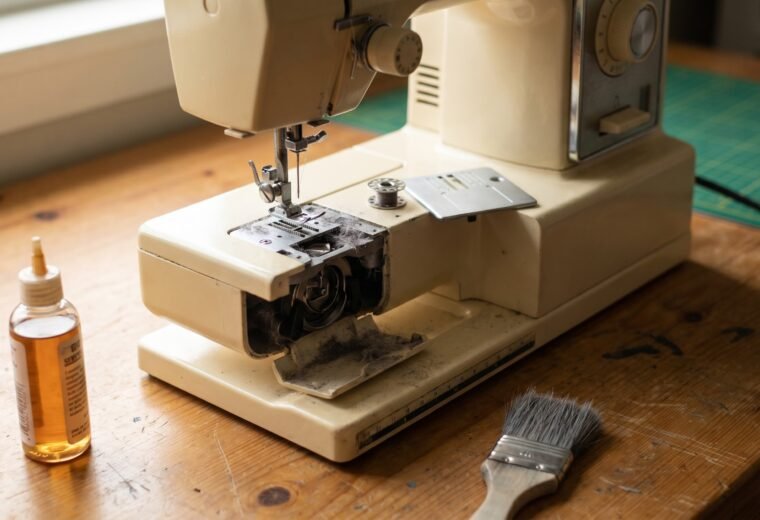
Oiling after cleaning. Most modern computerized machines - Singer computerized models, Brother CS series, and newer Janomes - are self-lubricating and carry a specific warning against user oiling. Check your manual: some list an explicit "no oiling required" notice, while others give oiling points and a recommended frequency. But older mechanical machines and heavy-duty models do require oil. If your machine calls for it, the NMSU extension publication on sewing machine maintenance recommends "one drop of oil on the exterior perimeter of the hook and the bobbin race" after cleaning, with a general frequency of "after each day's work or after 8 to 10 hours of use." Check your manual before applying any oil. For full oiling instructions, our how to oil your machine guide covers the specific drop points by machine type, and the clean and oil overview explains how the two tasks fit together.
How often should you clean?

Janome's guidance sets a useful baseline: a thorough clean "every time you change your needle, or approximately every 8 hours of use." That is about once per large project for most home sewers. But the right interval depends heavily on what you are sewing.
| Material / thread type | Lint level | Suggested interval |
|---|---|---|
| 100% cotton fabric, cotton thread | High | Every 2-3 bobbins |
| Cotton flannel, fleece, terry cloth | Very high | Every bobbin or more often |
| Polyester woven, poly thread | Low-moderate | Every 8 hours / project |
| Denim, canvas | Moderate | Every project; check after each bobbin |
| Silk, synthetic knits | Low | Every 8-10 hours |
The pattern is consistent across materials: cotton flannel and similar napped or woven-cotton fabrics produce far more lint than polyester double-knit, and 100% cotton thread sheds more fiber than polyester thread. The interval above is a starting point; if you see a bird's nest lint clump in the hook area when you change your bobbin, clean more frequently. Do not wait for problems to show up as symptoms - by then the compacted lint is interfering with the hook. Compacted lint in the hook race is one of the leading causes of people reaching for compressed air or WD-40, both of which make the situation worse.
After reassembly: the quick function check
Before threading and sewing, turn the handwheel toward you through two full rotations with no thread in the machine. "Toward you" means counterclockwise when you are looking at the right side of the machine - the standard direction that moves the needle down and back up in the correct sequence. The motion should be smooth, with no grinding or catching. If you feel resistance you did not feel before, stop. Check that the throat plate is seated flat (both screws tight, no gap), that the bobbin case is fully seated, and that no thread fragment was pushed under the hook race during cleaning.
Then thread the machine with the presser foot up - always - and sew a short test line on scrap fabric. Skipped stitches or thread shredding after a clean usually mean something was disturbed during reassembly. The most common culprit: a bobbin that was not clicked fully into its seat, or a needle plate that is slightly misaligned and interfering with the feed dog motion. Our skipped stitches guide walks through the diagnostic sequence if the test sew does not go cleanly.
Questions answered
Can I use a cotton swab to clean the bobbin area?
A dry cotton swab can reach narrow spots, but it leaves fibers behind that compress into the same kind of lint you just removed. A stiff lint brush or a vacuum nozzle extracts debris more cleanly. If you do use a swab, use it dry and follow immediately with a vacuum pass.
My machine has a drop-in bobbin. Does the cleaning process differ?
The sequence is the same - remove the bobbin cover, take out the bobbin, clean the hook race and feed dogs, reassemble - but you do not remove a separate bobbin case on a drop-in machine. The hook race sits in a channel; do not remove the retaining ring for routine cleaning - brush around the full circle and use tweezers for any thread wrapped around the hook post. See our drop-in bobbin cleaning guide for the exact steps.
How do I know if I have cleaned deeply enough?
If you can see the metal surfaces of the hook race clearly, with no visible fiber or fuzz, you have done the job. A flashlight helps. You should not need to remove the hook or the race retaining ring for routine maintenance - if lint is packed tightly enough that a brush cannot clear it, a technician with the right tools is the better call.
The machine jammed badly and I found a bird's nest of lint. Is that a cleaning problem?
A true bird's nest of lint in the hook area usually means cleaning was overdue. But a bird's nest of thread bunching under the fabric is almost always a threading problem - specifically, threading with the presser foot down so the tension discs never engaged. Those are two different problems with the same nickname. Our bird's nest bunching guide covers the threading cause; the lint version is fixed by the full cleaning process above.
Can I use rubbing alcohol to clean the hook race?
Most manufacturer manuals do not recommend solvents in the bobbin area. The NMSU extension publication on machine maintenance warns specifically against carbon tetrachloride and other solvents. A dry brush and dry cloth handle routine lint. If there is dried oil or varnish in the race - common on vintage machines or machines that were oiled with household oil or WD-40 - see our vintage machine cleaning guide for the specific approach to varnished oil; the steps differ enough from routine cleaning that they warrant their own treatment rather than a quick substitution here.
- Singer SE9150 Instruction Manual (ManualsLib)
- Janome AustraliaCleaning Your Sewing Machine
- WeAllSew (BERNINA of America official blog)
- Brother CS-6000i Instruction Manual (ManualsLib)
- New Mexico State University Cooperative Extension, Sewing Machine Maintenance (C102)
- iFixitHow to Fix Stuck Feed Dogs on a Brother BM3700 Sewing Machine
The Stitchmend team
Every fix here is built from manufacturer service manuals and needle-maker specs, and fact-checked against those sources before it goes live. How we work
Read next
 Cleaning & Maintenance
How to oil your sewing machine: which points, how much, which oil
 Cleaning & Maintenance
Clean and oil your machine: the combined maintenance routine
 Troubleshooting
Machine jamming: causes, fixes, and when it is the hook
 Troubleshooting