Bobbins and threading: your complete guide to both halves of the stitch
Every stitch needs two threads to lock together. This guide covers drop-in vs front-load bobbins, winding, inserting, threading the top, and why foot position is everything.
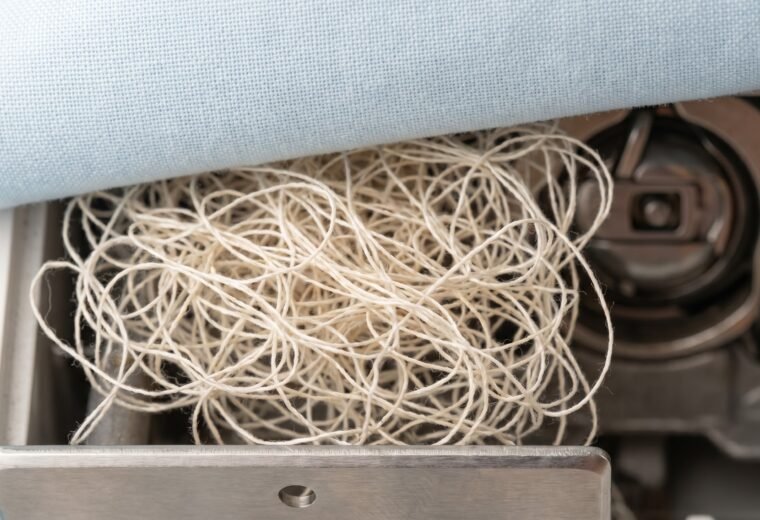
Every stitch your machine makes is actually two threads locking around each other inside the fabric - the top thread coming down from the spool, and the bobbin thread coming up from below. When either half is set up wrong, the stitch falls apart. And the most common setup mistake, the one behind more bird's nests and skipped stitches than any other single cause, takes about three seconds to commit: threading the machine with the presser foot down.
This guide covers both halves in order. First, how to identify your bobbin system and get the bobbin in correctly. Then, how to thread the top path so the tension discs actually engage. Then, the step everyone skips - drawing up the bobbin thread before you sew. Read it once and you'll recognize what went wrong every time a problem comes back.
Two bobbin systems: which one is in your machine
Before anything else, you need to know what you have. Home machines use one of two loading systems, and the insertion steps are different enough that doing it wrong produces immediate problems.
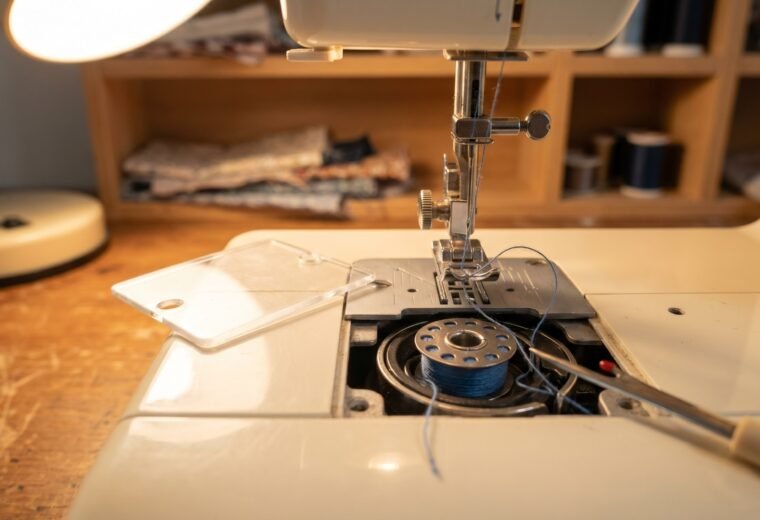
Drop-in (top-loading). Open a horizontal cover plate on top of the machine, and the bobbin sits flat in a fixed holder. Most Brother machines, many Singer models, and most modern Janome and Janome-made machines are drop-in. The bobbin loads from above with no removable case. You thread it through a tension slit in the cover plate, and the machine draws up the bobbin thread through the needle plate hole. Drop-in systems are faster and simpler. The one thing to get right is which way the thread unwinds, and that is machine-specific: follow the small arrow or threading diagram printed next to the bobbin window on your own machine. On most Brother drop-in machines the thread unwinds to the left, as Brother's own instructions state: "Place the bobbin in the bobbin case so that the thread unwinds to the left." Other brands print their own direction, so the diagram on your machine is the authority, not a one-size rule.
Front-loading (oscillating hook). Open a side or front door, remove a separate bobbin case (a small metal or plastic clip assembly), drop the bobbin in, pull the thread through the case's tension slot, snap the case back into the hook. Older Singer models (the 99, 66, 201, and many vintage mechanical Singers from the mid-20th century), most Berninas, and Pfaff/Viking models tend to be front-loading. The case has a clear path and a small latch that clicks into place. If it doesn't click, it isn't seated. Sewing with an unseated case produces an immediate rattling jam.
If you can't tell by looking, open the throat plate area with the machine off. A fixed, clear-covered holder with no latch to remove is drop-in. A removable clip-shaped holder with a tension arm and spring is a front-load bobbin case. Our guide to drop-in vs front-load systems covers the mechanical differences in more detail if you want to go deeper.
Bobbin class: size and material matter more than you think
The class number stamped on your bobbin - Class 15, Class 15J, Class 66, Class L, and others - is not just a catalog designation. Singer's FAQs put it directly: "While Class 66, Class 15, and Class 15J bobbins may look similar, using the wrong type can damage your machine." The difference is small in millimeters but real in function: a slightly taller bobbin can press against the timing hook, a slightly short one causes loose tension. The two most commonly confused are Class 15 and Class 66, and the fastest way to tell them apart is by shape, not height: a Class 15 has two flat sides, while a Class 66 is curved or domed on the sides. Class 15 is also the taller of the two (roughly 12mm versus about 10mm for the Class 66). Check your manual for the specific class, buy that class, and stick to it.
Plastic versus metal is a second variable. Some machines specify plastic bobbins (many modern Brother and Singer models); a few specify metal. A metal bobbin in a plastic-specified machine adds rotational mass the tension system wasn't calibrated for. If your manual specifies plastic, plastic is what you use.
Our reference table for which bobbin fits common machine models lists class and material by model series if you want to confirm before buying.
Bobbin class quick reference
| Class | Also called | Typical machines | Notes |
|---|---|---|---|
| Class 15 | SA156 (Singer) | Singer 4411, 4452, 9960; older mechanical Singers | Plastic standard; metal version available |
| Class 15J | SA156 (some variants) | Many modern Singer machines | Dimensionally near-identical to Class 15 (differences are minor); verify your manual before substituting |
| Class 66 | SA159 (Singer) | Vintage Singer 66, 201, 99; some Janome | Curved/domed sides (Class 15 has flat sides); slightly shorter than Class 15; do not substitute |
| Class 15 (Brother) | SA156 | Many Brother machines (CS6000i, CS7000X, XM2701, SE600) | Plastic; Brother part number SA156 per Brother support - same class name as Singer Class 15; verify fit before substituting |
| Class M | Jumbo class | Larger capacity machines; some Janome models | Larger diameter; holds more thread |
These class names are industry conventions; always verify against your specific machine's manual before purchasing replacements.
How to insert a drop-in bobbin correctly
The needle plate cover on a drop-in machine has a small slit or channel that most people miss. Threading through it is not optional.
- Rotate the handwheel toward you until the needle travels up to its highest point.
- Open the bobbin cover plate.
- Drop the bobbin in so it follows the arrow or threading diagram printed next to the bobbin window. On most Brother drop-in machines the thread unwinds to the left; the exact direction is machine-specific, so trust the diagram on your own machine over any general rule.
- Pull the thread through the tension slit in the cover plate. On most machines this means pulling the thread to the right, through the slot, then letting it drop. You should feel a slight resistance - that's the thread entering the tension spring. Brother's support documentation explains what happens without this step: "If the thread is simply placed in the slit in the needle plate cover, the bobbin thread will not be correctly threaded, resulting in poor sewing performance or incorrect thread tension."
- Leave about 6 inches of thread free. Close the cover plate.
Draw up the bobbin thread manually before your first stitch. Both Singer and Brother instruct users to do this every time - a loose bobbin tail that is not drawn up can get sucked into the hook area and tangle immediately. The draw-up steps are covered under "drawing up the bobbin thread before you sew" below.
One quiet cause worth ruling out first: lint. A pad of felted lint packed into the bobbin case or around the hook is a leading silent reason a machine stops picking up the bobbin thread cleanly and starts delivering uneven tension. Lift out the bobbin and brush the area out with the small stiff brush that came with the machine before you suspect tension or timing. Do not use compressed air or canned air - it blows the lint deeper into the hook race and behind the feed dogs, where it is far harder to remove. Our clean and oil a drop-in bobbin area guide walks through the full brush-out for top-loaders.
If you want the full procedure with the cleaning steps that make insertion reliable, inserting the bobbin correctly covers the clean-first sequence for both system types.
Threading the top path: order and foot position
Threading the top of the machine is simple when you do it in order, and a trap when you rush it. The single rule that governs everything else: raise the presser foot before you pass a single inch of thread through any guide.
Here is why that matters mechanically. Your machine has two small metal tension discs inside the threading path. When the presser foot is down, the discs press together. When the presser foot is up, they open. Thread the machine with the foot down and the thread sits on the outside of the closed discs - no tension grip whatsoever. iFixit's repair documentation states the mechanism precisely: "When the presser foot is up, the tension discs are wide open, allowing the thread to fall between the discs and taken into the proper tension when you start sewing." Singer's FAQ confirms you can test it afterward: "Now lower the presser foot, the thread should now resist when you pull it." If it doesn't resist, you missed the discs. Rethread with the foot up.
Follow this sequence:
- Raise the presser foot lever. Every step after this one depends on this being done first.
- Turn the handwheel toward you until the needle is at the top of its travel.
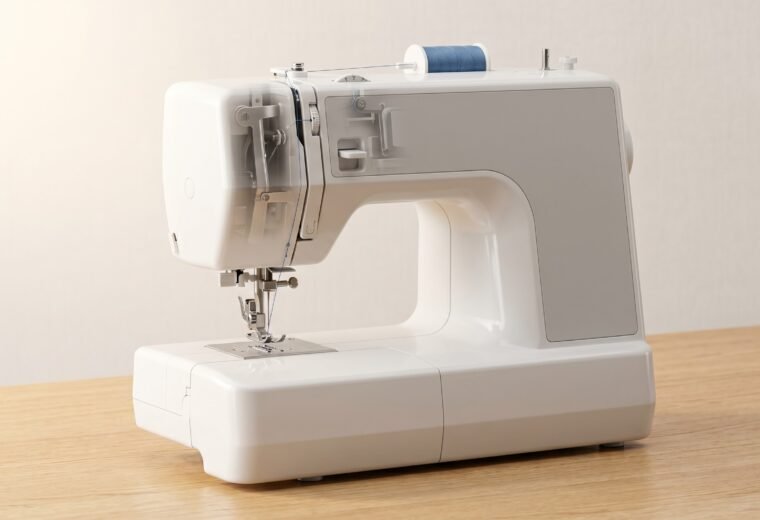
- Place the thread spool on the spool pin and fit the correct spool cap to hold it.
- Follow the numbered thread guides printed on your machine from top to bottom. These vary by brand and model, but the general path is: across the top, down into the tension channel, around the bottom of the tension assembly, up to the take-up lever (the moving metal hook that rises and falls as you sew), then down through any lower guides to the needle bar.
- Thread the take-up lever. This is the part most often missed on a quick rethread. The take-up lever pulls thread off the spool with each stitch cycle; if the thread isn't through it, you'll run out of tension almost immediately.
- Thread the needle. Most machines thread front to back; some thread left to right or right to left. Check the guide on your machine or the manual. The Schmetz/Organ/Klasse 130/705 H needle used in virtually every home machine has a flat shank that goes to the back, and the eye faces forward.
- Lower the presser foot briefly and pull the thread. It should resist. Raise the foot again.
If you want a machine-specific step-by-step, threading the top of the machine has illustrated sequences for several common models.
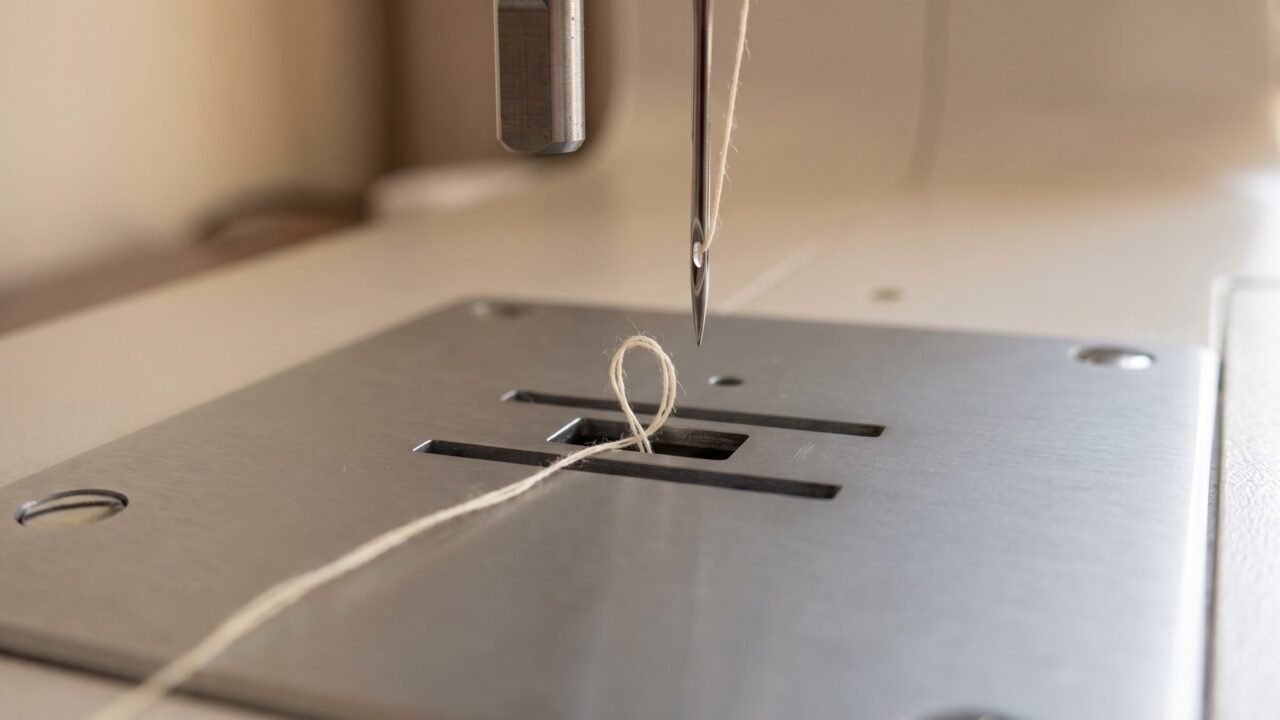
Drawing up the bobbin thread before you sew
With both threads loaded, you need the bobbin thread to come up through the needle plate before you start. Skipping this step - or just tucking both tails forward and hoping for the best - is one of the most reliable ways to get a bird's nest on your very first stitch.
The procedure is the same across almost every home machine:
- Raise the presser foot.
- Hold the top thread tail with your left hand, keeping light tension on it.
- Turn the handwheel toward you one full rotation. The needle travels down through the needle plate, passes through the bobbin area, catches a loop of bobbin thread, and comes back up. Keeping light tension on the top thread tail helps the loop appear cleanly at the top.
- A loop of bobbin thread will come up through the needle plate opening. Pull the top thread tail gently and the bobbin thread loop follows.
- Pull both tails - top thread and bobbin thread - out about 6 inches and lay them back under the presser foot toward the back of the machine.
Direction matters here. The reliable instruction is "toward you" - that is what every brand's diagram means, regardless of which side you view the wheel from. Singer puts it this way: "Always turn the handwheel towards you. Turning it in the opposite direction can disrupt your machine's timing." (Singer adds "counterclockwise" in its own materials, but that label depends on which side of the machine you are looking from, so go by "toward you," not by clock direction.) One rotation, always toward you. Brother's documentation confirms the same mechanic: "The upper thread should have caught the lower thread in a loop. Pull the upper thread toward you and the lower thread will come up from the bobbin in a large loop."
Holding both tails toward the back when you press the foot pedal for the first stitch prevents the loose ends from getting pulled down into the hook. It takes two seconds. If you get a small tangle on the very first stitch consistently, this step is what you're skipping.
Where bobbin and threading mistakes show up as problems
Most of what sewers blame on tension settings and bobbin problems is actually setup. This table maps the common symptoms to the actual cause in ranked order - the thing to check first is at the top.
| Symptom | Most likely cause (check first) | Second cause | Third cause |
|---|---|---|---|
| Bird's nest / loop tangle under fabric | Top thread not through tension discs (threaded with foot down) | Take-up lever missed during threading | Both thread tails not held toward the back at start |
| Loops on the underside of fabric | Top thread incorrectly threaded (Singer: "always an indication" of top threading) or top tension too loose | Take-up lever missed | Wrong bobbin class causing uneven feed |
| Bobbin thread pulled to the top surface | Top tension too tight | Thread snagged on a guide, creating extra drag | Wrong needle size for thread weight |
| Thread won't pull up through needle plate | Bobbin not through the tension slit in cover plate | Bobbin inserted against the unwind direction printed by the bobbin window | Bobbin case not clicked into place (front-load) |
| Skipped stitches | Needle (bent, dull, wrong type, not seated all the way up) | Top threading miss | Bobbin thread not drawn up, running loose |
| Tight, puckered stitch | Top tension too high, or thread snagged on a guide | Thread too heavy for needle size | Needle too fine for the thread, or thread caught at the spool cap |
| Thread keeps breaking | Needle dull, wrong size, or installed with flat side forward instead of back | Thread snagged on a rough spot in the path | Top thread wound too tightly on spool |
Three patterns in that table are worth sitting with. First: the bird's nest and the looping-underneath symptom both trace back to the top thread, not the bobbin. Singer's support documentation is unambiguous - thread looping under the fabric is "always an indication that the upper thread is not correctly threaded." The bobbin is the wrong place to start diagnosing. Second: loops on the underside and bobbin thread pulled to the top are opposite symptoms with opposite causes - loose top tension sends loops down, tight top tension pulls the bobbin thread up. They look related but need different fixes. Third: skipped stitches almost always start with the needle - a bent tip, a size mismatch for the fabric, or a needle pushed up only partway into the clamp.
For a deeper look at what the stitch itself is telling you, reading your stitch walks through how to diagnose by loop location and shape. If you've confirmed threading is correct and you still have bunching, the full bird's nest guide covers the less common causes including hook timing and hook burrs.
The needle at the center of both paths
Start here whenever you get skipped stitches. A bent, dull, wrong, or half-seated needle is the single most common cause of skipping by a wide margin - in practice something like nine times out of ten - and it is the first thing to rule out before you touch tension, threading, or timing. Swapping in a fresh needle of the right size and type costs a minute and resolves the majority of skipped-stitch complaints outright. Needle setup also earns its own section because the same errors show up in both threading problems and bobbin-thread-pickup failures.
Almost every home machine uses system 130/705 H, which Schmetz - a primary needle manufacturer - describes as fitting "99% of all home sewing machines." The flat shank is the identifying feature: one side of the upper shank is flat (that flat side faces the back of the machine on most models; confirm in your manual). The "H" designates the scarf, that small indentation behind the eye that helps the hook catch the thread loop.
Dual sizing: the metric number and the Singer/US number always travel together. A size 90 metric equals a size 14 US (written 90/14). Size 80 = 12 US, size 100 = 16 US. For most medium-weight woven fabric, a 90/14 universal is the starting point. Knits and stretch fabrics need a ballpoint or jersey needle - the rounded tip pushes between fibers rather than piercing them, which prevents skipped stitches on fabric that springs back.
Three installation details that cause immediate problems:
- Failing to seat the needle fully - slide it up into the clamp until it stops, then tighten the screw. A needle even 2mm short will miss the hook's catch timing by enough to skip stitches on nearly every pass.
- Installing the needle with the flat shank forward instead of back. This one is invisible until you sew.
- Using too light a needle for heavy fabric: light denim needs a 90/14, standard or heavy denim needs a 100/16, and very heavy denim or canvas calls for a 110/18. An undersized needle flexes and deflects under tension, misses the hook, and produces consistent skipping.
Needle sizing, types, and when to change are covered fully in our needle sizing guide.
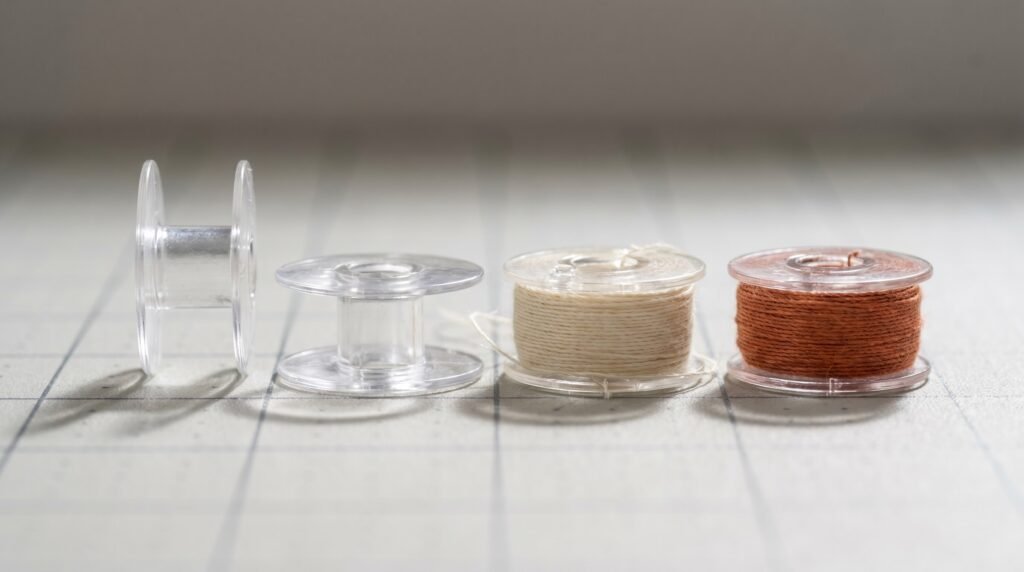
Winding a bobbin
Every machine has a bobbin winder - usually a small spindle on the top right of the machine - and most machines disengage the needle mechanism automatically when the winder is engaged. Wind too slowly and the thread lays loosely and unevenly; wind too fast on a light plastic bobbin and it can distort the spool. A few things that produce bad bobbins:
- Thread guides skipped during winding. Most machines have one or two guides the thread passes through before reaching the winder spindle; skipping them produces uneven tension on the wound bobbin.
- Filling the bobbin past the rim. An overfilled bobbin doesn't spin freely in the case, which tightens bobbin tension unpredictably. Fill to about 80-90% of the flange height.
- Starting without anchoring the thread through the bobbin's small hole. Wrap the tail once and hold it for the first few rotations, or the thread will slip and pile at the base.
The full winding procedure with common mistakes to avoid is in how to wind a bobbin.
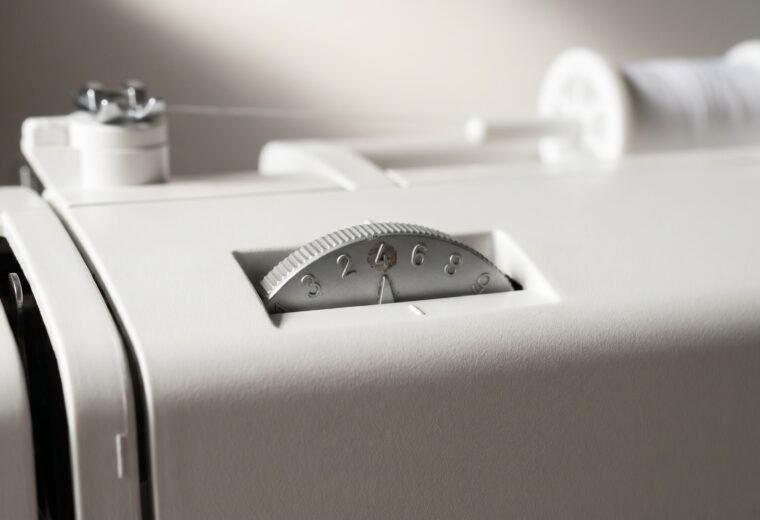
Bobbin tension: where to leave it alone
The bobbin-case screw controls how tightly the case grips the bobbin thread. On most machines it arrives calibrated from the factory, and Singer's FAQ notes plainly that "bobbin tension is typically pre-set and should not require adjustment." On many front-load cases, the adjustment screw is painted over with a dot of yellow or red lacquer from the factory - a visual marker that you've reached the boundary of DIY adjustment.
The test worth knowing is the drop test: hold the bobbin case by its thread tail so it hangs freely. It should not slide down on its own. Give the thread a gentle downward jerk - the case should slip about an inch to three inches and stop. If it drops freely under its own weight, tension is too loose; if it does not slip at all on the jerk, too tight. This tells you whether the calibration is within range - but if it's off, that's a technician adjustment for most users.
The drop test and the full boundary between DIY and tech-territory for bobbin tension are covered in detail in the bobbin tension drop test guide.
What is worth checking yourself before touching any screw: is the problem actually bobbin tension, or is it upper-thread tension that's too tight pulling the bobbin thread up to the top surface? The upper tension adjustment is the correct dial to reach for if your stitch reads unbalanced - and only after you've confirmed the threading is right. Upper thread tension adjustment covers how to read the stitch and dial correctly.
Questions answered
What's the difference between a Class 15 and a Class 15J bobbin?
Physically, they are the same size and generally interchangeable - the "J" designation refers to the hook and case style on the machine, not a different bobbin dimension. Singer's compatibility warning about mixing bobbin classes applies mainly to confusing Class 15 with Class 66, which are genuinely different sizes. That said, your manual will list the exact class for your machine; buy that class, and if you substitute, do it knowingly rather than by accident. The real mismatch to avoid is Class 15 versus Class 66 - those are not interchangeable.
Do I always have to draw up the bobbin thread before sewing?
Yes, as a safe default on every machine. On many newer computerized machines the needle can catch the bobbin thread on the first stitch cycle if you sew very slowly, but both Singer and Brother instruct users to draw the bobbin thread up manually before starting. Skipping the draw-up and relying on the machine to grab it is the fastest route to a bird's nest on your first stitch. Draw it up, pull both tails toward the back, then sew. The 20 seconds it takes is insurance against a two-minute jam.
My machine was threading fine yesterday. Why is it suddenly making a mess?
Something changed - almost always one of four things: the thread came out of the take-up lever during a previous stitch cycle, the needle is now slightly bent or dull, the bobbin thread tail got loose in the case, or (on a drop-in) the thread came out of the tension slit. Rethread completely with the foot up, replace the needle, and reseat the bobbin before looking for any other cause.
Can I use any brand of 130/705 H needle in my machine?
Schmetz, Organ, and Klasse all make 130/705 H needles and all fit standard home machines. Quality differences between brands are minor for typical sewing. Organ needles are Brother's own recommendation and tend to be the most affordable; Schmetz carries a wider variety of specialty types. One caveat: a small number of older Singer models with specific hook geometry are reported to have thread-pickup issues with certain needle brands - check your model's manual or the not-picking-up guide if a brand change fixes the problem.
The take-up lever - do I need to thread it every time?
Yes. The take-up lever is part of the stitch cycle; it pulls thread off the spool on the downstroke and takes up slack on the upstroke. If thread pops out of it mid-sewing (which happens when the machine is stopped with the needle in a mid-cycle position), rethreading just the needle without re-engaging the take-up lever will produce skipped stitches or a jam almost immediately.
- Singer official troubleshooting guide
- Singer Machine FAQs
- Singer Heavy Duty 4411 product pageused to confirm the 4411 uses a top drop-in bobbin system (not front-load)
- Singer Heavy Duty 4452 product pageused to confirm the 4452 uses a top drop-in bobbin system (not front-load)
- iFixit "What To Do When Your Sewing Machine Gets Jammed"
- Schmetz needles FAQ
- Brother USA support documentation (SA156 bobbin)
- Brother USA product page (SA156)confirming part number SA156 for common Brother home machines
- Brother official support documentation
The Stitchmend team
Every fix here is built from manufacturer service manuals and needle-maker specs, and fact-checked against those sources before it goes live. How we work