Brother sewing machine troubleshooting: the recurring issues, E-codes, and where to stop
Fix the most common Brother problems fast: bobbin thread not catching, tension on computerized models, E1/E6 codes, and the needle note that Brother actually recommends.
Most Brother problems come down to four things: a misthreaded upper path, the wrong bobbin seated wrong, a needle that should have been changed two projects ago, or a mystery E-code on the display. This guide covers each one in the order you should actually check them, plus the specific spots where a computerized Brother behaves differently from a mechanical one, and the hard line between what you can fix yourself and what belongs at a service center.
The problem Brothers are famous for: bobbin thread not catching
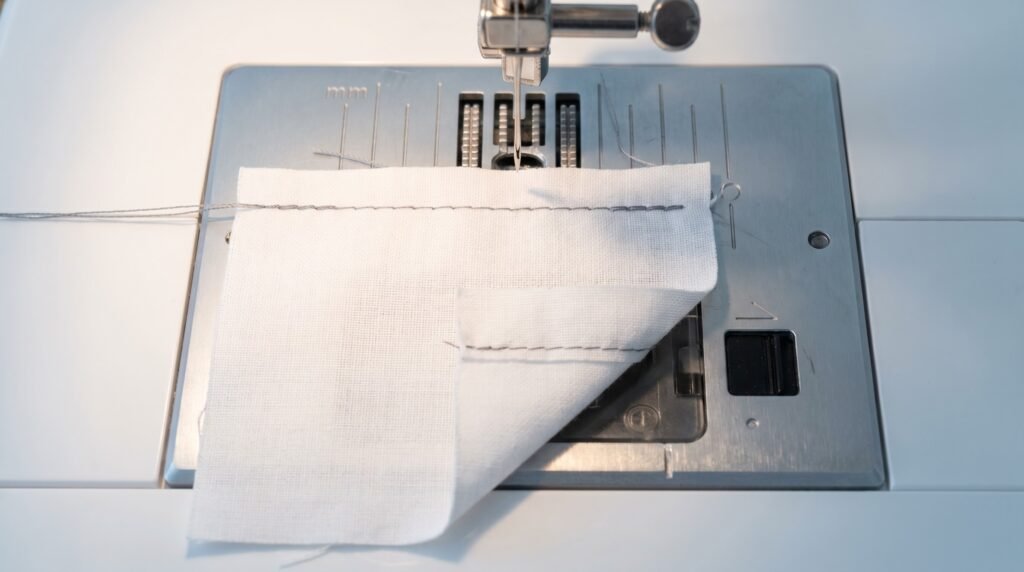
"It's not picking up the bobbin thread" is the most common complaint across the Brother CS, XM, and GX families - and it is related to the second most common one, thread bunching or forming a "bird's nest" on the underside of the fabric right after you start sewing. Both problems trace back to the same root cause in the majority of cases: the upper thread never seated fully in the tension discs because the presser foot was left down while threading - closed discs cannot grip the thread, so the top path runs loose from the first stitch. Brother's own troubleshooting documentation names the cause clearly: the needle is not installed correctly, the bobbin is not the right type, or the upper thread is pulling too tight because the presser foot was down during threading.
Work through this order before touching anything else:
- Rethread the upper path with the presser foot UP. This is the step most people skip. When the presser foot sits down, the tension discs stay closed and the thread never seats properly inside them. Brother's support page on tension problems states it directly: "The pressure foot [sic] has to be raised so the thread can go into the tension disc." Rethread the entire upper path from scratch, then check the bobbin thread draws up correctly on the first stitch.
- Check the needle. Brother specifies 130/705 size 11-16 for all domestic models. The flat of the shank goes toward the back of the machine - confirm yours is seated that way and driven firmly to the top of the needle bar slot before tightening the clamp screw. Then lay the needle flat-side-down on any smooth surface and look at the gap between the shank and the surface. It should be perfectly even along the length. If it rocks or shows more gap at one end, that needle is bent and it will miss the bobbin hook on every pass. Replace it.
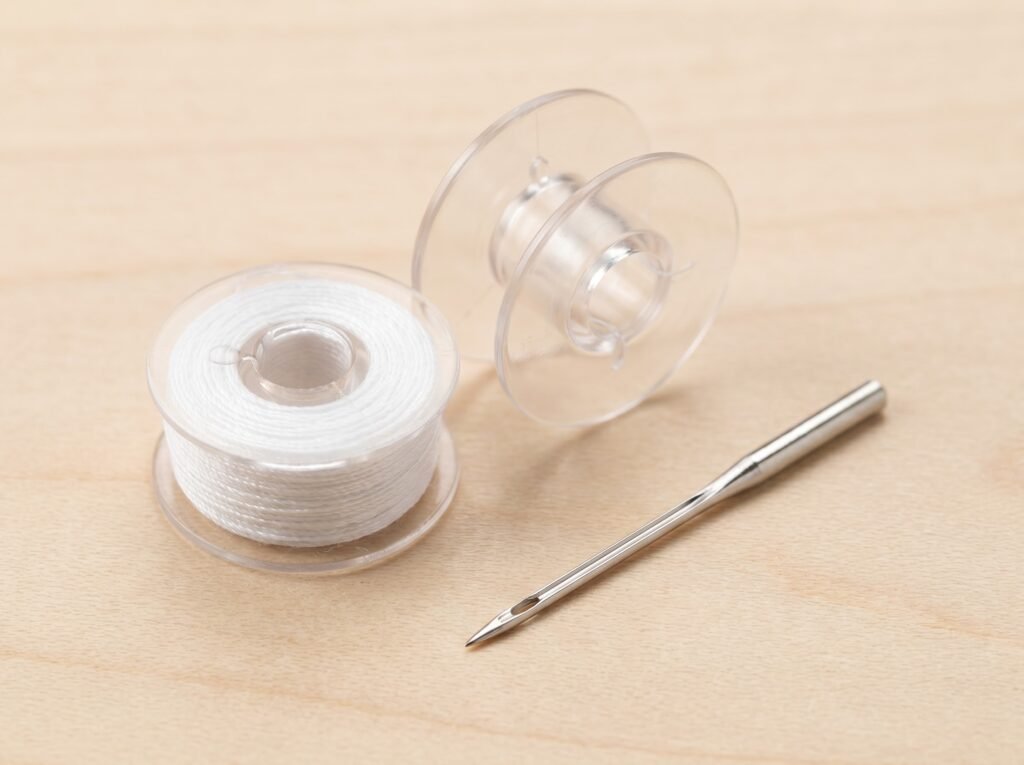
- Check that you have the correct bobbin. Brother uses the SA156, a high-plastic Class 15 type bobbin. The official note is unambiguous: "Use of any other bobbin may result in injuries or damage to the machine." Class 66, Class L, and metal bobbins are the common wrong-bobbin swaps - they look close enough to slot in but sit at the wrong height relative to the hook, so pickup fails. If you see "Class 15J" on a package, that denotes the hook or case style, not a different bobbin size - a Class 15J bobbin is physically the same as a Class 15 and fits Brother's SA156 slot. The real mismatch is 15 versus 66, and metal versus plastic where the machine calls for plastic. If you grabbed a bobbin from another machine, that is your problem.
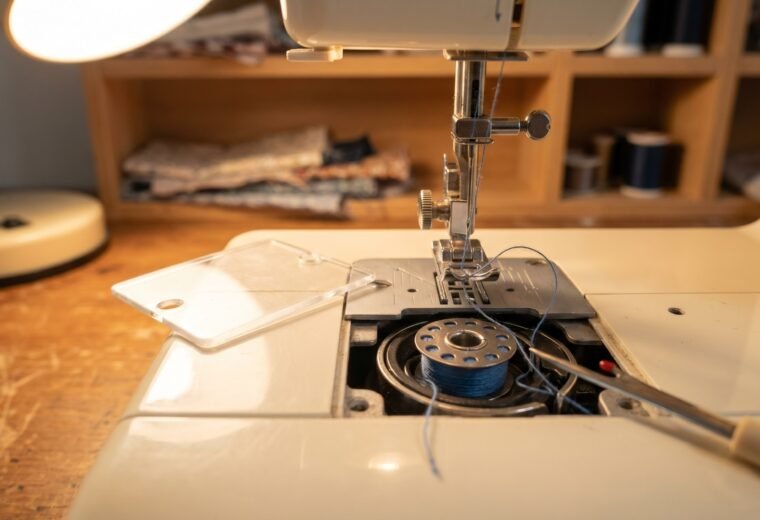
- Clean the bobbin area. Lint packed under the needle plate or inside the bobbin case prevents the thread from feeding under the pretension correctly. A few passes with a soft brush - never compressed air, which drives lint deeper - clears it in under a minute.
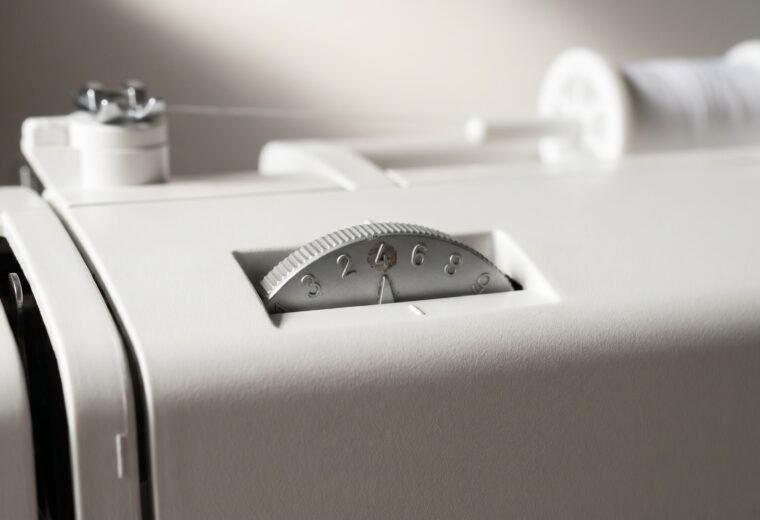
- Set the top tension to 4. Brother's standard upper-tension setting is 4. If yours drifted or someone moved it, reset it and test on a scrap before deciding the machine is broken.
That whole list is about the upper thread. If you are sure the top is threaded correctly and the stitch still looks loose from the bobbin side, do the bobbin drop test before you ever reach for a screwdriver. On a machine with a removable front-load bobbin case, thread the bobbin into the case the normal way, then hold the case suspended in the air by the loose thread tail. Give the thread one small, gentle jerk upward. A correctly tensioned case drops about an inch to three inches in a controlled slither and then stops; if it free-falls to the floor the bobbin tension is far too loose, and if it does not budge at all it is far too tight. This single test tells you in five seconds whether the problem is even on the bobbin side, which saves you from chasing it on the top.
If the drop test says the bobbin tension is off, look at the case before adjusting anything. Brother's standard bobbin case has a factory-set tension screw, often sealed with a dab of paint, and Brother's own guidance is to leave the Phillips (+) screw alone entirely: turning it "may result in damage to the bobbin case." Only the slotted (-) screw on an adjustable case is meant to be touched, and a sealed factory screw means the case is calibrated and you should not break that seal. That makes a mis-tensioned standard case technician territory, not a tweak. For the full method and the front-load versus drop-in differences, see our bobbin tension drop test guide.
If none of the steps above fixes it, our full not-picking-up-bobbin-thread guide covers the less-common causes including a damaged needle plate and a worn hook assembly.
Tension problems on computerized Brother models
A computerized Brother (CS6000i, CS7000X, SE600, and similar) manages stitch selection and some functions electronically, but the tension mechanism itself is the same physical disc-and-spring system you find on a mechanical machine. The fix sequence is identical - rethread first, needle second, dial last.
Reading the stitch tells you which direction to move:
- Loops or loose thread on the surface of the fabric means top tension is too tight, or the upper thread is not seated in the tension discs. Try rethreading before touching the dial.
- Loops on the underside mean top tension is too loose or the upper thread was threaded with the presser foot down. Again, rethread first.
The tension dial on most Brother models runs 0-9, with 4-5 as the balanced setting for standard woven fabrics. To loosen, turn to a lower number; to tighten, go higher. Always test on a scrap piece of the same fabric you are sewing - tension that looks right on cotton broadcloth will behave differently on denim or stretch jersey.
One place computerized models differ from mechanical ones: they will refuse to sew if a sensor detects an error condition, and they display a letter-number code instead of just jamming. Those codes are covered in the next section.
The detail most guides skip: Brother's fabric-and-needle chart for the CS7000X specifies ball-point needles sized 75/11 to 90/14 for all stretch fabrics (jersey, tricot, T-shirt fabric, fleece, interlock). If you are getting skipped stitches or tension chaos on a knit, a universal needle is almost certainly the culprit. The ball-point tip slides between knit loops rather than piercing them; that single swap fixes most stretch-fabric tension complaints without any dial adjustment at all. More on needle selection is in our needle types guide.
E-codes: what they mean and what to do
Brother displays single-letter codes (E followed by a number) when the machine detects a condition it cannot proceed through safely. Most of them clear in seconds once you know what they mean. F-codes are a different category entirely.
| Code | What triggered it | Fix |
|---|---|---|
| E1 | Start/Stop pressed while presser foot is raised, or reverse button pressed with foot up | Lower the presser foot and press start again |
| E2 | Buttonhole lever is down but a non-buttonhole stitch is selected | Raise the buttonhole lever |
| E3 | Buttonhole lever is up but a buttonhole stitch is selected | Lower the buttonhole lever |
| E4 | Bobbin winder shaft is pushed to the right while sewing | Push the bobbin winder shaft back to the left |
| E5 | Start/Stop pressed while foot controller is also connected | Either disconnect the foot controller or use the foot controller to start sewing |
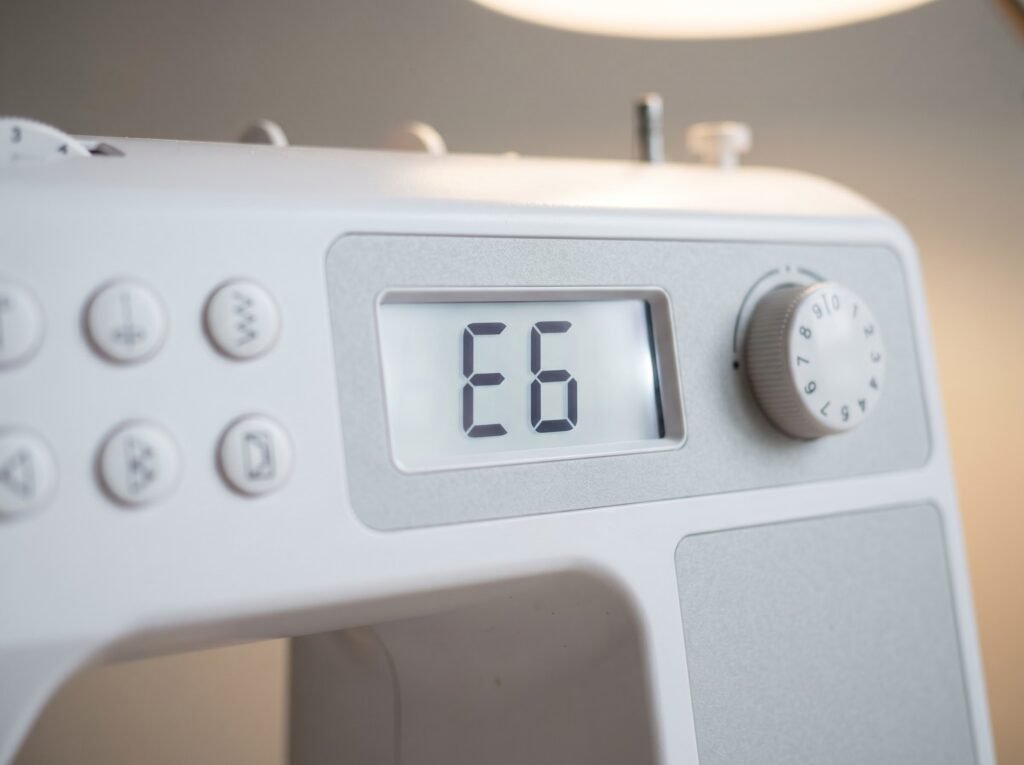
| E6 | Motor locked up - thread tangle, bent needle hitting the needle plate, or seized shaft | Turn off and unplug. Clear the tangle, inspect the needle, turn the handwheel slowly by hand to confirm nothing is catching |
| E7 | The twin-needle mode key was pressed while a stitch incompatible with twin needle is selected | Select a stitch that is compatible with twin needle before pressing the twin-needle key, or cancel and leave twin-needle mode off |
| E8 | Twin needle is turned on and a stitch that cannot be sewn with twin needle is selected | Switch to a stitch compatible with twin needles, or turn off twin-needle mode |
| E9 | Needle plate cover removed while machine is still on | Turn off the machine, reattach the cover, then power back on |
| F + any number | Internal malfunction - mechanical or electronic fault the machine cannot self-clear | Contact a Brother Authorized Service Center |
One honest caveat: the codes above are the common set Brother documents across the Innov-is and computerized lines, but the exact list and numbering vary by model. Some panels run E01 through E11 and split a few of these conditions differently, and a code that means one thing on a CS-series machine can mean something else on an embroidery combo unit. Always cross-check against the error-message page in your own model's manual before assuming a fix; if your display shows a code that is not on this list, that is the reason.
E6 deserves a closer look because it is the most alarming and the most repairable at home. When the motor locks up, the machine is protecting itself from further damage. Unplug first. Then open the bobbin area and remove any tangled thread - sometimes a massive knot has wound around the hook assembly. Check the needle for bending by turning the handwheel slowly by hand and watching whether the needle clears the needle plate cleanly. If it hits or wobbles, replace the needle before powering back on. Once the obstruction is gone, most E6 events clear on first restart.
If the E6 returns immediately after the restart without any visible tangle, the shaft may be seized or there may be a mechanical fault inside - that is the stop line for DIY. Continued forcing can strip the hook timing. Take it to service.
F-codes have no home fix. Every F-code in Brother's documentation resolves to "Contact your nearest Brother authorized service center." Do not try to clear them by power-cycling repeatedly; the fault is electronic or mechanical at a level that requires a technician's tools.
Needles on Brother machines: the Organ note
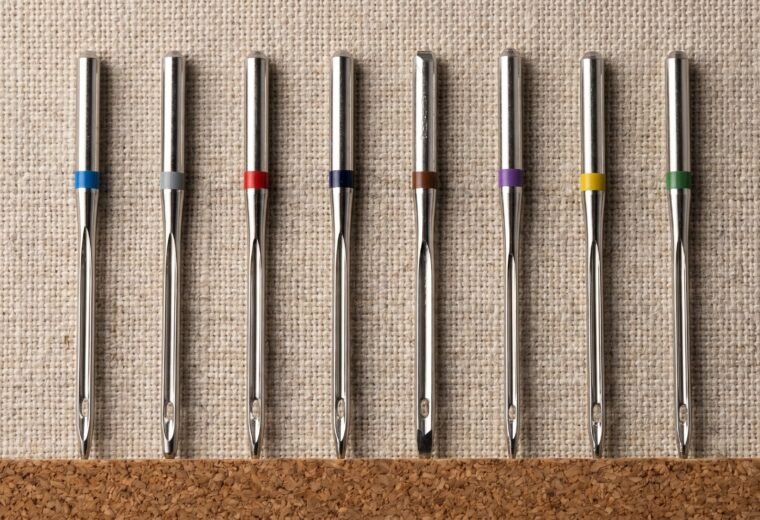
Brother's official needle page recommends SCHMETZ 130/705H as the standard needle, sized #80 or #90 for general sewing. That is the 80/12 or 90/14 in dual notation - the Euro size first, the US size second. Both numbers appear on every modern needle package (Schmetz, Organ, and Klasse all follow this convention), so read either one.
What the specs page does not highlight: Organ is widely cited as the factory-installed needle brand on many Brother machines, with the HAx1 being the household designation for the 130/705 flat-shank system. Organ is widely available, affordable, and Brother-compatible - it is a reasonable choice when you want to match what came in the box. Schmetz carries more specialty types (topstitch, embroidery, microtex) and is the easier brand to find in US fabric stores. Klasse covers the same basic ground at a similar price point to Organ.
None of the three brands has a meaningful quality edge for everyday sewing. Where it matters is type selection: for stretch and knit fabrics, all three brands make a ball-point or jersey needle in the 130/705 system, and that type change is more consequential than the brand choice. Our needle types guide covers the full type-to-fabric matching table, and our Schmetz vs. Organ vs. Klasse comparison goes through the actual differences in more detail.
One practical note on needle sizing for common Brother tasks: Brother's own CS7000X fabric chart specifies 65/9 to 75/11 for lightweight fabrics like lawn or voile, 75/11 to 90/14 for medium-weight broadcloth and flannel, and 90/14 to 100/16 for heavyweight denim and canvas. If you have been sewing denim with a 90/14 universal and getting skipped stitches or a laboring motor, moving up to a 100/16 denim needle is likely all it takes.
Mechanical vs. computerized: what actually differs for repairs
Brother's mechanical models (XM2701, GX37, LX3817, and similar) have no display, no sensor-triggered stops, and no software logic between you and the machine. When something goes wrong, it goes wrong physically and you can usually see or feel it. The handwheel feels stiff, the stitch skips, the needle breaks. The diagnostic path is entirely tactile and visual.
One common mechanical complaint that is almost never a broken part: fabric not moving, or moving unevenly. Before assuming the feed dogs are damaged, check four things in order - that the drop-feed lever or knob (if your model has one) is in the UP/engaged position, that the stitch length is not set to 0, that the presser foot is actually lowered, and that lint has not packed between the feed dog teeth. Those four checks clear the overwhelming majority of "fabric won't advance" calls without any repair at all.
Computerized models add sensors and control boards that can either help or confuse. The help: the machine tells you what it detected via E-codes, which saves guessing. The confuse: a sensor itself can fail or generate false codes, especially on older computerized Brothers that have been through heavy use or a power surge. If you get a persistent error that does not match any visible problem - E1 while the presser foot is clearly down, for example - suspect the sensor or the control board rather than the physical condition.
One maintenance warning that applies to every Brother, mechanical or computerized, and quietly kills more machines than any error code: use sewing machine oil and nothing else. Brother's own maintenance instruction is blunt about it: "Apply only sewing machine oil. Use of any other type of oil may result in damage to the machine." WD-40, 3-in-1, and general household oils are not lubricants for this job. WD-40 in particular is a water-displacing petroleum product that evaporates and leaves a residue; 3-in-1 and cooking oils oxidize and turn thick. Either way, that residue gums the hook race and the tension parts until the machine drags and skips. A machine that someone "fixed" with WD-40 often runs worse a month later than it did before. If yours has been hit with the wrong oil, that gumming is its own problem; for the right product and where to apply it, see our best sewing machine oil guide and why WD-40 and compressed air do not belong near a sewing machine.
For both types, the repair boundary is the same in practice: threading, needle, bobbin, lint, and belt tension are DIY. True timing (needle-hook desync) is DIY-possible but only after ruling out needle and threading issues, because a significant share of suspected timing failures clear with a needle change alone. See our guide to telling timing from non-timing issues before you start adjusting the hook position. Anything involving the control board, a blown capacitor, or internal wiring is technician territory - not because it is physically impossible to access, but because diagnosing electronic faults without the right equipment will cost more time and risk than a single service visit.
Model-specific pages for common Brother machines
Some Brother models have their own quirks beyond the general troubleshooting above. The pages below cover model-specific problems, settings, and known failure points for the most common ones:
- Brother CS6000i problems and fixes - the most widely sold Brother; threading path, foot pressure, and the specific presser foot sensor quirk
- Brother CS7000X problems - the CS6000i's heavier sibling; feed dog issues and LCD behavior
- Brother XM2701 problems - mechanical; the bobbin winder disengagement issue and tension basics
- Brother GX37 problems - entry-level mechanical; needle position and stitch-length-0 feed issues
- Brother SE600 problems - combo sewing and embroidery; hoop alignment and E-code behavior
- Brother PQ1500SL problems - high-speed straight-stitch; timing sensitivity and foot pressure settings
For a side-by-side look at how Brother compares to Singer on common failure patterns, threading, and repair costs, the Singer troubleshooting hub covers the Singer side of that comparison. Needle system, bobbin class, and the threading-with-foot-up rule are identical across brands - what differs is model layout and where each brand's weaknesses tend to appear.
If you are still deciding whether the machine is worth repairing at all, a basic clean-and-service is commonly quoted in the $80 to $150 range, though local rates vary by region and shop - call ahead for an estimate before committing. On an entry-level Brother under $200 new, that math is close. The repair-vs-replace guide and calculator walks through the decision with actual numbers for your machine's age and symptom.
Replacement parts - bobbins, needles, presser feet, and the less-common items like feed dogs and tension assemblies - are covered at our parts identification guide.
The Stitchmend team compiled this guide from Brother USA official support documentation, Brother operation manuals, and SCHMETZ needle technical specifications, cross-checked and edited before publishing.
Questions answered
Why does my Brother keep displaying E1?
E1 means the Start/Stop button (or foot controller) was activated while the presser foot is raised. Lower the presser foot lever and press start again. If E1 appears even with the foot clearly down, the presser-foot sensor may be faulty - that requires a service visit.
My Brother tension looks fine on top but the underside is a mess. What's wrong?
Loops on the underside almost always mean the upper thread was not properly seated in the tension discs - usually because the presser foot was down during threading. Raise the presser foot, rethread the entire upper path from scratch, and test on a scrap. Change the needle too; a dull needle throws tension balance even when everything else is correct.
Can I use any Class 15 bobbin in a Brother?
Brother specifies the SA156, which is a high-plastic Class 15 type. If you see "Class 15J" on a package, that refers to the hook or case style - the bobbin itself is the same physical size as a Class 15 and fits the SA156 slot. The real mismatches to avoid are Class 66 (a different, slightly larger bobbin), Class L, and any metal bobbin. Metal bobbins are explicitly prohibited by Brother - they can damage the hook. Use SA156 or bobbins Brother certifies as compatible with your specific model.
My Brother shows an F-code. Can I fix it myself?
No. Every F-code in Brother's documentation directs you to a Brother Authorized Service Center. F-codes indicate an internal mechanical or electronic malfunction that requires diagnostic equipment to identify and repair safely.
Is Organ or Schmetz a better needle for Brother machines?
Both fit the 130/705 H system and both work correctly in any Brother. Organ is widely cited as the factory-installed brand on many Brothers and is typically cheaper. Schmetz has a wider range of specialty types. For everyday sewing, the brand choice matters less than getting the right needle type (universal, ball-point, denim) and size for your fabric.
The Stitchmend team
Every fix here is built from manufacturer service manuals and needle-maker specs, and fact-checked against those sources before it goes live. How we work