Why your sewing machine makes a bird's nest underneath (it's the top thread)
A wad of looped thread under your fabric is almost always the top thread, not the bobbin. Here's the 2-minute fix and why the tension dial is the wrong first move.
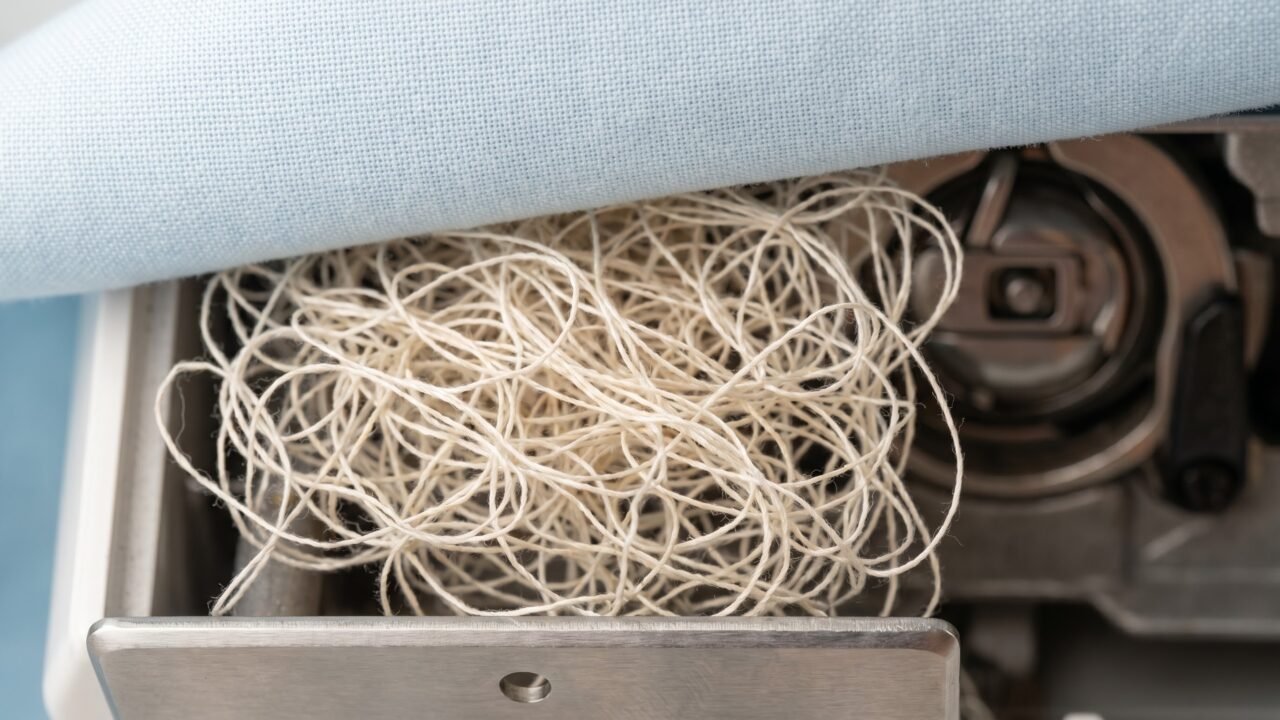
Pull your fabric out and find a tangle of looped thread underneath, and the instinct is to blame the bobbin. Almost everyone does. But Singer's official support is unambiguous on this point: "Thread looping on the underside of the fabric is always an indication that the upper thread is not correctly threaded." The bobbin is usually innocent. The bird's nest is your top thread, piled up under the fabric because the tension discs never got hold of it.
The fix takes two minutes. More importantly, once you've done it correctly once, you'll catch the warning signs before the tangle even starts.
Why the bird's nest happens: the presser foot rule
Your machine has two small metal discs inside the threading path. When you lower the presser foot, those discs press together and pinch the thread between them, creating the top tension. When the presser foot is up, the discs open wide.
Thread the machine with the foot down - which is easy to do by habit, especially mid-project when you're just rethreading quickly - and the thread sits on top of the closed discs instead of between them. No grip is applied. When you start sewing, the top thread runs free, loops down through the fabric with every stitch, and piles up under the work. The bobbin thread is visible on top; the pile grows underneath. That tangled wad is pure top thread.
iFixit describes it precisely: "When the presser foot is up -- the tension discs are wide open, allowing the thread to fall between the discs and taken into the proper tension when you start sewing." Brother's support documentation goes further: "If the presser foot is not raised, the sewing machine cannot be threaded correctly." It is not a tip. It is a mechanical requirement.
A second, overlapping cause: starting to sew without holding both thread tails. If you lower the needle and immediately press the foot pedal, the loose top thread gets pulled down into the hook assembly before any tension is established. Even a correctly threaded machine can produce a small bird's nest on the very first stitch if you let the tails go. Hold both - top thread and bobbin thread - toward the back of the machine for the first few stitches.
The 2-minute fix

Cut the tangled thread away from under the fabric first. Trying to pull it free can yank the needle, bend it, or chip the hook tip. Use scissors and remove it completely. Then follow this sequence in order.
- Raise the presser foot lever all the way up. Not halfway. The discs need to be fully open before any thread is placed in the path.
- Raise the needle to its highest position by turning the handwheel toward you. Singer specifically calls for this so the thread can seat in the take-up lever correctly.
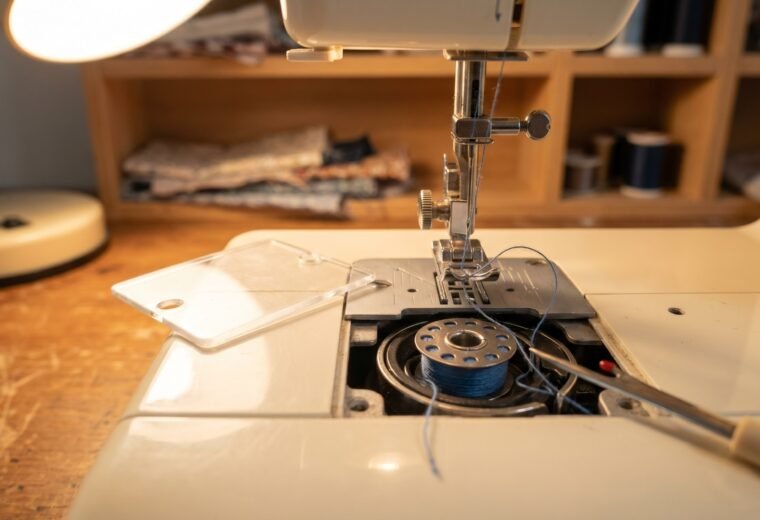
- Remove the top thread completely from every guide, the tension mechanism, and the take-up lever. Do not just re-loop the last section. Start from the spool.
- Rethread the entire top path following the numbered guides or the printed diagram on your machine, with the presser foot lever still up. Every guide must be engaged in the right order.
- Lower the presser foot and tug the thread. Singer's FAQs describe this as the check: "Now lower the presser foot, the thread should now resist when you pull it." Resistance confirms the discs have engaged. If the thread pulls freely, the foot is still up or the thread missed the tension mechanism entirely - go back to step 3.
- Draw up the bobbin thread by lowering and raising the needle once with the foot pedal or handwheel. Pull both thread tails to the back or side, 4-6 inches long.
- Start sewing, holding both tails for the first 3-4 stitches.
If the bird's nest returns immediately after this, the bobbin is worth checking next - but the fix above resolves the problem in the vast majority of cases. See our guide to the machine not picking up the bobbin thread if you suspect the bobbin is involved.
Why reaching for the tension dial first makes things worse
The tension dial does one thing: it adjusts how tightly the discs grip the thread. If the thread is not seated between the discs at all, turning the dial accomplishes nothing. You end up with an unknown dial setting on top of a threading error, which makes the real cause harder to find when you eventually rethread correctly.
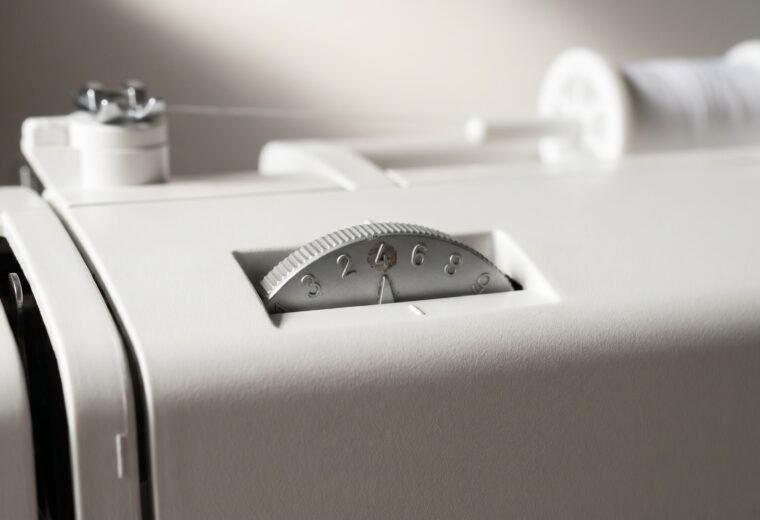
A standard top tension setting for most home machines is 4 or 5 on a 0-9 scale, and Singer's guidance is to set it there during rethreading as a baseline. If stitch quality is still uneven after a clean rethread, that is the right time to diagnose the tension - by reading the stitch, not by guessing at the dial. Loops on the underside point to the top thread being too loose or mis-threaded; bobbin thread being pulled to the top means the top tension is set too tight. Our guide on upper thread tension covers that diagnosis step by step.
The broader principle: tension problems should be diagnosed only after rethreading and a needle change have been completed and confirmed.
When the bird's nest comes back after correct rethreading
If you rethread carefully with the foot up, do the resistance check, and still get bunching after a few seams, three things are worth checking.
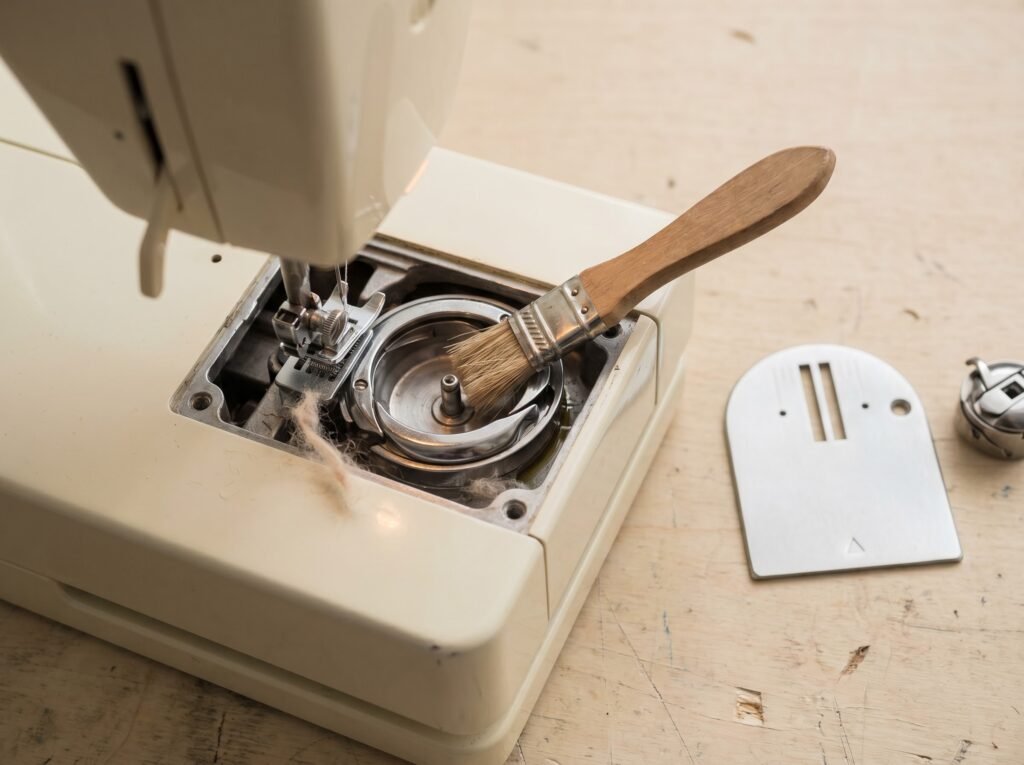
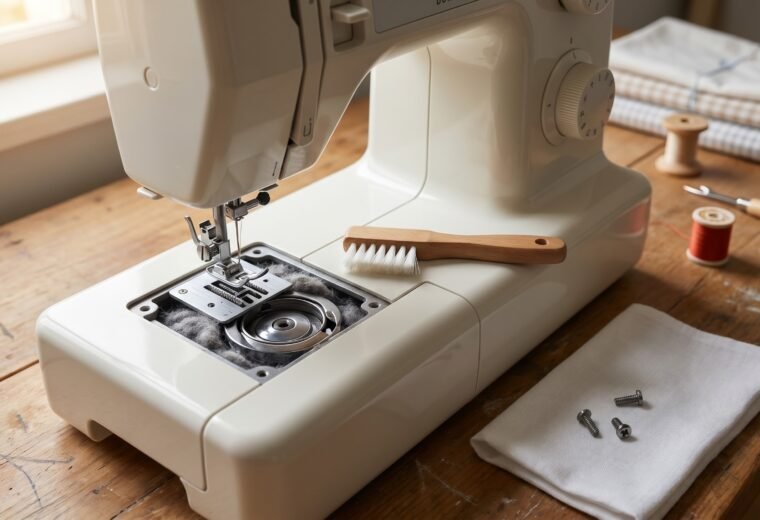
Lint in the hook assembly. The rotary hook that catches the top thread loop and passes it around the bobbin case can accumulate lint and thread fragments in the hook race. Lint sitting in the hook race reduces the clearance between the hook tip and the needle, so the hook tip misses or only partially catches the thread loop - leaving the top thread loose rather than drawing it through cleanly. Singer recommends cleaning the shuttle area with a lint brush and adding one drop of sewing machine oil to the hook area during regular maintenance. Remove the needle plate, pull out the bobbin and bobbin case, and brush the hook race clean with the small brush that came with the machine. More detail in our machine cleaning guide.
A damaged or poorly seated needle. A bent needle tip, or a needle not pushed all the way up into the clamp, changes the geometry between needle and hook. The hook may not catch the thread loop cleanly, and the result looks like a bird's nest even though the threading is correct. Check the needle: seat it fully into the needle clamp - slide it in until it will go no further - with the flat side of the shank facing back (your machine's manual will confirm the orientation), then tighten the clamp screw firmly. If the needle is more than a project old or shows any visible bend, replace it. A size 90/14 universal (system 130/705 H) is a good general starting point for medium-weight wovens; needles are inexpensive and a fresh one eliminates this cause quickly.
Thread that is not under the presser foot at the start. Both thread tails must be behind or to the side of the presser foot before you lower the foot and begin sewing. If the tails are in front, they can get caught in the first stitch and trigger bunching that looks identical to a threading error.
Symptom-to-cause reference
The table below is a quick diagnostic for the most common bird's-nest and bunching scenarios. Every entry assumes rethreading with the foot up has already been tried - because that step solves the majority of cases before any deeper investigation is needed.
| What you see | Most likely cause | First action |
|---|---|---|
| Large wad of thread under fabric, first few stitches | Top thread threaded with presser foot down | Rethread completely with foot UP; hold tails at start |
| Bunching at start only, then stitches improve | Thread tails not held; loose start | Hold both tails toward the back for first 4 stitches |
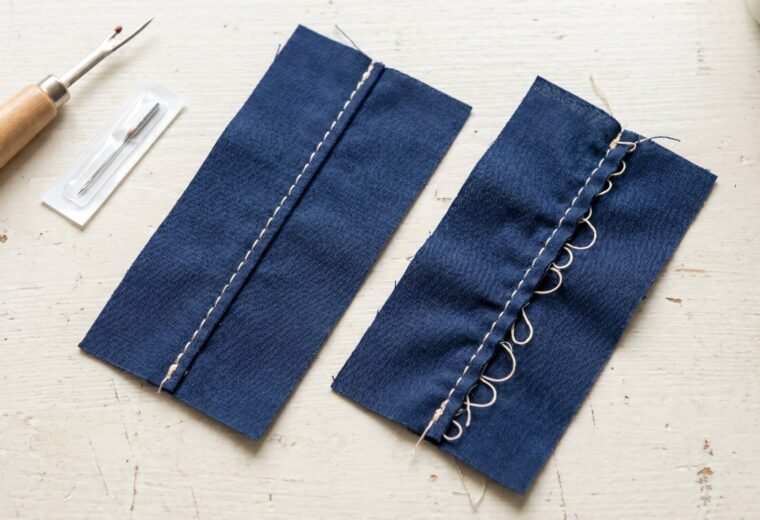
| Loops on underside throughout the seam | Top tension too loose or thread bypassed a guide | Rethread; check each guide in sequence; check dial is at 4-5 |
| Thread resistance test fails (thread pulls freely with foot down) | Thread missed the tension discs entirely | Rethread from scratch, presser foot up, slower |
| Bunching returns after correct rethread | Lint in hook race OR bent/unseated needle | Clean hook area; replace needle (90/14, system 130/705 H) |
| Rattling noise plus thread tangle | Upper thread tangled in bobbin case (Brother support) | Remove bobbin case, clear thread from case, rethread top |
What about the bobbin?
Bobbin problems do cause thread issues - just not usually the bird's-nest pattern. When bobbin tension is off or the bobbin is incorrectly seated, the symptom tends to be uneven stitch tension, loops, or thread pulling to one side, rather than a pile-up under the fabric.
If you have rethreaded top and bottom, replaced the needle, and cleaned the hook, and bunching persists, the bobbin case tension is worth checking with the drop test. Hold the bobbin case by its thread and give the thread a gentle downward jerk. The case should slip 1-3 inches and hold - not drop freely, not stay frozen. That check you can do yourself: freely-dropping means the tension screw is too loose; zero movement means it is too tight. What requires a technician is the next step - turning the tension screw itself - because on most machines it is sealed from the factory with a yellow paint dot, and a quarter-turn error in either direction will throw the calibration off for every thread weight you run. Our bobbin winding and seating guide covers the setup steps before you get to tension.
For deeper tension diagnosis after you've ruled out the top thread, the tension troubleshooting hub covers bobbin, stitch-reading, and when the dial actually needs adjustment.
Frequently asked questions
Can a damaged spool cause bird's nesting?
A cracked or notched spool can catch the thread and release it unevenly, which creates tension surges that look like bunching. Set the spool on the pin so it turns smoothly, or use a spool cap if the thread is catching at the rim. If the thread feeds in uneven jerks, the spool is worth swapping before assuming a machine problem.
My machine has an automatic threader - does the presser-foot-up rule still apply?
Yes. The auto-threader handles the needle eye only; it does not thread the tension discs. You still need the presser foot up when you run the thread through the tension path. Check your manual - most auto-threader machines print a diagram showing the path, and every step before the needle requires the foot lever raised.
Is it safe to clear a bird's nest by pulling the fabric?
No. Pulling the fabric with a tangle under it can yank the needle sideways and bend or break it. In severe tangles it can also damage the hook tip. Cut the thread with scissors, remove the fabric, and then clear the tangled thread from the hook area before rethreading.
The bunching only happens on certain fabrics - why?
Stretchy or slippery fabrics (knits, satin, chiffon) amplify any tension problem because they offer less resistance as the stitch forms. A slight threading error that goes unnoticed on cotton can produce a bird's nest on jersey. The fix is the same - rethread with foot up - but you may also want to reduce presser foot pressure slightly and use a needle suited to the fabric (a ballpoint 80/12 for knits, for example). More on that in our sewing machine troubleshooting guide.
The Stitchmend team compiled this guide from Singer troubleshooting guides and machine FAQs, Brother service documentation, iFixit repair procedures, and Schmetz needle specifications; every key claim was verified against a primary source before publishing.
The Stitchmend team
Every fix here is built from manufacturer service manuals and needle-maker specs, and fact-checked against those sources before it goes live. How we work
Read next
 Troubleshooting
Why your machine won't pick up the bobbin thread, and how to fix it
 Tension
How to diagnose and correct upper thread tension
 Tension
Sewing machine tension: reading your stitch before touching the dial
 Cleaning & Maintenance
How to clean your sewing machine (hook, feed dogs, bobbin area)
 Bobbins & Threading