Sewing machine tension: read your stitch before you touch the dial
Loops on top or bottom? Diagnose top-thread vs bobbin tension in 30 seconds, fix it in the right order, and only touch the dial as a last resort.
Most sewing machine tension problems fix themselves the moment you rethread with the presser foot up. No dial, no screwdriver, no adjustment required. The remaining cases follow a clear ranked sequence: fresh needle, clean bobbin area, then - if everything else checks out - a careful turn of the tension dial. The mistake most people make is going straight to the dial, which solves nothing if the actual cause is a threading error.
This guide shows you how to read your stitch to identify which thread system is causing the problem, then walks you through the correct fix order so you don't spend 20 minutes adjusting a dial that didn't need touching.
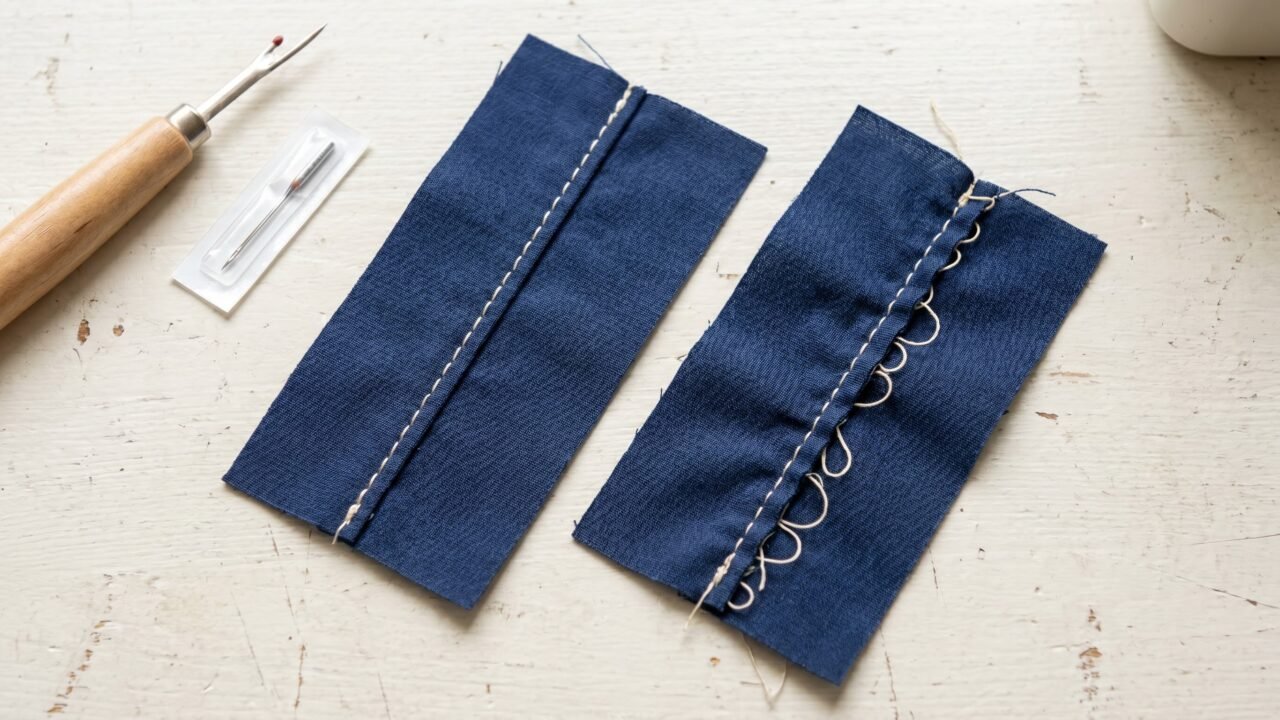
Read your stitch first: top or bobbin?
Flip the fabric over and look at both sides. A correctly balanced stitch looks identical top and bottom: the thread join sits inside the fabric layers, with neither color visible on the surface. Brother's guidance describes it precisely - "the upper thread and the bobbin thread should cross near the center of the fabric."
Use the table below to identify what your stitch is telling you. Every scenario maps to a specific cause and the right first move.
| What you see on top | What you see on the underside | What it means | First move |
|---|---|---|---|
| Stitch looks normal | Stitch looks normal | Tension is balanced | Nothing - you're good |
| Looks tight, flat, maybe slightly puckered | Loops or slack top thread on the underside | Top thread too loose OR mis-threaded | Rethread with presser foot UP |
| Bobbin thread pulled up, dots of bobbin color showing on top | Top thread lies flat, looks tight | Top thread too tight OR bobbin mis-seated | Rethread top; reseat bobbin; then loosen the dial |
| A ridge of bobbin color pulled fully to the surface | Only the flat top thread shows | Top tension far too tight | Rethread top; check tension dial |
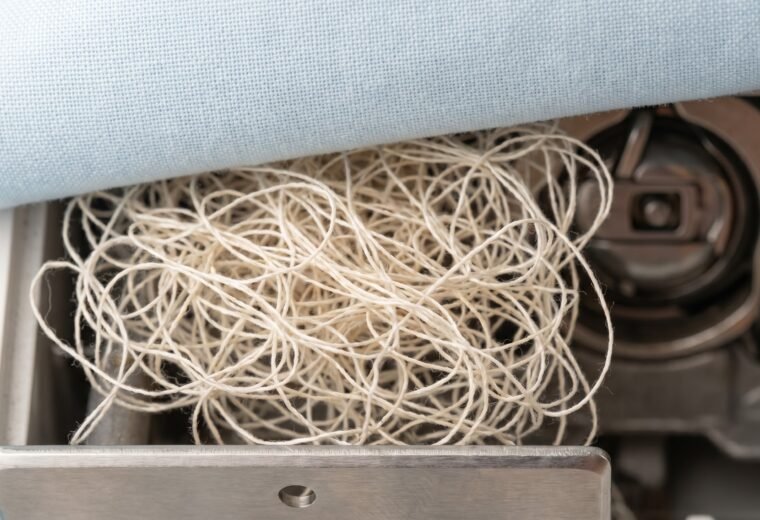
| Top surface looks normal or slightly tight | Bird's nest - knotted mass of loops on the underside; fabric won't move | Top mis-threaded with foot DOWN | Clear jam, rethread foot UP - see bird's nest guide |
| Fabric puckering, seam weak | Both sides look tight | Overall tension too tight for fabric weight | Rethread; try lighter tension; check needle size |
A fuller breakdown of the stitch-reading skill - including how to do a contrast-thread test to see exactly where the join sits - lives in the stitch diagnosis guide. Come back here once you know which thread system to work on.
The fix order (don't skip ahead)
Most tension advice starts at step four. That's the problem. The steps below are ranked by how often each one is the real culprit, and each step eliminates a cause before you move on. Skip ahead and you'll likely be adjusting a dial that had nothing to do with it.
Here is the same idea as a frequency ranking. Across reported "tension" complaints, this is roughly how often each cause is the actual problem - and the one-line self-test that confirms it. Work top to bottom and stop at the first one that proves true.
| Most-likely cause, in order | How to confirm it in 30 seconds | If confirmed |
|---|---|---|
| Top thread mis-threaded (foot was down) | With the foot UP, pull thread at the needle; lower the foot and pull again. No change in resistance = thread never seated in the discs. | Rethread foot UP (Step 1) |
| Wrong, bent, dull, or blunt-for-knits needle | Swap in a fresh needle of the right type for the fabric; sew a scrap. Knit + skipped stitches almost always means a sharp needle where a ballpoint belongs. | Change the needle (Step 2) |
| Bobbin issue: lint, mis-seated, or wrong class | Pull the bobbin, clear lint, reseat it, and check the part number against your manual. | Clean and reseat; match the bobbin (Step 3) |
| Thread snag in the path or poor-quality thread | Pull thread slowly through the whole path by hand, feeling for a catch; try a fresh spool of good thread. | Clear the snag; change thread |
| Upper dial genuinely set wrong | Only after all of the above check out: stitch is still unbalanced on a clean rethread. | Nudge the dial half a step (Step 4) |
| Hardware: worn tension spring or timing | Everything above ruled out and the fault persists or arrived with a new noise. | Bench repair territory; see below |
Step 1: rethread with the presser foot UP
This is the single most important rule in sewing machine threading, and it's the one most often skipped. When the presser foot lever is down, the tension discs - the two small metal discs you can feel on the front face of the machine, usually near the tension number dial - clamp shut. Thread runs past them without seating between the plates, so the entire upper tension mechanism might as well not exist. Brother's support documentation states it plainly: "If the presser foot is not raised, the sewing machine cannot be threaded correctly."
The fix is simple. Raise the presser foot lever all the way up. Raise the needle to its highest position using the handwheel. Cut your thread and start fresh, following the numbered thread guides on your machine from the spool through every guide, through the tension mechanism, down through the take-up lever, and finally through the needle eye. Singer's guidance recommends setting the tension dial to 4 before you rethread as a clean starting point.
Here's a quick check to confirm the tension discs are actually engaging: with the presser foot UP, pull the thread from the needle. It should slide with slight resistance. Lower the foot, then pull again. The resistance should increase noticeably. If there's no difference at all, the thread is not seated in the tension mechanism.
Many people discover the "tension problem" disappears completely after rethreading correctly. Try a test seam on scrap fabric that matches your project fabric before going further.
Step 2: change the needle
A bent, dull, or wrong-size needle is the second-most-common cause of uneven stitching - and it shows up as loops, skipped stitches, or puckering that looks exactly like a tension fault. The needle controls how cleanly the hook catches the upper thread loop; even a slightly bent needle can cause the hook to miss or grab inconsistently, producing irregular stitch tension from one stitch to the next.
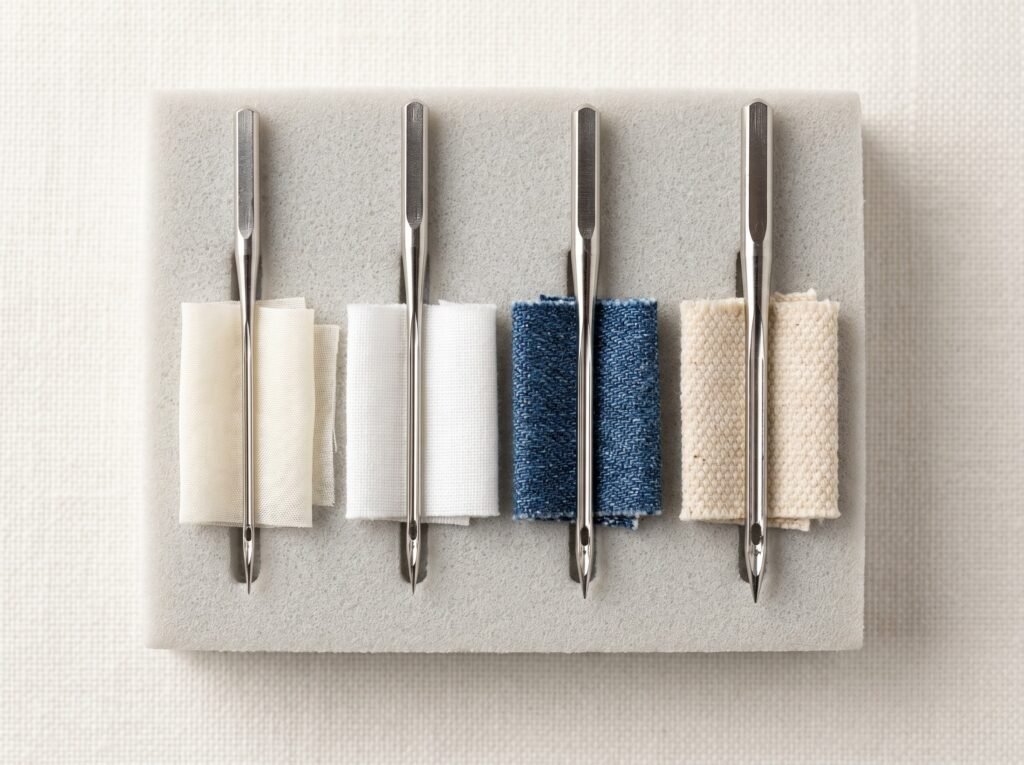
Home sewing machines across all major brands use the 130/705 H system (also called HAx1). Schmetz describes the flat shank as a design feature that "makes sure that the needle is always in the right position and cannot be inserted incorrectly" - but you still need to push it all the way up into the needle clamp before tightening the screw. Singer's guidance is specific: "the flat part of the needle should be positioned towards the back" and the needle "needs to be pushed as far up the needle shaft as possible."
Sizing runs in dual notation - a 90/14 needle has a 0.90 mm blade diameter (the 90 is the metric NM size) and a US size of 14. For general woven fabrics, 80/12 handles lighter cotton and quilting fabric; 90/14 suits medium-weight denim; 100/16 is the right choice for canvas and heavy fabrics; 70/10 is the choice for fine silk or chiffon. (Schmetz's fabric guide lists Jeans needles in 90/14-110/18 for canvas, with 90/14 as the minimum - heavy canvas needs 100/16 or 110/18.)
Sewing a knit and seeing skipped stitches? Change the needle before you touch anything else. A universal needle has a sharp point that pierces straight through the loops of a knit, so the hook arrives to find nothing to catch and the stitch drops out. The fix is a ballpoint or jersey needle (same 130/705 system, just a different tip): Schmetz designs its rounded ball point to "avoid breakage of knit fibers at stitch creation," nudging the loops aside instead of splitting them so the hook catches every time. Jersey, interlock, fleece, ribbing and most stretch fabrics all want a ballpoint. This is one of the most common "tension" complaints that is not a tension problem at all - the stitch looks loose and uneven only because half the stitches never formed. More on point shapes in the needle types guide.
Change the needle if it has been in the machine for more than about eight hours of sewing, or at the start of any new project. A fresh needle costs a few cents. A dull needle can corrupt an hour of work.
Our full needle selection chart - covering point types, fabric pairings, and the size-to-fabric-weight table - is in the needle guide.
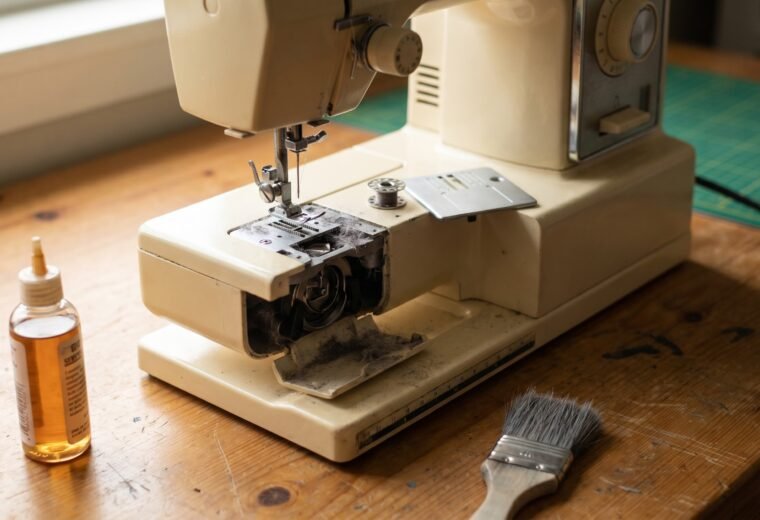
Step 3: reseat the bobbin and check the bobbin area
If rethreading and a fresh needle didn't fix the stitch, look at the bobbin. Remove it, wipe out any lint from the bobbin seat and the area under the throat plate, and reseat the bobbin correctly. On drop-in machines, the thread should unspool counterclockwise (check your manual's diagram). On front-load machines, the bobbin case should click into place with a distinct snap.
While the bobbin is out, confirm it is the right one. Bobbins come in classes - Class 15, 15J, 66, L, M and others - and Singer's own guidance is blunt about it: "Use only bobbins that are the same class/style as those that come with your machine - don't substitute!" Class 15 and 15J designate the same physical bobbin - the J suffix describes how the hook and case are engineered on the machine side, so the two wind and seat identically and can be swapped freely. The real incompatibility is between genuinely different classes, such as Class 15 and Class 66, or a flimsy plastic bobbin substituted for the metal one your machine was built around. A bobbin of the wrong class sits at the wrong height in the case, catches under its own flange, and throws off tension or jams the works. The differences can be too small to see by eye, so match the part number in your manual rather than whatever happened to fit. The which bobbin fits guide lists the classes by machine.
Lint packed around the bobbin case can mimic tension problems by dragging on the bobbin thread unevenly. A thorough cleaning of the hook race and bobbin area is worthwhile whenever stitching becomes inconsistent for no obvious reason. Never blow compressed air into the bobbin compartment - it drives lint further into the mechanism. Use a small brush or a vacuum with a narrow nozzle instead.
Thread showing on the top of the fabric occasionally points to a bobbin seated slightly wrong rather than to an actual tension mismatch. Reseat it and run another test seam before moving to the dial.
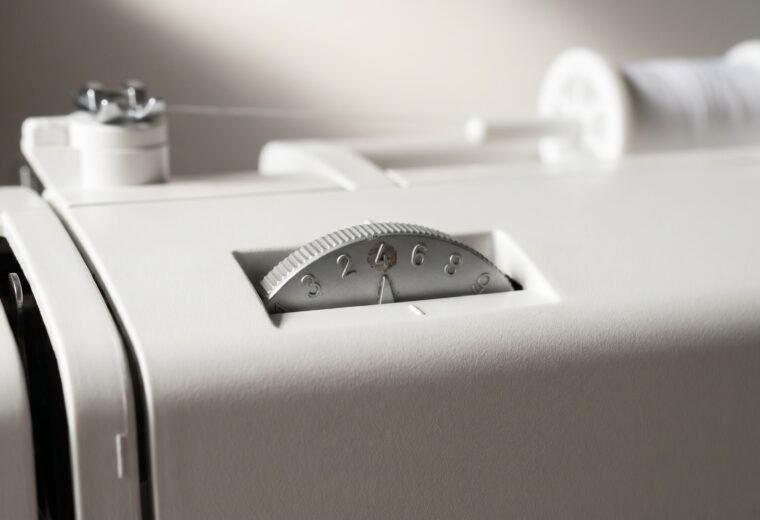
Step 4 (last resort): adjust the upper tension dial
Only reach for the tension dial after you have confirmed that the upper thread is correctly seated with the presser foot up, the needle is fresh and the right type, and the bobbin is properly installed and the area is clean. At that point, if the stitch is still unbalanced, a small dial adjustment is appropriate.
Brother's guidance describes the direction clearly: turn the dial to a lower number to loosen the upper thread tension; turn to a higher number to tighten it. Most machines run well between 3 and 5 for standard fabric and thread. Move the dial by half a step, sew a test seam, and evaluate before moving further. Chasing the right number in large jumps makes it harder to find the sweet spot.
If loops appear on the surface of the fabric after adjusting, the upper tension is still too tight. If loops appear on the back, it's too loose. Both readings are covered in the upper thread tension deep-dive, which also covers puckering, the correct setting for different fabrics, and what to do when the dial stops making a difference.
Bobbin tension: where to stop
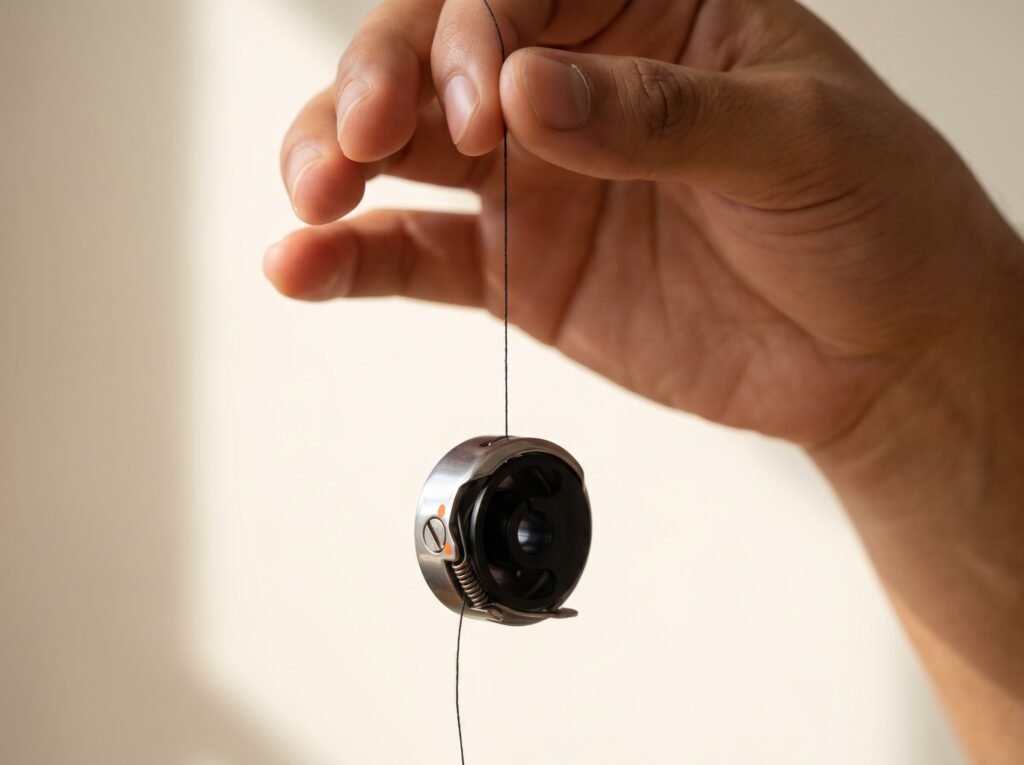
Bobbin tension is a different system from the upper dial, and it's one you should approach carefully. Singer's official FAQ is direct: "The bobbin tension is pre-set at the factory and usually never needs adjusting." Most modern machines reinforce this with a small paint seal on the bobbin-case tension screw - a yellow or orange dot that shows whether the screw has been moved from its factory position.
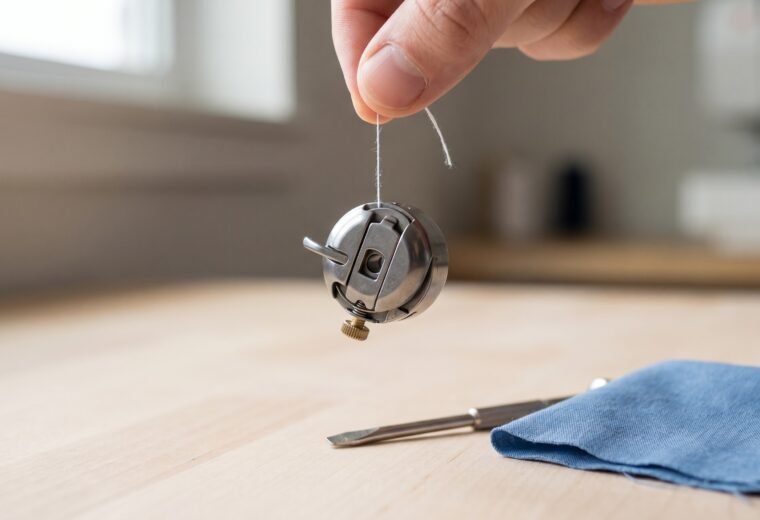
The standard check is the drop test: thread a wound bobbin into the case, hold the case suspended by the thread tail, and give the thread one small upward jerk (a flick of the wrist, not a yank). A correctly tensioned bobbin case slips down about 1 to 3 inches and then stops - it neither plummets nor refuses to budge. If it free-falls or keeps sliding, the bobbin tension screw is too loose. If it won't move at all on a gentle jerk, it's too tight. The point of the inch-or-so benchmark is to give you something measurable instead of a vague feel: hold the case at eye level, jerk once, and watch how far it travels.
If the drop test reveals a problem and you've confirmed the bobbin is threaded correctly and seated properly, the bobbin case screw may need a tiny adjustment. This is the point where most home sewers should pause. A quarter-turn of that screw is a significant change. Moving it past the factory-set point without a tension gauge or calibration tool can send you further from correct tension rather than closer. Our bobbin tension and drop test guide walks through the procedure in detail, including when the honest answer is to take it to a technician.
Thread tangling specifically under the fabric - what sewers call a bird's nest - almost always traces back to the top thread, not the bobbin. This is the most persistent myth in sewing machine troubleshooting. When the top thread is mis-threaded (presser foot down during threading), the lack of upper tension means the top thread buries itself in loops under every stitch. The fix is rethreading the upper thread correctly. More on this in the bird's nest guide.
When the problem keeps coming back
A tension problem that returns after you've corrected the threading usually means one of three things: the thread is snagging somewhere in its path (check the spool pin, the thread guides, and whether the spool itself is feeding freely), the needle is wrong for the fabric or thread weight, or the machine needs a full cleaning because lint is interfering with the hook's ability to catch the thread loop cleanly.
Before looking deeper, run a quick snag check: remove the spool from the spool pin and slowly pull the thread through its entire path by hand, feeling for any resistance or catch. A rough notch on the spool pin, a bent thread guide, or a small burr on the take-up lever can drag on the thread just enough to mimic a tension fault - and this kind of snag is often the culprit when tension problems return after rethreading.
Occasionally, a machine that can no longer hold consistent tension has a worn tension disc or a damaged spring inside the tension assembly. These are not expensive parts, but replacing them involves disassembling the face plate. The tension assembly replacement guide walks through that job, and the full troubleshooting index maps this kind of persistent fault to the specific component, with a clear read on what's DIY territory and what needs a technician's bench.
Before you commit to that, do the math. A shop tune-up that opens the machine, cleans and re-times it, and sorts the tension generally runs somewhere around $80 to $150 depending on your area. That is money well spent on a solid mechanical machine or anything you are attached to. But if the patient is a basic entry-level model that sells new for under $200, a repair bill in that range plus the hassle of being without it can put you most of the way to a replacement, and a sticky tension assembly on a cheap machine often is not the only thing about to fail. We lay out that decision in plain numbers in the is it worth repairing guide, so you are not paying $120 to nurse along a $150 machine.
One genuine stop-line: if a machine's tension was fine and suddenly went wrong without any threading change or needle change, especially if it also makes a new noise, suspect a timing issue. True timing problems - where the needle and hook are out of sync - do produce stitch irregularity that looks like tension. But most of what gets diagnosed as a timing fault is actually a threading or needle issue; confirm those are ruled out first before going further.
The Stitchmend team compiled this guide from Singer and Brother service documentation, Schmetz needle technical specifications, and Brother's threading and tension FAQs, cross-checked and edited before publishing.
Questions answered
Why do I have loops on the bottom of my fabric?
Loops on the underside almost always mean the upper thread is not correctly seated in the tension mechanism - usually because the machine was threaded with the presser foot down. Rethread from scratch with the presser foot lever raised all the way. This resolves the problem in the vast majority of cases without touching any dial.
Does bobbin tension need adjusting?
Rarely. Bobbin tension is factory-set on most machines and stays correct unless the bobbin case screw is disturbed. But here is the question that trips people up: what if the drop test looks fine and the upper threading is correct, yet stitching is still uneven? Work the everyday causes first, roughly in this order: old or cheap thread with an uneven twist (try a fresh spool of a quality thread - this fixes it more often than people expect), a wrong or worn needle, lint packed into the hook race, and a snag somewhere in the thread path. A worn tension disc or weak tension spring can cause this too, but that is a rare, late-stage hardware fault and it lives on the upper-tension side of the machine, not the bobbin - suspect it only after everything above is genuinely ruled out, and look for it under upper-tension troubleshooting rather than the bobbin case.
What tension number should I use?
Most machines sew correctly at a setting between 3 and 5 for standard woven fabrics with medium-weight thread. Singer recommends setting the dial to 4 before rethreading as a neutral starting point. Adjust by half-steps, sewing a test seam after each change. Very lightweight fabric may need a slightly lower number; heavy denim or canvas may need a touch higher.
Can a needle really cause tension problems?
Yes - and it does, often. A bent needle misses the hook on some stitches, creating irregular stitch formation that looks like inconsistent tension. A needle that is too large for the fabric creates a big hole that the thread sinks into unevenly. A universal needle on a knit fabric skips stitches because the point pushes through the loops instead of spreading them. Change the needle and you frequently resolve what appeared to be a tension fault.
My tension dial does nothing. What's wrong?
If turning the dial produces no change in the stitch, the upper thread is almost certainly not passing through the tension discs at all. This happens when the machine was threaded with the presser foot down - the discs were closed and the thread slipped past them. Raise the presser foot, rethread completely from the spool, and the dial will work again.
The Stitchmend team
Every fix here is built from manufacturer service manuals and needle-maker specs, and fact-checked against those sources before it goes live. How we work