Is it worth repairing a sewing machine? A practical guide to the keep-or-replace decision
Most broken machines need a clean, a needle, and 20 minutes. Here's how to calculate whether a repair quote is worth paying, and what the honest DIY line is.
Before you haul your machine to a shop or order a replacement, consider this: the majority of "broken" sewing machines need a new needle, a rethread, and a lint brush - that is the whole fix. A standard clean-and-tune service call usually runs $80 to $150 - mechanical machines toward the lower end, computerized models toward the higher - but many of the problems that send machines to the shop are free to resolve at home if you know where to look.
That said, some repairs genuinely cost more than a cheap machine is worth. The question is knowing which situation you are in. Below is a decision table and a step-by-step cost calculation to answer it for your specific machine.
The repair-vs-replace calculation
The core math is simple: if the total cost of repair gets you a machine in good working order for a lower price than buying an equivalent replacement, repair wins. If it does not, it probably does not.
Run these four numbers:
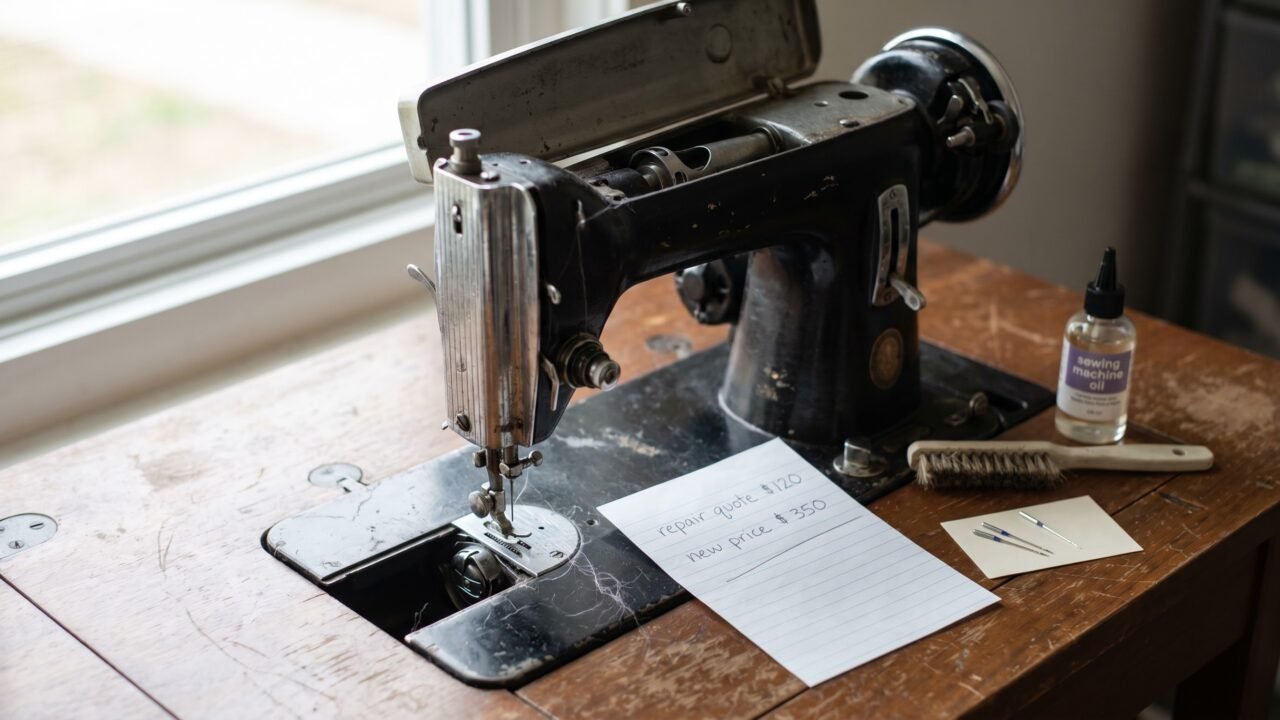
- Current resale value (A): Search your model on eBay's completed listings (not asking price - completed sales). A working Singer Heavy Duty 4423, for example, typically sells used for $80-$120. A non-working one might sell for $30-$50 as parts. The gap is your repair upside ceiling.
- Cost of equivalent replacement (B): What would you pay today for a comparable machine in working condition - new or used? This is your ceiling for what repair is worth spending.
- Repair quote (C): Get an itemized estimate. Ask the technician to separate labor from parts. A shop charging $130 in labor to fix a $160 machine is a red flag. A shop charging $45 for a service/tune-up on a machine you paid $400 for is reasonable.
- DIY savings potential (D): Before paying anyone, run through the free-fix checklist below. If the problem is needle, lint, or threading related, the repair cost is zero.
The verdict: if C is greater than 50% of B, the repair is marginal - worth a second opinion before committing. If C is greater than B, skip it unless you have a strong sentimental or functional reason to keep the machine (see the vintage section below). If D resolves the problem, the whole calculation is moot - you pay nothing.
The free-fix checklist: try this before spending anything
Singer's official troubleshooting guidance and iFixit's maintenance documentation both point to the same short list of causes that cover the vast majority of home-machine complaints. Work through this in order.
| Symptom | Most likely cause (check first) | Free fix? |
|---|---|---|
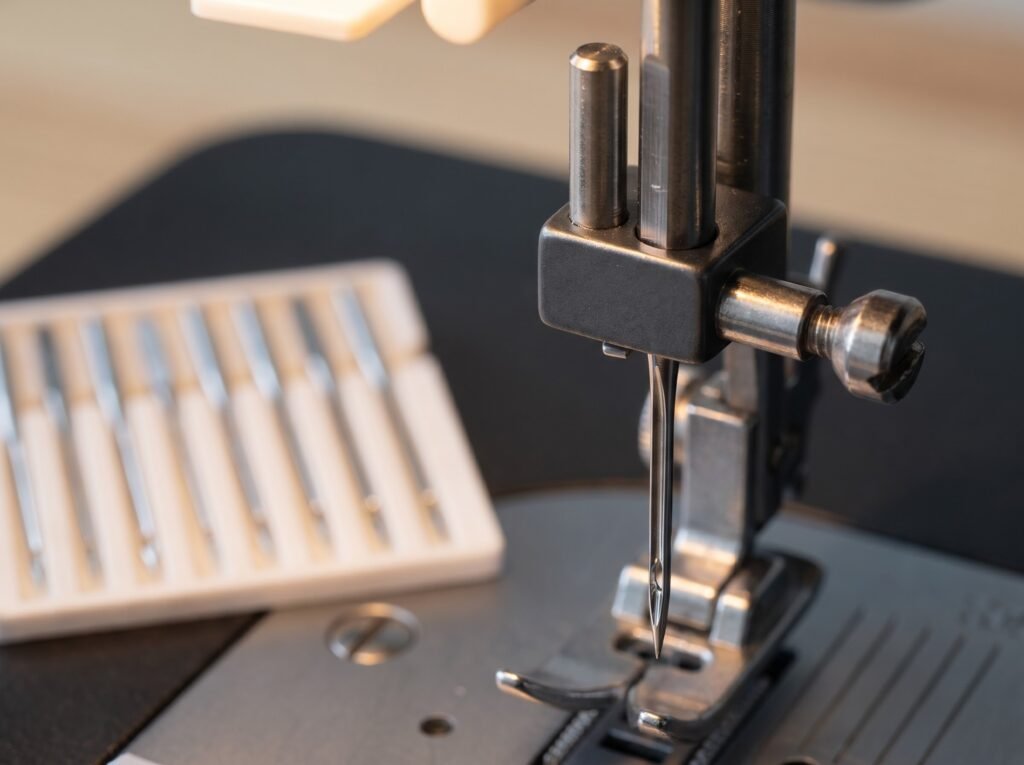
| Skipped stitches | Needle: bent, installed wrong, or (on knits/stretch) a universal where a ballpoint is needed | Yes - new needle, ~$1 |
| Thread bunching underneath | Top thread seated incorrectly (foot was down when threading) | Yes - rethread with foot UP |
| Thread keeps breaking | Wrong needle size for the thread/fabric; nick on the needle plate | Usually yes |
| Machine jams / won't move | Lint packed under the feed dogs or around the hook | Yes - clean with a brush |
| Fabric not feeding | Feed dogs dropped, stitch length set to 0, or presser foot not lowered | Yes |
| Noisy / grinding | Dried oil on the hook; lint in the hook race | Yes - clean and re-oil |
| Loose or uneven tension | Mis-threading (presser foot was down); old or wrong needle; wrong-class bobbin in the case | Yes - rethread, new needle, check bobbin class |
| Tension wanders or bobbin thread jams | Wrong-class bobbin (e.g. a Class 66 where Class 15 is specified, or wrong material - metal vs plastic) sitting slightly off in the case | Yes - swap to the correct bobbin class for your machine |
| Needle keeps breaking | Bent needle, pulling fabric, wrong needle type for the thickness | Yes |
Two habits prevent most of these in the first place. Thread always with the presser foot raised - the tension discs are open only when the foot is up, and threading with the foot down means the thread never seats between the discs. iFixit describes this precisely: when the presser foot is up, the discs are "wide open, allowing the thread to fall between the discs and be taken into proper tension." The second habit is changing the needle on a real schedule. iFixit puts the interval at roughly every 8 hours of sewing or four full bobbins; in practice the more useful triggers are simpler: fit a fresh needle at the start of each new project, and the moment trouble shows up (skipped stitches, thread breaking, snagging, a tip that looks bent). Singer's own guidance lines up with this - replace the needle when starting a project and at the first sign of those symptoms. Most sewers run the same needle for years, then blame the machine.
Two needle details catch people out. First, system versus size are not the same thing. The needle system - the shank and shape that fits the machine - is 130/705 H (also written HAx1, the flat-shank home-machine standard Schmetz says is used by 99% of home machines). The size is separate, written in dual Euro/US notation: a 90/14 is a good general-purpose size, with finer fabrics needing a 70/10 or 80/12 and heavier fabrics a 100/16. A pack of 130/705 H needles in size 90/14 costs pennies, and a fresh one resolves more problems than any other single action. Second, the point matters as much as the size. A standard universal needle has a slightly tapered point that is fine for woven fabric but slips between the loops of a knit instead of catching the thread, which is one of the most common real causes of skipped stitches on jersey and stretch fabric. For knits, switch to a ballpoint/jersey needle (or a stretch needle for anything with Lycra or Spandex); its rounded point pushes between the knit fibers instead of slipping past them, and Schmetz attributes the prevention of skipped stitches on these fabrics to exactly that point geometry. If your stitches skip only on stretchy material, the needle type, not the machine, is almost always the cause.
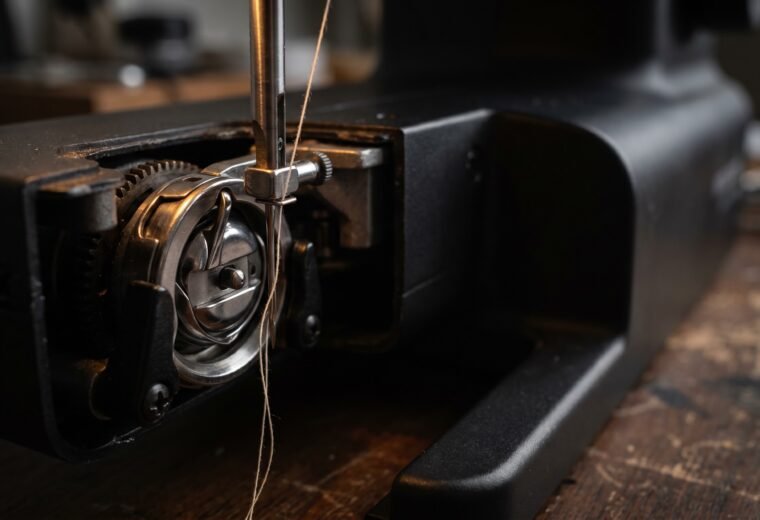
One more free check that gets missed: the bobbin itself. Bobbins come in classes (Class 15, Class 66, L, M, and others), and they are not interchangeable even when they look almost identical to the eye. Note: Class 15 and Class 15J take the same physical bobbin - the J designation describes the hook and case configuration your machine uses, not a distinct bobbin size, which means a 15J bobbin and a plain Class 15 bobbin are freely interchangeable. The real incompatibility is 15 versus 66, or using the wrong material (metal versus plastic) where the manual specifies one or the other. The wrong class or material sits a hair off in the case and shows up as wandering tension or thread that jams under the plate. The fix costs nothing if you already own the right ones: check your manual for the class your machine takes, then match both the class and the material to that spec. Our guide to which bobbin fits your machine and the breakdown of plastic versus metal bobbins cover how to identify the common classes.
If the symptom points at the bobbin case rather than the bobbin, there is a quick diagnostic before you buy a replacement. For a front-loading metal case, the bobbin-tension drop test tells you whether the case spring is set right: thread a wound bobbin into the case, hold the thread tail, and let the case hang. With a gentle upward jerk the case should drop about one to three inches and then stop. If it free-falls or will not budge, the case spring tension is off. Adjust it with the larger screw on the case - but note that the smaller tension screw is usually set at the factory and often sealed with a dab of yellow or red paint; that paint mark means "do not touch," and turning it throws off a calibration that is hard to recover at home. Stay on the main screw, in tiny increments, and stop if you reach the paint-sealed one. A genuinely cracked or worn bobbin case is an inexpensive part ($10 to $30) and a straightforward swap on most machines.
If you work through the entire checklist and the problem persists, that is when you go to the next section. Our symptom-by-symptom troubleshooting guide maps every symptom to a ranked cause list if you need to go deeper on any one of them.
Which repairs are worth paying for, and which are not
Once you have ruled out the free fixes, the cost picture depends heavily on which component needs work.
| Repair type | Typical cost range | Worth it on a budget machine (<$200 new)? | Worth it on a mid-range machine ($200-$600)? |
|---|---|---|---|
| Clean, oil, and tune-up (service) | $80 to $150 | Marginal (if it solves the problem, yes) | Yes, nearly always |
| Needle plate replacement | $15-$40 parts + labor | Yes | Yes |
| Bobbin case replacement | $10-$30 parts + labor | Yes (often DIY - run the drop test in the free-fix section first) | Yes |
| Drive belt replacement | $20-$50 parts + labor | Yes (DIY-possible) | Yes |
| Feed dog replacement | $20-$60 parts + labor | Marginal | Yes |
| Timing adjustment | $75-$150 labor | Marginal on very cheap machines | Yes |
| Circuit board / electronic module | $80-$300+ parts | No (part often costs more than machine) | Case by case |
| Motor replacement | $50-$150 parts + labor | No (unless machine is high-value) | Marginal - get a quote |
Timing is a point where many guides either panic the reader or wave it away. The real picture: many machines sent in for "timing" turn out to have a needle or threading problem - rule those out with the checklist above before assuming the hook is out of sync. A genuine timing adjustment (where the needle and hook are physically out of alignment) is DIY-possible on many mechanical machines if you follow your service manual carefully. It is not trivial, and it does have a real stop-line: if you open the machine and find broken gears, a bent shaft, or cracked plastic, that is technician territory. Our detailed guide at sewing machine timing explained covers how to confirm the diagnosis and where the honest DIY boundary sits.
For the electrical category - the machine will not turn on, the foot pedal is unresponsive, internal wiring - always unplug first and follow manufacturer safety guidance. Do not attempt internal electrical repairs. Singer and Brother both provide safety documentation with their machines specifically on this point. The article when to stop DIY and see a technician covers the full electrical stop-line with the manufacturer-backed reasoning.
When a sentimental or vintage machine is worth saving
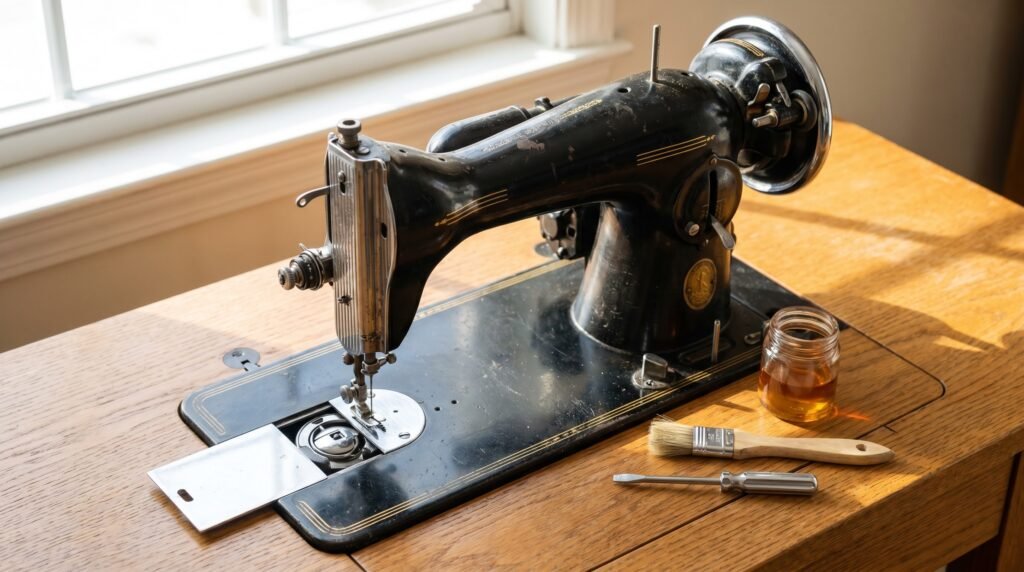
A metal-bodied machine from the 1930s through 1970s - a vintage Singer 99, a Singer 15-91, a pre-electronic Bernina 830 - operates on a different calculus. These machines were built to last decades. The cast-iron and all-metal construction means that a $100 service on a machine your grandmother used is not a bad deal: you get a precision mechanical device that will run another 30 years with proper care, and the machine itself is worth more in working condition than the cost of the service.
The actual repair threshold for vintage metal machines sits higher than for plastic-chassis budget models. A few honest points:
- A full clean, oil, and tune-up on a vintage mechanical is nearly always cost-effective. These machines have no electronics to fail and very few parts that wear out.
- Replacement parts for common vintage Singers (bobbins, bobbin cases, presser feet, needle plates) are still widely available and inexpensive.
- The one genuine risk is internal rust or a bent drive shaft from being stored wet. If the handwheel is locked solid and won't turn by hand, get a professional assessment before forcing anything. Our guide to cleaning a vintage sewing machine covers safe approaches for machines that have been in storage.
- Computerized machines from the 1990s are a different matter: their proprietary circuit boards are often unavailable and expensive. A 1994 computerized machine with a failed board is rarely worth the repair cost.
The basic toolkit that pays for itself
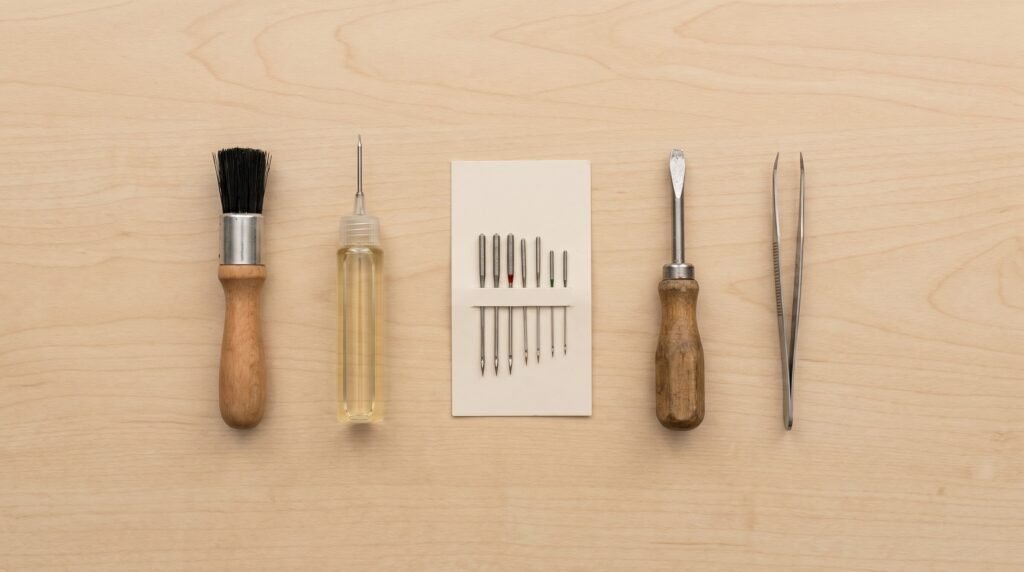
A sewing machine maintenance kit costs roughly $15 to $25 and handles everything in the free-fix checklist above. These items belong on any sewer's workbench.
| Item | Purpose | Approximate cost |
|---|---|---|
| Small lint brush (nylon bristle) | Feed dogs, hook race, bobbin area - removes packed lint | $3-$6 |
| Sewing machine oil (clear, fine) | Hook, needle bar, handwheel pivot on mechanical machines | $5-$8 |
| Assorted needle pack (130/705 H, sizes 70/10 through 100/16) | Fresh needle per project or per 8 hours | $4-$7 |
| Small flathead and Phillips screwdrivers | Needle plate removal for deep cleaning; bobbin case access | $4-$8 (or use a precision set you likely have) |
| Tweezers | Removing thread wrapped around the hook or feed dogs | $2-$4 |
One item the toolkit does not include: WD-40, 3-in-1 oil, or canned/compressed air. WD-40 and household oils leave a residue that turns gummy inside the machine and eventually causes the very jamming you are trying to prevent. Compressed air drives lint deeper into the mechanism rather than removing it. iFixit is direct on this: "Canned air adds moisture, which creates gunky lint, which jams up machines." iFixit recommends a brush; the Stitchmend team also recommends a small vacuum nozzle as a practical complement for pulling loosened lint clear of the machine. Our clean and oil guide covers the full process and the specific oiling points by machine type.
If your machine is computerized and the manual does not mention oiling, skip it entirely. Singer's FAQ confirms that machines with no oiling instructions in the manual "have been pre-lubricated at the factory and will not need additional lubricating." Adding oil to a sealed computerized machine can damage it.
For needle-related issues - which cover the majority of problems most home sewers will ever encounter - the needles guide covers the full 130/705 system, size selection by fabric, and the common mistakes that lead to skipped stitches and needle breaks.
The Stitchmend team compiled this guide from Singer and Brother service documentation, iFixit maintenance procedures, and Schmetz needle specifications, cross-checked and edited before publishing.
Questions answered
What is a typical sewing machine repair cost?
The most useful number is this: on any machine that sold new for under $200, a repair quote above $100 deserves scrutiny - price a comparable working replacement first before committing. Standard tune-up rates run $75 to $100 at most shops (mechanical machines tend toward the lower end, computerized models toward the higher), with parts billed on top of that. High-end brand shops can reach $100 to $150 for the same service.
Is it worth fixing a 20-year-old sewing machine?
It depends on whether it is all-metal or plastic-chassis. A metal-bodied mechanical from the 1980s or earlier is generally worth servicing - these machines are durable, parts are available, and a $100 tune-up buys you decades more use. A plastic-chassis budget machine from the early 2000s is a closer call: price a comparable replacement first.
Can I fix tension problems myself?
Usually yes. Most tension problems trace back to threading with the presser foot down (the tension discs never engaged the thread) or a dull/wrong needle. Rethread with the foot raised, install a fresh needle matched to your fabric, then test. Touch the tension dial only after those two steps. Our tension guide covers the full diagnosis sequence.
What problems should I never try to fix myself?
Internal electrical faults (always unplug first, then call a technician), a bent or broken drive shaft, severely damaged gears, and circuit board failures. Timing CAN be DIY-possible on mechanical machines with the right guidance - see our timing article for the honest assessment of where the DIY line sits.
Do I need to oil my sewing machine?
Only if your manual says to. Many modern machines - especially computerized models from Brother, Singer, and Janome - are factory pre-lubricated and need no user oiling. Singer's FAQ states that if the manual is silent on oiling, the machine was pre-lubricated at the factory. Our clean and oil guide explains which machines need oil and exactly where to apply it.
- iFixitBasic Sewing Machine Maintenance
- iFixitWhat To Do When Your Sewing Machine Gets Jammed
- Singer Official Support
- Schmetz Needles
- Singer Heavy Duty 4423 product pageused to verify current retail price ($229.99)
The Stitchmend team
Every fix here is built from manufacturer service manuals and needle-maker specs, and fact-checked against those sources before it goes live. How we work
Read next
 Troubleshooting
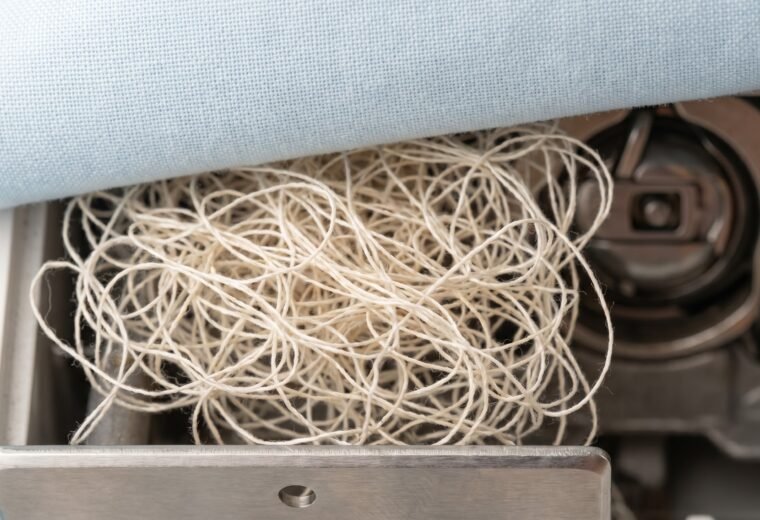
Why your sewing machine makes a bird's nest underneath (it's the top thread)
 Cleaning & Maintenance
How to clean and oil a sewing machine the right way
 Timing & Mechanical Repair
Sewing machine timing explained: is it really out of time?
 Timing & Mechanical Repair
When to stop DIY and see a sewing machine technician
 Troubleshooting