Sewing machine parts: identify what broke and replace it yourself
Which sewing machine part is failing, does it fit your model, and can you replace it? The field-replaceable parts guide with symptom routing, part-finder steps, and a DIY vs. technician boundary table.
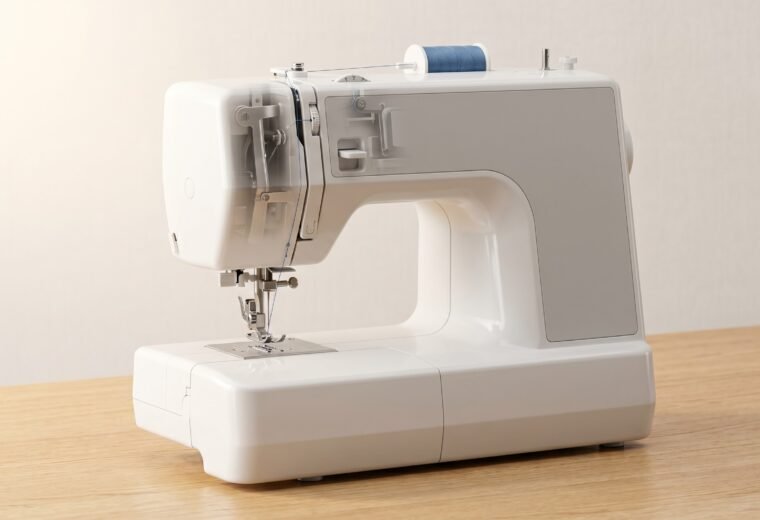
Something on your machine stopped working. You do not yet know the name of the part or whether replacing it yourself is realistic. That is exactly what this guide settles: the field-replaceable parts on a home sewing machine, how each one fails, how to find the right replacement for your specific model, and where the DIY line sits before you hand it to a technician. The replaceable tier is wide, and most repairs that bring a machine back to life take less than 20 minutes at the table.
The field-replaceable parts: what they are and how they fail
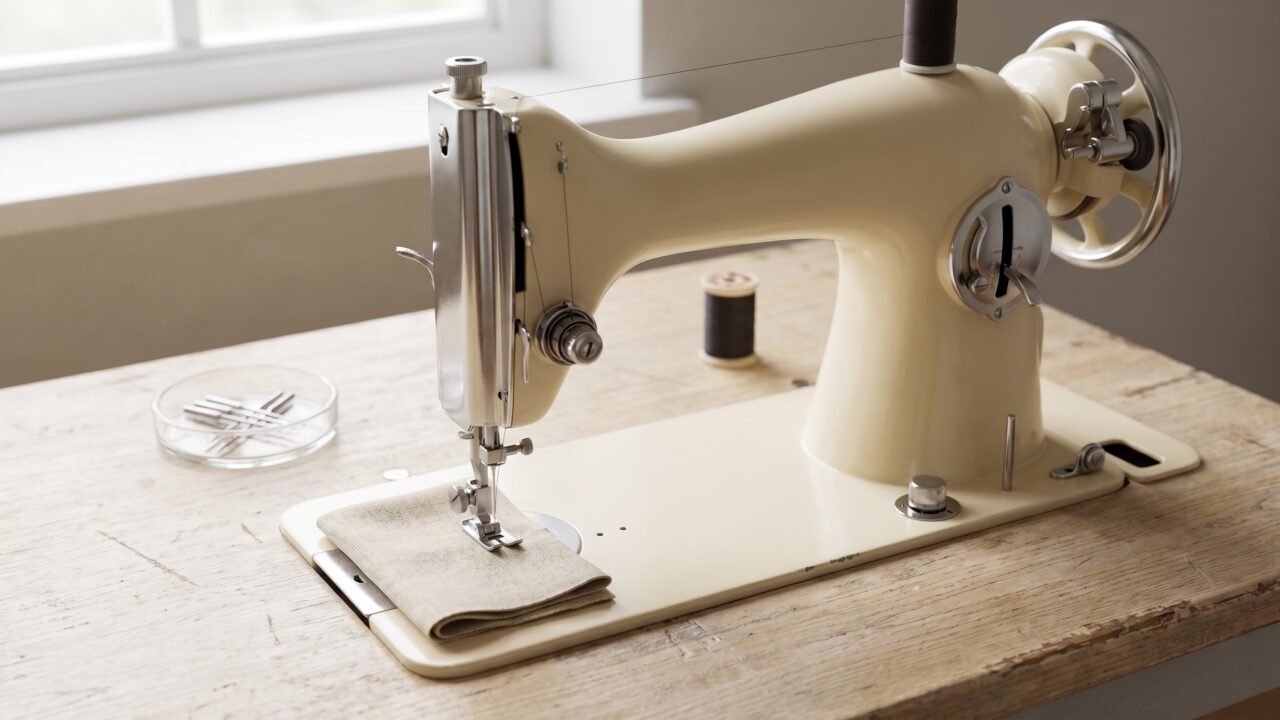
Every home sewing machine - Singer, Brother, Janome, Bernina, Juki, Pfaff, Kenmore, Husqvarna Viking - runs on the same basic anatomy. A few parts wear fast. Others break from misuse. A small category ages out quietly. Here is what is on the table for a capable DIY repair.
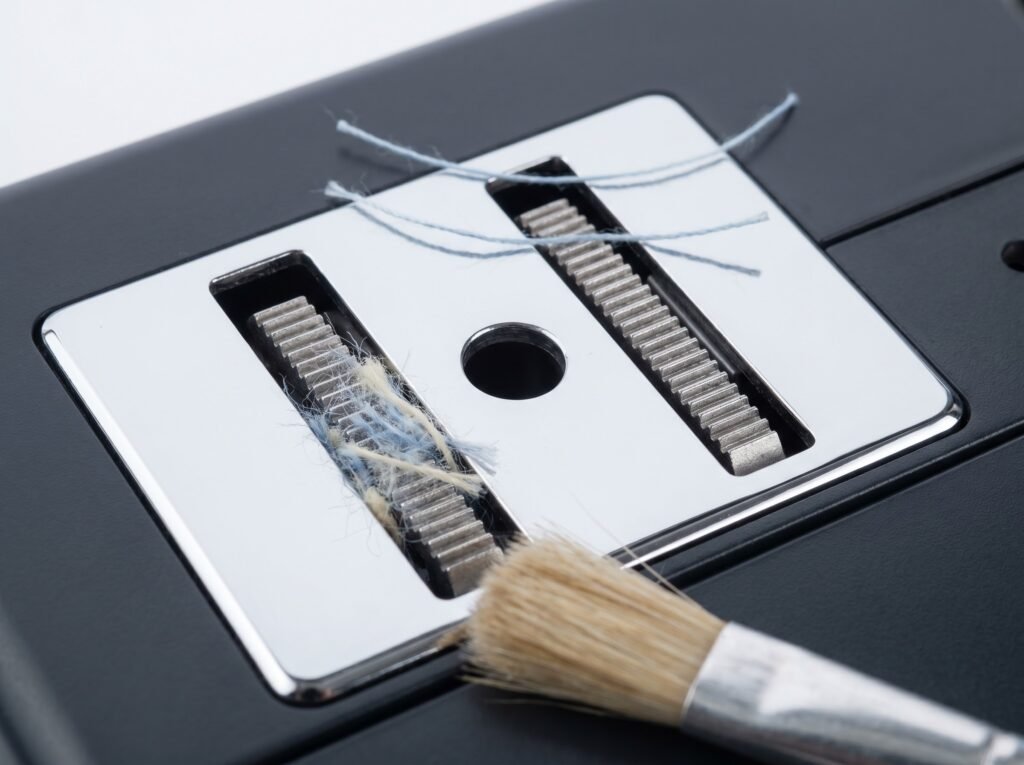
Two rules apply every time this guide tells you to clear lint or lubricate, because both are where beginners do the most accidental damage. First, clear lint with a stiff brush or a small vacuum, never with compressed or canned air. Air does not remove the lint - it drives the packed fuzz deeper into the bobbin race, the feed dog slots, and the tension discs, and on a computerized machine it can blow debris straight onto the circuit board. Second, if a moving part needs oil, use sewing machine oil only. WD-40, 3-in-1 oil, and household or motor oils are too heavy and leave a residue that gums up, attracts lint, and degrades the rubber and plastic inside the machine; the cleanup afterward is far worse than the squeak you were trying to fix. The no-WD-40, no-canned-air guide covers both mistakes in detail.
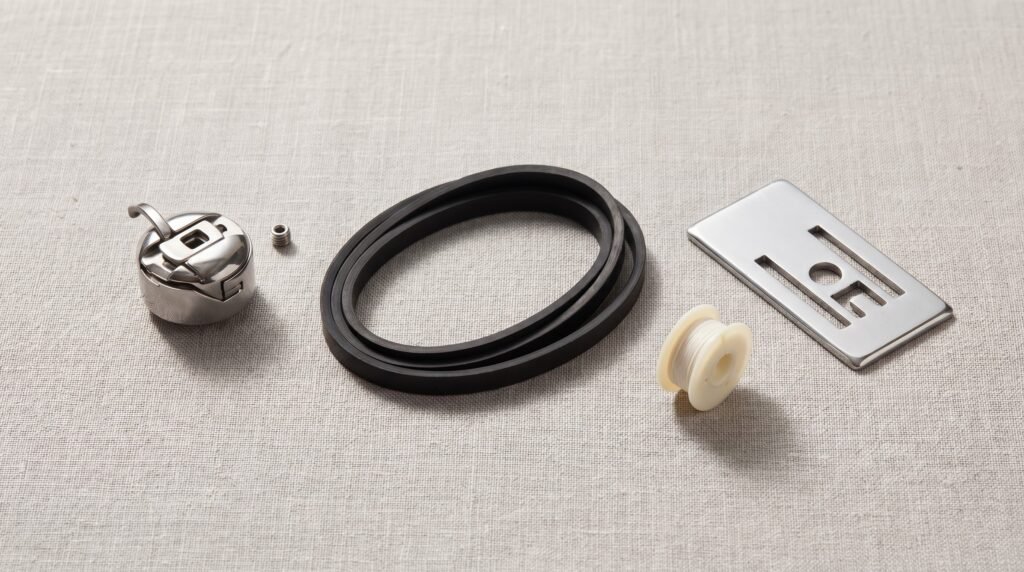
Needle
The most-replaced part by far, and the first thing to swap when anything goes wrong with stitch quality. Home machines use the 130/705 H system (flat shank, 15x1 in some older Singer references), which covers virtually every domestic brand. Schmetz, Organ, and Klasse all conform to this standard. Sizes run in dual Euro/US notation: 70/10 for delicate sheers, 80/12 for lightweight fabrics (chambray, flannel, jersey), 90/14 for quilting cotton and standard wovens, 100/16 for heavier material (use a Jeans-type needle rather than Universal for canvas and heavy denim). A bent or blunt needle is invisible to the eye but audible - a faint popping sound on each stitch is a reliable sign. Change it every 8 hours of sewing or at the start of each new project, whichever comes first. The flat of the shank normally faces the back of the machine, but verify in your manual since a few models differ.
Throat plate (needle plate)
The metal plate beneath the presser foot, perforated by the stitch hole and the feed dog slots. It scratches and nicks from a deflected needle strike, which then snags thread on every pass. A scratched throat plate is more common than sewers realize, especially after a needle break. Replacement is two screws and two minutes on the large majority of domestic machines (some older or industrial models use four). The replacement must match your model - the stitch-hole geometry varies between straight-stitch-only plates and zigzag plates, and the feed dog slot spacing is machine-specific. Removing and replacing the throat plate is also the route to cleaning compacted lint from around the feed dogs (the throat plate replacement how-to covers the exact steps).
Feed dogs
The toothed metal teeth that grip and advance the fabric. Feed dogs clog with lint, but they rarely need outright replacement unless a tooth physically breaks - which does happen on older machines with metal fatigue or after sewing over pins. Before ordering a replacement, confirm the issue is mechanical: stitch length must not be at 0, the drop-feed lever must be fully in the sewing position, the presser foot must be lowered, and compacted lint must be cleared from the slots. If the feed dogs move but the fabric still will not advance, check the timing and the presser foot pressure before concluding the feed assembly itself is gone. The fabric not feeding guide runs through each cause in order.
Bobbin case (front-load machines)
The metal or plastic cup that holds the bobbin in front-loading machines and controls lower thread tension via a spring and a small set screw. A cracked bobbin case, a chipped or bent tension spring, or a case that sits unevenly in the race causes persistent tension problems that no amount of dial adjustment will fix. To test whether the case is the issue: remove it, inspect the tension spring for chips or distortion, and check that the case seats firmly with no play. The set screw on the tension spring often carries a factory paint seal - a dot of yellow or red lacquer. Moving that screw is technician territory unless you are confident in the procedure and have a fine watchmaker's screwdriver; an over-adjusted bobbin case is harder to fix than the original problem. Replacement cases must match both the machine model and the class. Class 15 and Class 15J cases share the same dimensions - the J in 15J identifies the hook and case design, not a different physical size - so one drops in where the other was; Class L and Class M are genuinely different sizes and are not interchangeable with Class 15 or with each other. The bobbin case replacement how-to walks through the swap.
Drive belt
The rubber or urethane belt linking the motor to the upper shaft. Belts crack, stretch, and break with age - a high-pitched squeal under load, or a handwheel that turns freely without the needle moving, points here immediately. Many machines hide the belt under the side or back cover, accessible with a screwdriver. A worn belt that has not yet snapped will slip under load and show as irregular stitch timing. Replacement belts must match the width, length, and tooth profile of the original; the machine model and the OEM part number are both needed. The drive belt replacement how-to has the procedure.
Presser foot and foot shank
Presser feet are the most commonly swapped accessory, and a cracked or damaged foot is a straightforward swap. The foot attaches to a shank (low-shank, high-shank, slant-shank), and the shank must match the machine. A broken shank requires replacing the shank, not just the foot. Most current domestic machines are low-shank; high-shank is common on older Singer heavyweights. The presser feet guide covers compatibility in detail.
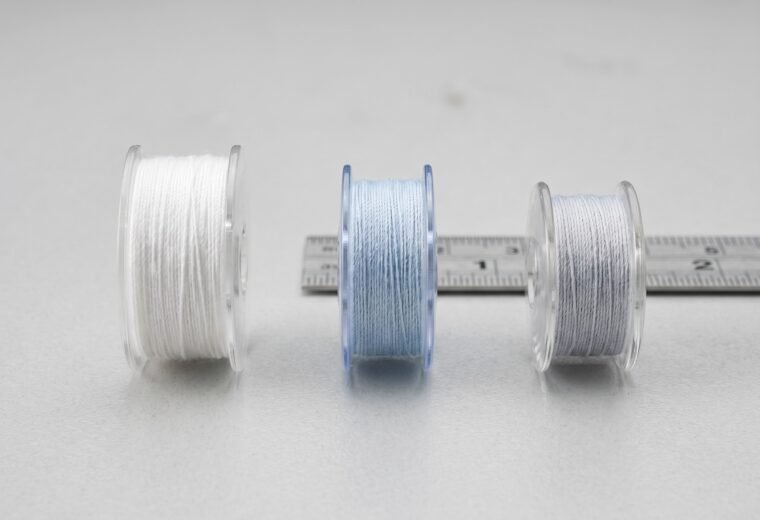
Bobbin (the bobbin itself)
Bobbins look universal but are not. The real incompatibility is between entirely different classes - Class 15 versus Class 66, or a metal bobbin where the machine specifies plastic. Class 15 and Class 15J bobbins have identical dimensions - the J suffix describes the hook and case design, not a different bobbin size - so they work interchangeably in the same machine. What is not fine: a Class 15 in a machine rated for Class L or Class M, or plastic where the mechanism was designed around metal. Those mismatches cause tension irregularities, false thread jams, and in rare cases can damage the hook assembly. Always match the class designation in your manual and match plastic versus metal to what the machine originally shipped with. A cracked or slightly out-of-round bobbin creates inconsistent lower tension even when everything else is correct. They are inexpensive; replace on suspicion. The bobbin compatibility guide has the full class chart.
Light bulb
Most machines built before about 2010 use a screw-base 15-watt incandescent bulb. In the US market, the standard base is E12 (candelabra); E14 is the European and UK equivalent. Some older Singer models use a proprietary bayonet type instead. US parts suppliers typically list these as "screw-base 15W" - check your manual for the exact base type before ordering, and if buying from a UK or European supplier, confirm whether the listing is E12 or E14. Many newer machines use an integrated LED that is not user-replaceable. The light bulb replacement how-to covers the common variants.
Foot pedal (speed controller)
A pedal that delivers no power, cuts in and out, or runs at only one speed is a common failure point - the internal carbon resistor wears over years of use. Before any disassembly: unplug the machine, check the cord for visible damage, and confirm the pedal socket seats fully. Manufacturer safety guidance is consistent: do not attempt internal electrical repair without appropriate training and tools. Testing the pedal with a known-good replacement (many technicians lend one for diagnosis) is the fastest route to confirming the pedal is the issue. The foot pedal troubleshooting and replacement guide covers what is safe to do yourself and where to stop.
Tension assembly
The tension discs and their spring, located inside the face of the machine. A tension assembly that skips, reads the same regardless of the dial setting, or produces permanently loose upper thread despite correct threading usually has debris between the discs or a worn spring. Cleaning comes first - rethread with the presser foot up (which opens the tension discs), then try again. If the discs themselves are worn or the spring has lost its range, the assembly can be replaced, but the procedure requires disassembling the face plate and is model-specific. The tension assembly replacement how-to covers the process and the stop-line.
How to find the part that fits your exact model
Generic part descriptions are not enough. A "Class 15 bobbin case" for a Singer 4423 is not the same component as one for a Janome HD1000, even though both machines use Class 15 bobbins. The model number is the key, and finding it takes about 30 seconds.
Model numbers on Singer machines appear on a sticker on the front lower right, the bottom, or the back of the machine. Brother machines show a cosmetic model name on the front fascia, but the full parts-compatible model string for ordering is on a sticker on the back or bottom of the machine - Brother's official parts guidance directs you there. Janome places it on a sticker on the right side panel or the bottom. Older Kenmore machines carry a three-part model number on a plate near the hinge. Once you have it, the part-number lookup guide takes you through the manufacturer parts portals, authorized dealer lookup, and what to do when the machine is discontinued.
For the most common replaceable parts, here is the identification and ordering framework:
| Part | What you need to match | Where to verify compatibility | Substitution risk |
|---|---|---|---|
| Needle | 130/705 H system (universal for home machines); needle type for your fabric; size for your thread/material | Any Schmetz, Organ, or Klasse pack; all fit 130/705 home machines | Low - system is universal; type/size must match fabric |
| Throat plate | Exact model number; stitch type (straight-only vs. zigzag) | Manufacturer parts portal; authorized dealer | High - wrong plate causes needle strikes and feed dog mismatch |
| Bobbin | Bobbin class (15 and 15J are dimensionally identical and drop in for each other; L and M are genuinely different sizes - do not mix across these groups); plastic vs. metal as specified | Machine manual; class printed on bobbin or case | High - mixing across class groups (e.g., 15 in an L-rated machine) causes tension failures and hook damage |
| Bobbin case | Exact model or compatible class; metal vs. plastic | Manufacturer parts portal; model number required | High - misfit case causes constant tension and timing issues |
| Drive belt | Width, length, tooth pitch; OEM part number preferred | Manufacturer parts portal or belt cross-reference chart | Medium - close-fit aftermarket belts usually work; wrong tooth pitch slips |
| Presser foot | Shank height (low/high/slant); attachment style (snap-on vs. screw) | Machine manual shank specification | Medium - wrong shank height causes misalignment and needle strikes |
| Foot pedal | Connector type and pin layout; voltage/wattage rating | Manufacturer parts portal; OEM part number on pedal label | High - wrong wattage rating is a safety issue; use OEM or verified compatible |
| Light bulb | Base type (E12 screw in US market; E14 in European/UK market; or bayonet; or integrated LED); wattage | Machine manual; existing bulb base markings | Low - correct base type and wattage; LED upgrade often works |
Symptom-to-part routing: diagnosing what actually needs replacing
Before ordering anything, run through the symptom. The table below maps common failure presentations to the most likely failed part - starting with the cheapest, easiest fix and ending with the parts that require more disassembly or judgment.
| Symptom | Most likely cause (ranked: start here) | Part to check / replace | Difficulty |
|---|---|---|---|
| Skipped stitches | 1. Needle (bent, blunt, wrong type, not fully seated); 2. Wrong needle for fabric (knit needs ballpoint/stretch); 3. Upper thread mis-routed; 4. Bobbin mis-seated; 5. Timing (last resort) | Needle first; then check threading; then skipped stitches guide | Easy (needle) to advanced (timing) |
| Thread bunching / bird's nest under fabric | Upper thread not seated in tension discs (presser foot was down during threading) - almost always; bobbin mis-seated second | Rethread with presser foot UP; not a part failure in most cases; if persistent after rethreading, check tension assembly and bobbin case | Easy; see bird's nest guide |
| Broken needle | Needle bent or wrong size; pulling fabric; needle hitting presser foot or throat plate (wrong plate or needle position set wrong) | Replace needle; check throat plate for damage; see needle keeps breaking guide | Easy; inspect throat plate for scoring |
| Fabric not feeding | 1. Feed dogs dropped (check lever); 2. Stitch length at 0; 3. Presser foot not lowered; 4. Lint packed in feed dog slots; 5. Feed dog assembly worn | Settings check first; then clean; feed dog replacement is last; see fabric not feeding guide | Easy to moderate |
| Machine jams / handwheel hard to turn | Thread jam in bobbin race; bobbin wound incorrectly or wrong class; needle bent into mechanism; lint compaction | Remove bobbin, throat plate, and clear the race; check and replace bobbin; new needle; see machine jamming guide | Easy to moderate |
| Tension problems (loops on top or bottom) | Threading error (the large majority of cases); wrong bobbin or bobbin tension; dirty tension discs; worn tension spring | Rethread with foot up; bobbin drop test (hold the threaded case by the thread tail and give a gentle jerk - it should slip about 1 to 3 inches, then stop; a free fall means too loose, no movement means too tight); if persistent after all checks, tension assembly replacement; see tension guide | Easy (threading) to moderate (assembly) |
| Squealing / no motion despite handwheel turning | Drive belt worn or broken | Drive belt replacement; see drive belt guide | Moderate |
| Machine won't turn on / intermittent power | Cord connection; foot pedal failure; internal wiring | Check cord and pedal connector first; pedal replacement if pedal confirmed bad; internal wiring = technician | Easy (pedal) to technician-only (internal wiring) |
| Persistent skipped stitches after needle and threading checks | Timing off (needle-hook desync) | Timing check and adjustment; see timing guide | Advanced DIY or technician |
| Sewing light out | Bulb burned out; integrated LED failure | Replace bulb if screw/bayonet type; integrated LED = technician or manufacturer service | Easy (removable bulb) to technician |
DIY vs. technician: the honest boundary
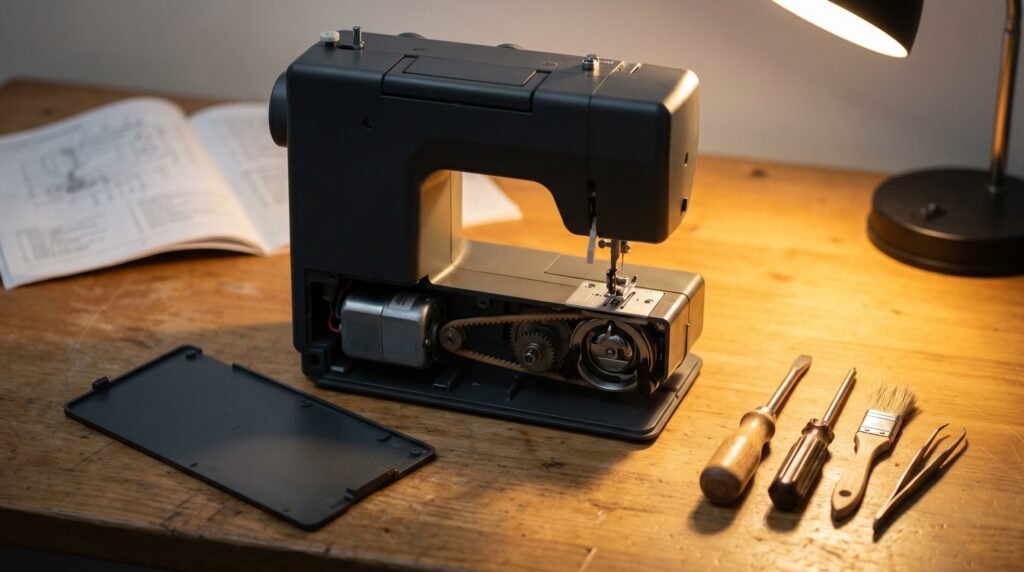
The field-replaceable parts in this guide are genuinely DIY-accessible for a patient beginner. A good portion of "broken machine" situations resolve with a fresh 90/14 needle, a correct rethreading, and five minutes of lint removal. Actual part swaps - throat plates, bobbins, drive belts, presser feet, even bobbin cases - require only basic tools and a careful read of the procedure.
There is a clear stop-line, and it is not about skill level. It is about safety and irreversibility.
Stop and see a technician for:
- Any internal electrical work (wiring, motor, internal speed control board). Manufacturer safety guidance across all major brands is explicit: do not service electrical components yourself.
- Hook timing adjustment on any machine where the timing procedure is not fully documented in the owner's manual. A misset hook timing worsens skipped stitches, can bend or break needles, and in some cases damages the hook race. The timing fix guide covers when it is DIY-possible and when the stop-line applies.
- Bobbin tension screw adjustment on cases bearing a factory paint seal (yellow or red lacquer dot). That seal signals a factory calibration; moving the screw without a watchmaker's precision screwdriver and a reference measurement leaves you worse off than when you started.
- Any repair on a computerized machine that involves the main board, display, or solenoids.
On the repair-vs.-replace question: a basic service and tune-up typically runs about $80 to $150 at an independent technician. If the machine is an entry-level model that originally cost under $200, a $120 repair quote for a non-part issue (sluggish timing, full service) deserves a real comparison against a replacement. The repair-vs.-replace guide walks through the calculation with numbers, not guesswork. For Singer-specific part scenarios, the Singer repair guide covers model-by-model quirks that affect what is worth fixing.
Going deeper
For tracking down discontinued parts or navigating a manufacturer's parts portal, the part number lookup guide goes through the exact steps by brand: Singer PartsDirect, Brother's parts search, Janome's authorized service network, and third-party cross-reference databases for machines that went out of production years ago.
One last note on parts sourcing: OEM (original manufacturer) parts are worth the small premium for anything that contacts the thread path - bobbin cases, throat plates, and tension assemblies especially. Aftermarket needles from Schmetz, Organ, or Klasse are fine; those brands are designed to the 130/705 standard and in some cases are what the manufacturer ships from the factory. For drive belts, verified-compatible aftermarket is usually fine. For foot pedals, stick to OEM or a manufacturer-verified replacement - wattage mismatches are a genuine safety concern.
Questions answered
Can I use any needle brand in my machine?
Yes, for home machines. All three major needle brands - Schmetz, Organ, and Klasse - conform to the 130/705 H standard that nearly every domestic sewing machine uses. Quality differences between brands are minor. Organ is slightly cheaper and is what Brother recommends for its machines. Schmetz offers more specialty types. What matters more than brand is the needle type and size for your fabric.
How do I know which bobbin class my machine uses?
Check your machine manual first - the bobbin class is listed in the specifications or bobbin threading section. The class is also usually printed or embossed on the bobbin itself, and on the bobbin case. Common classes are 15 (the most widely used on domestic machines, including most Singer, Brother, and Janome home models - Janome prints its Class 15 plastic bobbin "Style J" and lists it as fitting all of its home-use models), 15J (physically identical to Class 15 - the two work in place of each other; the J in the name refers to the hook and case design, not to any difference in the bobbin's size or shape), L (the narrower bobbin, about 8.9mm wide against the Class 15's roughly 11mm, used in longarm quilting, multi-needle and commercial embroidery, and industrial straight-stitch machines, plus a few non-domestic Janome units like the 1600P and HD9), and M (the larger bobbin for Brother commercial and embroidery models such as the Innov-is 4000D and PR-600 series, plus longarm and industrial machines - not standard domestic Brother machines). Standard Janome home machines use Class 15 (Style J), not Class L. If you own a Brother home machine such as a CS6000i, CS7000X, XM2701, or similar, your bobbin is Class 15, not Class M. Do not mix plastic and metal unless your manual specifies both are acceptable.
My tension is off even after rethreading. Is the tension assembly broken?
Probably not yet. Run through the checklist first: rethread with the presser foot up (tension discs must be open during threading), install a fresh needle, reseat the bobbin and run the bobbin drop test (hold the threaded bobbin case by the thread tail and give it a gentle jerk - a correctly tensioned case slips about 1 to 3 inches and then holds; if it drops in free fall the bobbin tension is too loose, and if it does not budge it is too tight), and clean the tension disc area. If tension is still wrong after all of that, and the dial reading does not change the stitch at all, the tension spring or disc may be worn. At that point, the tension assembly replacement guide is the next step.
What parts should I keep on hand as spares?
At minimum: a box of assorted needles in your most-used sizes (80/12, 90/14, and one ballpoint/stretch type), two or three spare bobbins of the correct class, and a spare throat plate if you sew heavy fabrics or embroidery. A spare drive belt is worth having for machines over 10 years old. Everything else you can order as needed - most parts ship in a few days from authorized dealers.
- SingerTroubleshooting tips and Singer help center
- Brother USAOfficial support
- Schmetz NeedlesHow to read the needle package and needle/fabric recommendations
- iFixitHow to Fix Stuck Feed Dogs on a Brother BM3700
- JanomeOfficial bobbin product page
The Stitchmend team
Every fix here is built from manufacturer service manuals and needle-maker specs, and fact-checked against those sources before it goes live. How we work